This salt crystals science project is a fun and easy science experiment for kids, perfect for home or school. Every time we grow a new batch of crystals, whether they are salt crystals or borax crystals, we are always amazed by how cool this type of science experiment is to do! Not to mention how easy it is as well!
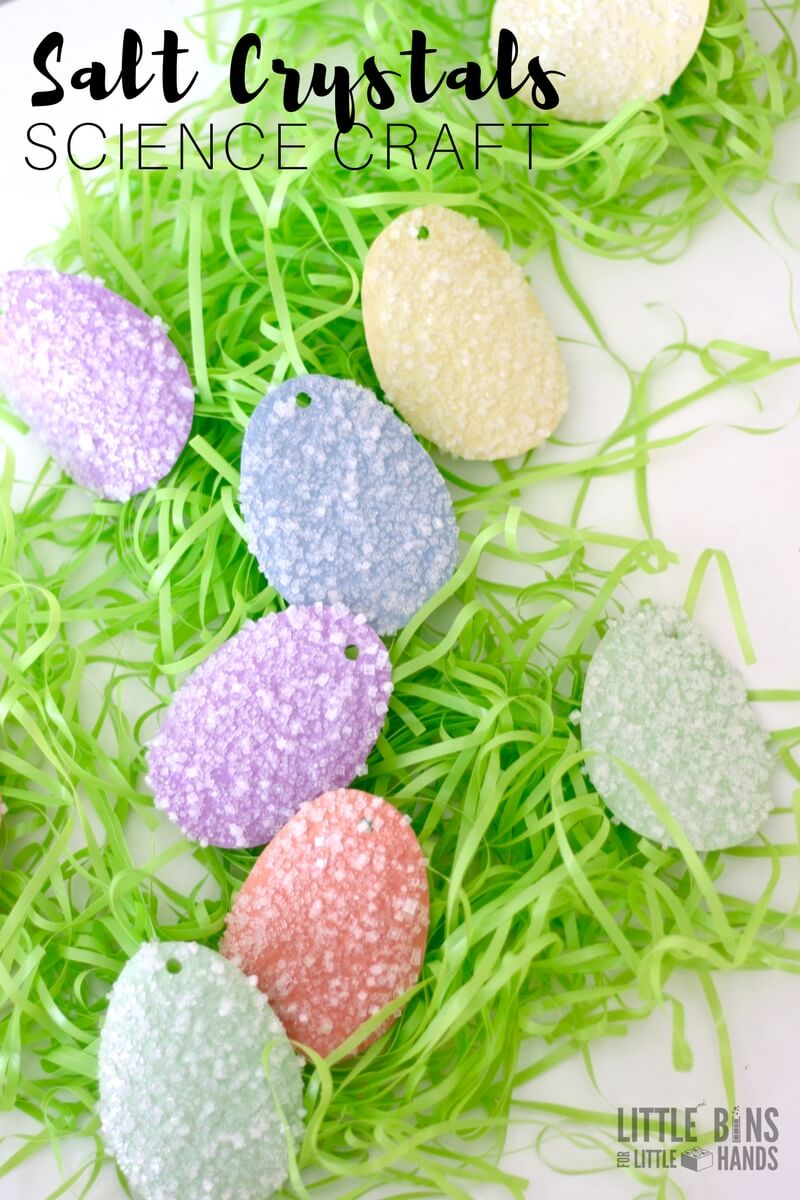
Salt Crystals Experiment
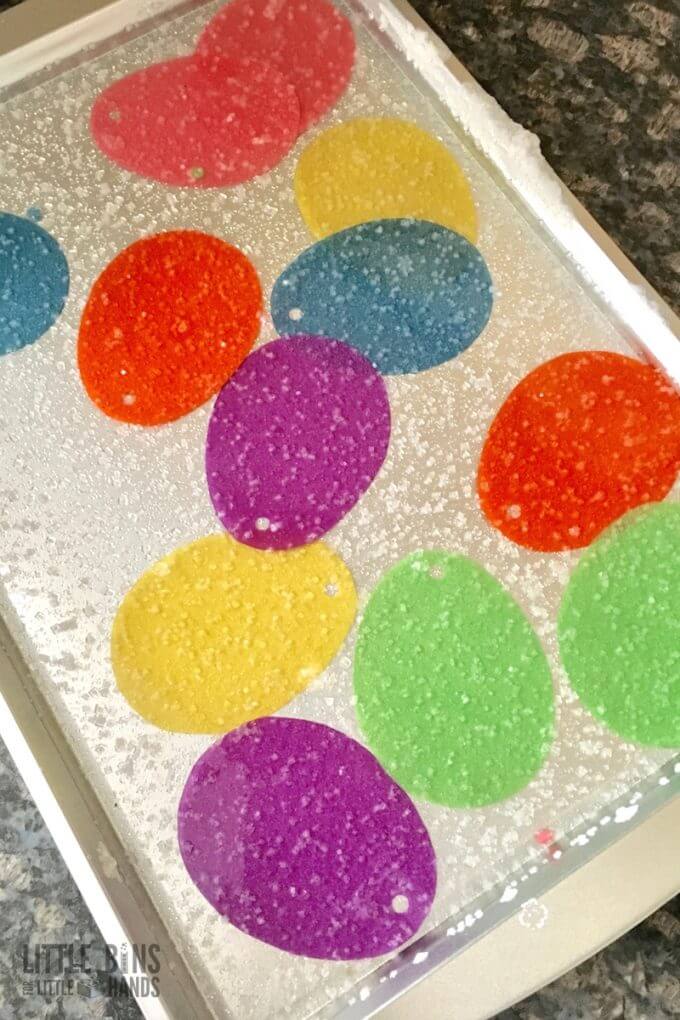
Here we went with an Easter egg theme for our salt crystals. But you could use paper cutouts of any shape or even string or pipe cleaners suspended in the solution.
Supplies:
- Construction Paper
- Water
- Salt
- Container and Spoon {for mixing salt solution}
- Tray or Plate
- Hole Puncher and String {optional if you want to hang them when you are finished}
Instructions:
STEP 1: Start by making as many cut out shapes as you would like. Or you can just make one giant shape if you prefer that fills your tray. You will want the shapes to lay as flat as possible, so we used a cookie tray.
At this point, go ahead and punch a hole in the top of the paper cutouts if you plan to use your salt crystals as an ornament!
Also check out how we have done this with paper leaves, snowflakes, gingerbread men and hearts for different themes!
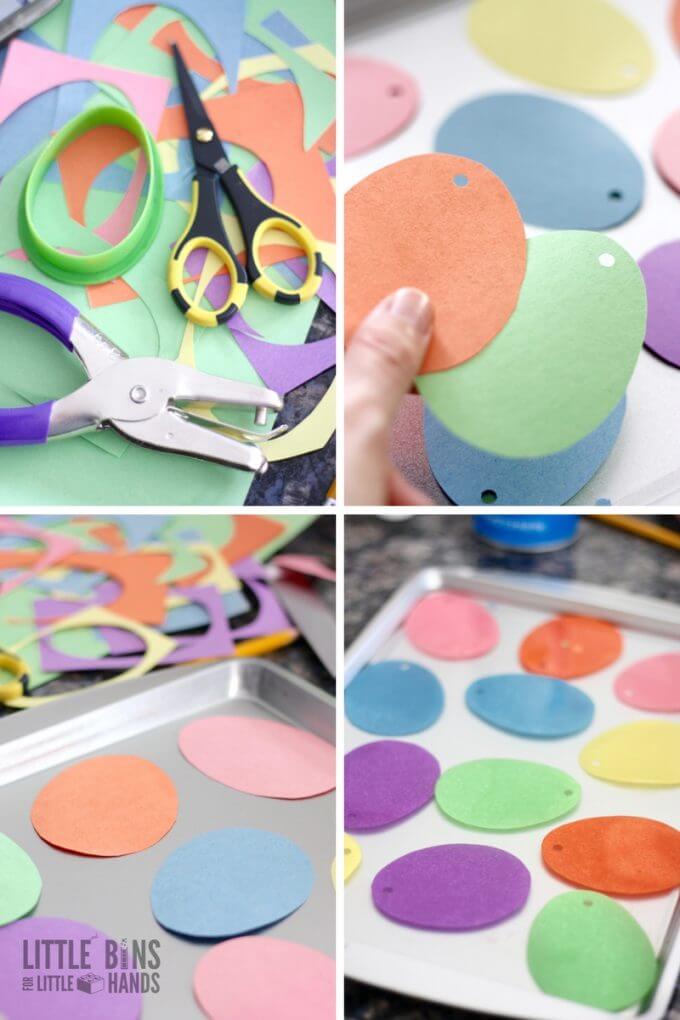
STEP 2: Place your cutouts on your tray, and get ready to mix your super saturated solution (see below).
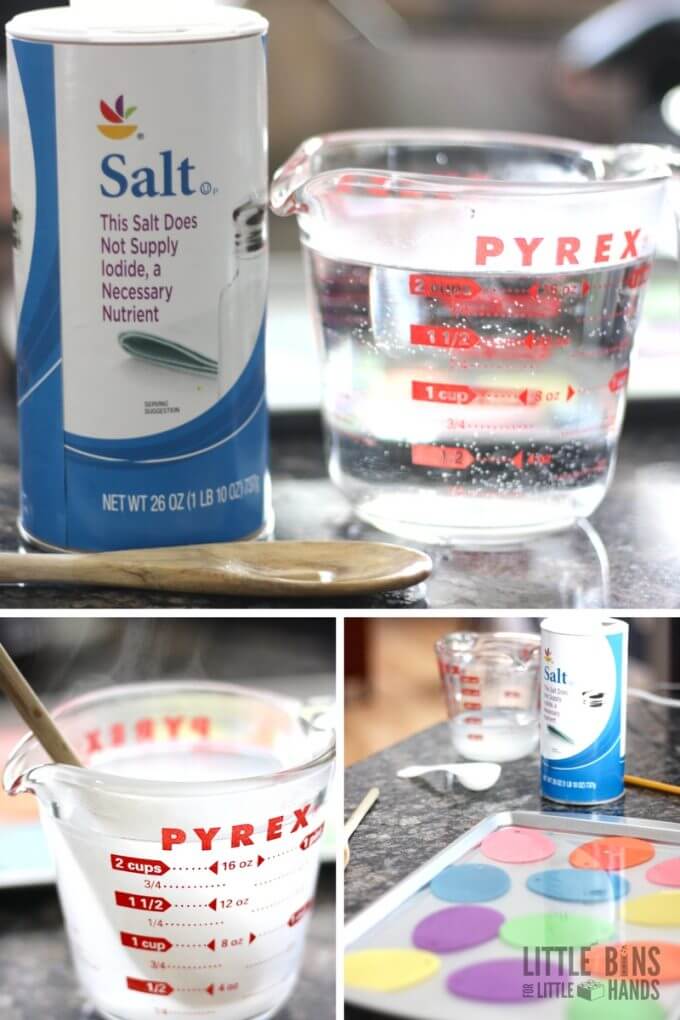
STEP 3. First you need to start with hot water, so this is an adult only step if needed.
We microwaved about 2 cups of water for 2 minutes. Though you can see from the above right photo, we did not use all of our solution for our tray.
STEP 4. Now, it’s time to add the salt. We added one tablespoon at a time, stirring very well until completely dissolved. You can feel the point at which it’s not gritty as you stir. {Close to 6 tablespoons for us}
Do this with each tablespoon until you can’t get rid of that gritty feeling. You will see a bit of salt on the bottom of the container. This is your super saturated solution!
STEP 5. BEFORE you pour the solution onto your paper shapes, move your tray to a quiet location that won’t be disturbed. It’s easier than trying to do it after you have added the liquid. We know!
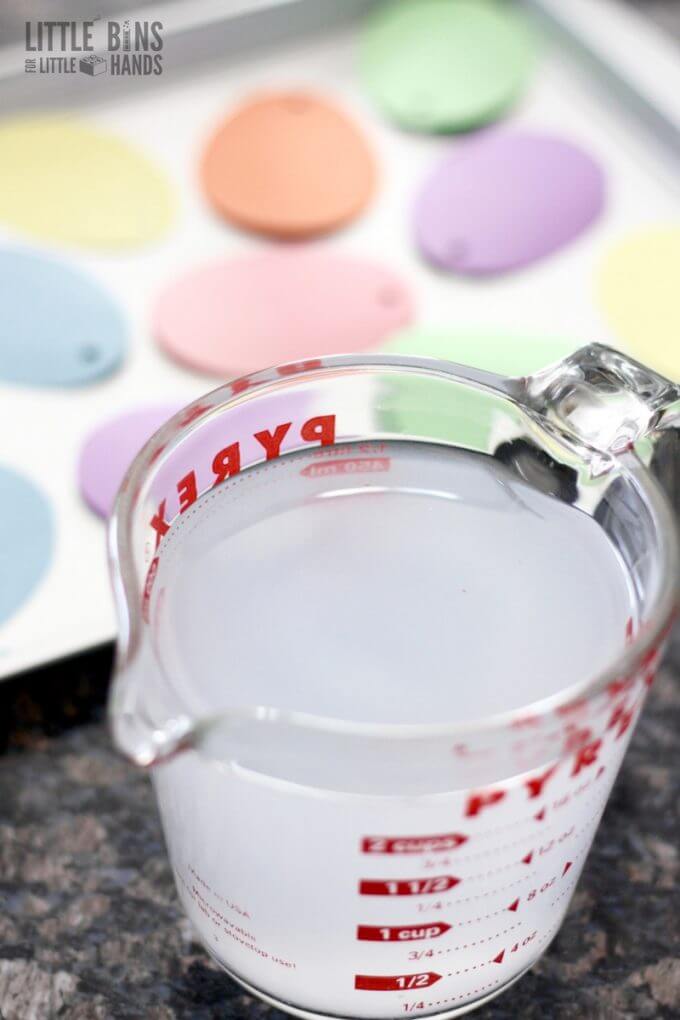
Go ahead and pour your mixture over the paper just covering them with a thin layer of the solution.
The more solution you pour over, the longer it will take for the water to evaporate!
You can see that our egg cutouts had a bit of a tough time staying separated and we didn’t try to fix it too much. You could experiment with different methods like tape to stick them down first or an object to block their movement.
Now you just need to give it time to form the salt crystals. We set this up mid-morning and started seeing results by late evening and definitely the next day. Plan to allow approximately 3 days for this activity. Once the water has evaporated, they will be ready.
Borax Crystals are ready faster if you need a quicker crystal growing activity!!

How To Grow The Best Salt Crystals
To make the best crystals, the solution has to cool slowly. This allows the forming crystals to reject any impurities that are also caught up in the solution. Remember, the crystal molecules are all the same and are looking for more of the same!
If the water cools too quickly, the impurities are trapped, creating an unstable, misshapen crystal. You can see that here when we tried to use different containers for our borax crystals. One container cooled slowly and one container cooled quickly.
We transferred our salt crystal covered egg cutouts to paper towels and let them dry out for a while. Plus, the crystals really seem to bond nicely as everything dries out more.
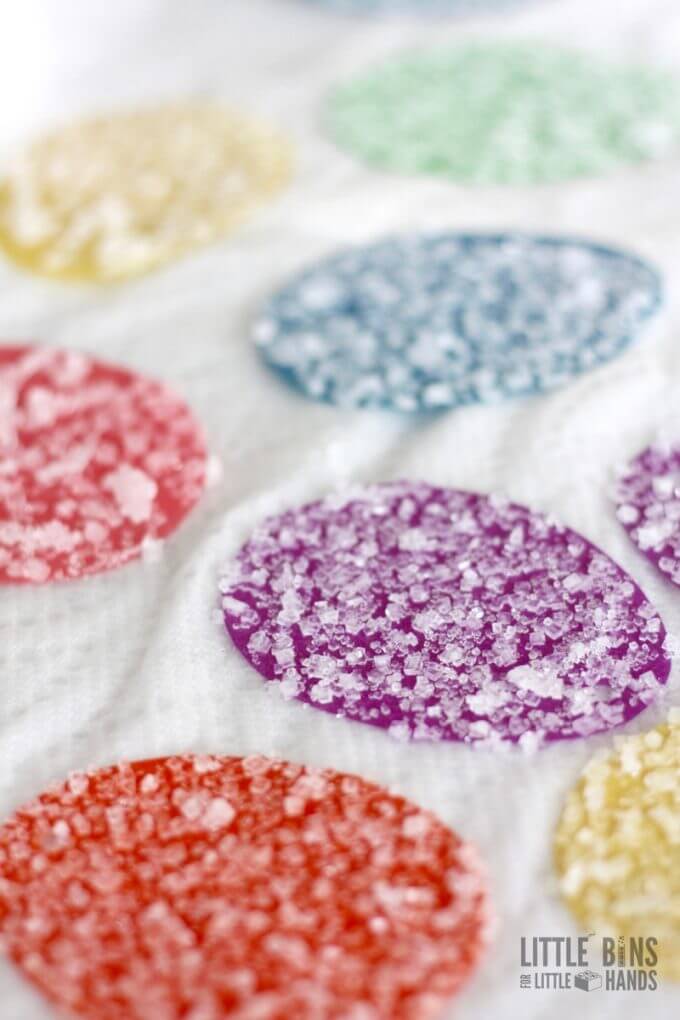
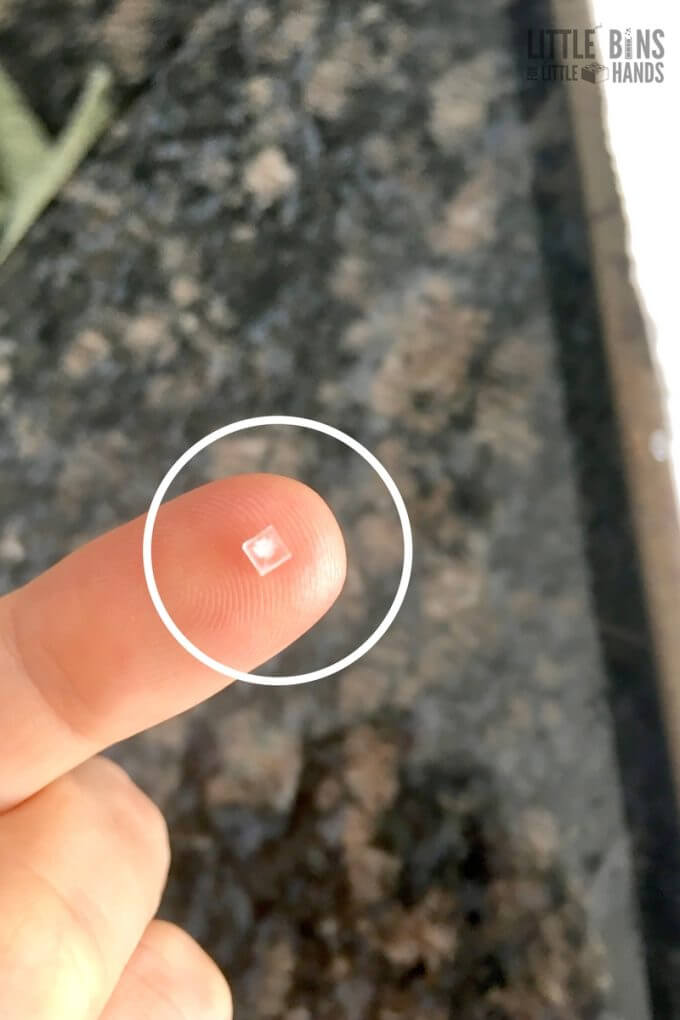
When they are nice and dry, add a string if you wish. Examine the salt crystals with a magnifying glass too. You can explore one single crystal as well like we did below.
These crystals are so cool and they will always be cubed shaped whether they are by themselves or in a cluster. This is because a crystal is made of molecules that come together in a repeating pattern. Check out our single crystal above!
How Do Salt Crystals Form
To make salt crystals you start with a supersaturated solution of salt and water. A supersaturated solution is a mixture that can’t hold any more particles. Like with the salt here, we have filled all the space in the water with salt and the rest is left behind.
Water molecules are close together in cold water, but when you heat the water up, the molecules spread away from each other. This is what allows you to dissolve more salt in the water than you normally could. It even appears cloudy.
You can try this experiment with cold water to compare the differences in the amount of salt needed to get this mixture, and you can compare the results of the crystals afterward.
So how do the salt crystals grow? As the solution cools the water molecules start to come back together, the particles of salt in the solution fall out of place and onto the paper. More will connect with the molecules that have already fallen out of the solution.
As the salt solution cools and the water evaporates, water molecules no longer separate the atoms (niacin and chlorine). They begin to bond together, forming the special cube-shaped crystal for salt.
Click here to get your FREE Science Challenge Calendar
Set Up A Salt Crystals Science Project
This salt crystals experiment would make an easy science fair project. You could experiment with different water temperatures, different trays or plates, or covering the crystals slightly to minimize heat loss.
You could also vary the type of salt used. What happens to drying time or crystal formation if you use rock salt or Epsom salt?
Check out these helpful resources…
More Fun Science Experiments With Salt
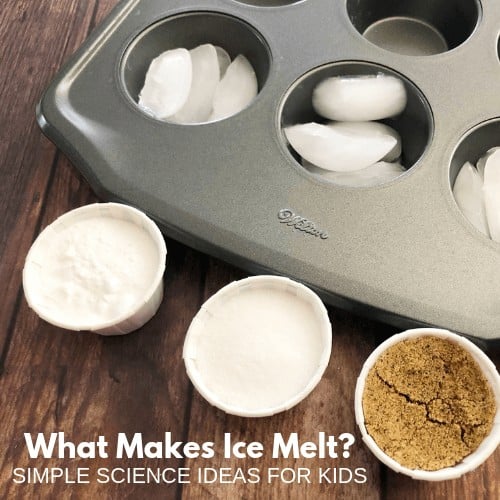
- Investigate what makes ice melt faster
- Use salt and ice to make ice cream in a bag
- Or homemade slushies
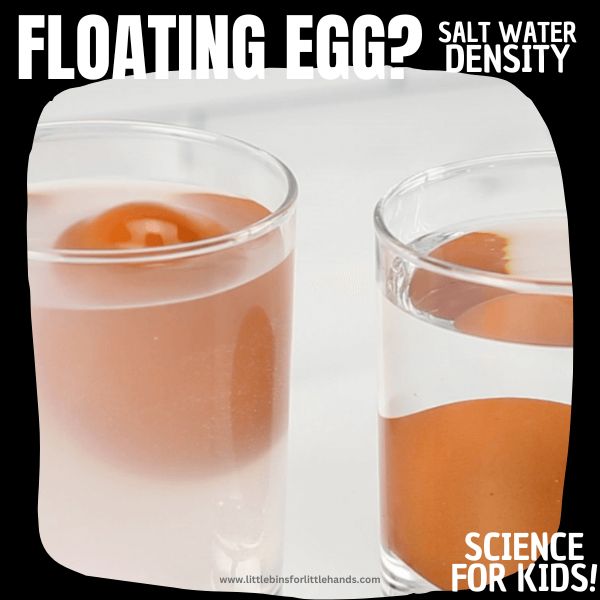
- Explore how salt changes the density of water
- Try this fun salt and soda experiment
- Set up a salt volcano

Printable Science Projects Pack
If you’re looking to grab all of our printable science projects in one convenient place plus exclusive worksheets and bonuses like a STEAM Project pack, our Science Project Pack is what you need! Over 300+ Pages!
- 90+ classic science activities with journal pages, supply lists, set up and process, and science information. NEW! Activity-specific observation pages!
- Best science practices posters and our original science method process folders for extra alternatives!
- Be a Collector activities pack introduces kids to the world of making collections through the eyes of a scientist. What will they collect first?
- Know the Words Science vocabulary pack includes flashcards, crosswords, and word searches that illuminate keywords in the experiments!
- My science journal writing prompts explore what it means to be a scientist!!
- Bonus STEAM Project Pack: Art meets science with doable projects!
- Bonus Quick Grab Packs for Biology, Earth Science, Chemistry, and Physics


I am having trouble growing the crystals, is it possible that I am heating the water up too much? After a few days very little of the water has evaporated and no crystals have formed.
Are you adding enough salt? You have to create a saturated solution! Email me sarah@littlebinsforlittlehands.com
Can you pour the borax solution over the egg shapes in the pan?