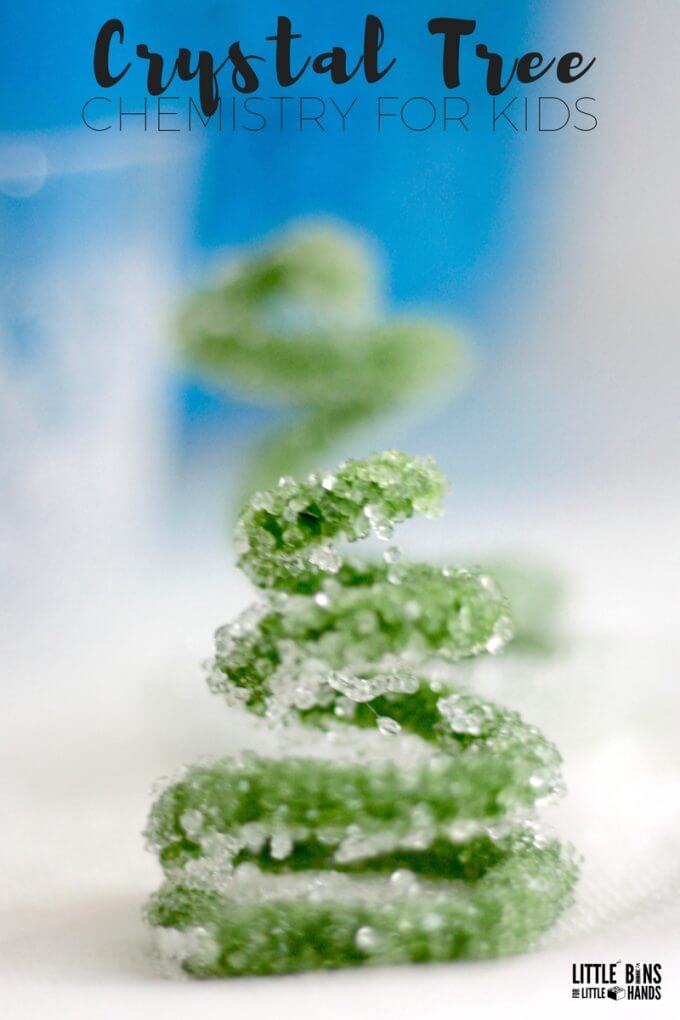
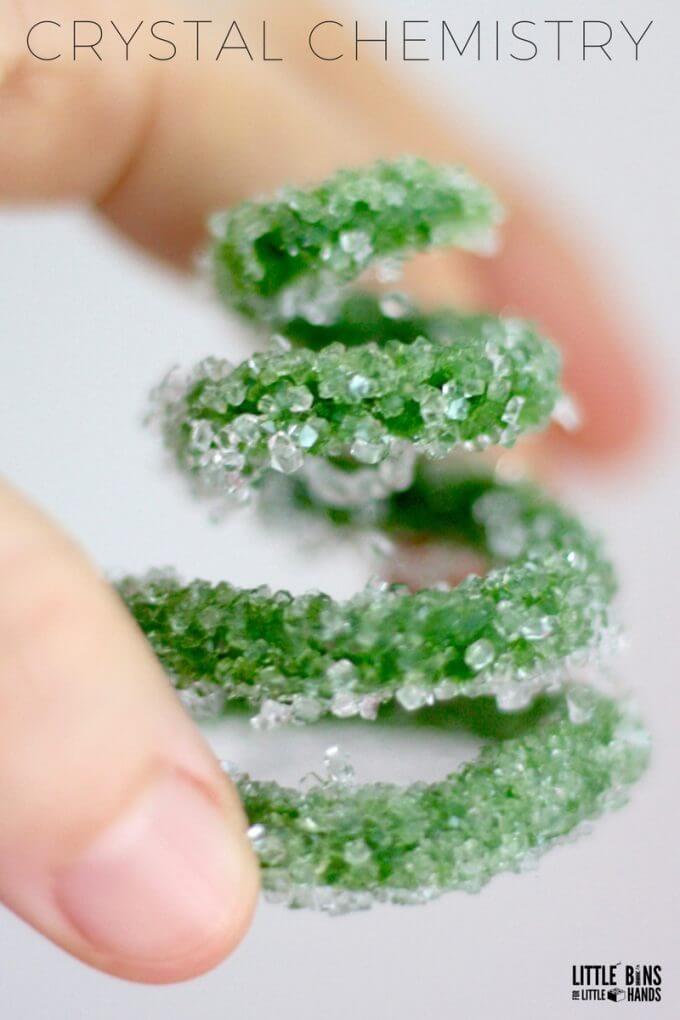
Aren’t crystals pretty? Did you know that you can grow crystals pretty easily at home AND it’s a cool chemistry activity too! All you need are a couple ingredients and you too can make these gorgeous pipe cleaner crystal trees that look like they are covered in ice! Terrific winter themed science for kids!
Grow Crystals For Winter Science
Crystal growing is an awesome winter STEM challenge for kids. It’s not quite playful science and there isn’t a whole lot of hands-on with this activity, but it does turns into an experiment you can keep for a while!
A crystal science activity is more of an observation experiment, to begin with, but you can definitely feel the crystals at the end. Kids are always amazed by the end result. Learn more about the science of growing crystals below.
If you want a crystal growing method that is much more hands-on, try growing salt crystals with your kids instead! They can do more the work!
It may sound tricky to grow crystals, but it really isn’t at all. You will be hooked and may end up growing crystals all year round!
More Fun Pipe Cleaner Crystal Projects To Try
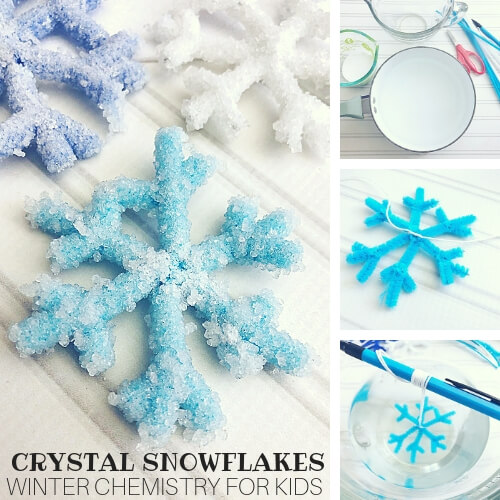
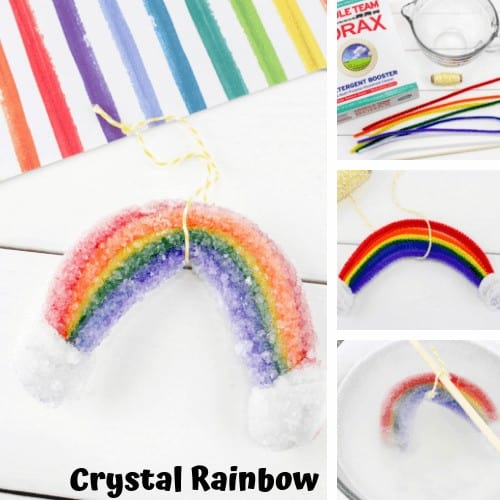
You can shape your pipe cleaners any which way you want including snowflakes, hearts, gingerbread men, rainbows, and more!
The Science of Growing Borax Crystals
What you make at the beginning is called a super saturated solution. A supersaturated solution is a solution that contains more solute than would normally be able to dissolve under normal conditions.
The borax powder has been suspended throughout the solution and remains that way while the liquid is hot. A hot liquid will hold more borax than a cold liquid!
Supersaturated solutions are sensitive to disturbances like adding a pipe cleaner to the solution and it can trigger the rapid precipitation of the excess solute.
As the solution cools, the particles settle out of the saturated mixture, and the settling particles form the crystals that you see. Cube like crystals will form if the process of cooling is slow enough. While impurities remain behind in the water.
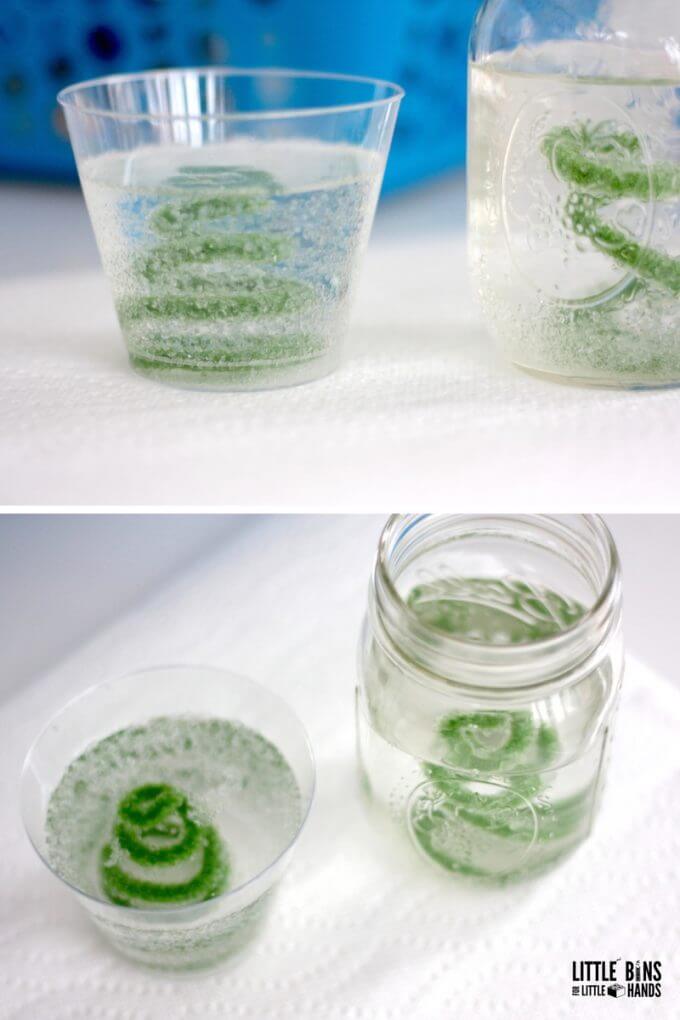
Plastic Cup vs Glass Jar
We found using a plastic cup versus the glass jar caused a difference in the formation of the crystals. The glass jar crystals are more heavy duty, larger, and cube shaped.
While the plastic cup crystals are smaller and more irregularly shaped. Much more fragile too. The plastic cup cooled off more quickly and they contained more impurities than those in the glass jar.
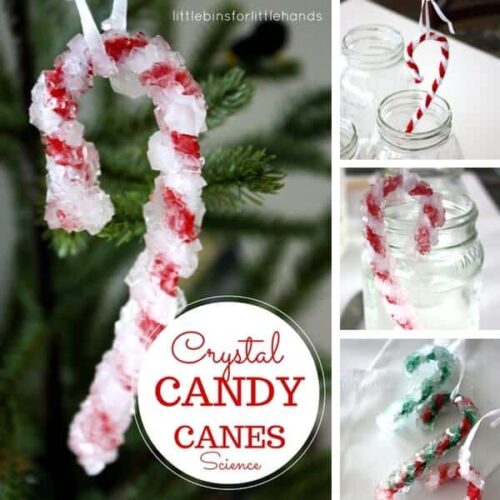
You will find that the crystal growing activities that take place in the glass jar hold up quite well to little hands and we still have some of the candy cane crystal ornaments for our tree.
Make sure to grab a magnifying glass and examine the crystals up close! They are so pretty and really do sparkle.
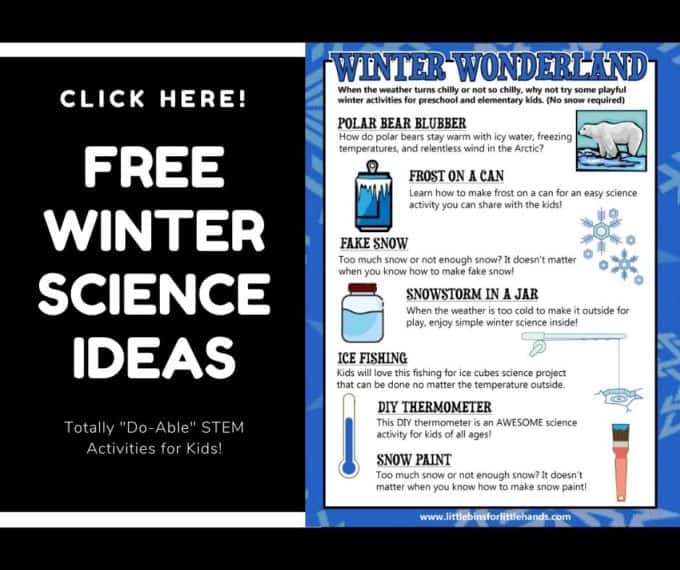
Get your FREE printable Winter Science Guide!
Growing Crystals
Get Prepared! Gather your supplies and clear a workspace. Growing crystals doesn’t require much effort but they do need a quiet place to rest. It’s important that you don’t disturb them for about 24 hours. However, you can observe the changes all you want!
Supplies:
- Borax Powder {laundry aisle of most stores}
- Water
- Pipe Cleaners
- Mason Jars
- Tablespoon, Measuring Cup, Bowl, Spoon
Instructions:
STEP 1. This crystal tree is made by simply curling the pipe cleaner around itself like a spring. Pull it around a bit till you get it right, but there is no wrong way to make one!
STEP 2. Attach thread or string to the end of the pipe cleaner and tie it to a skewer or pencil.
STEP 3. Bring 2 cups of water to a boil and stir in the borax powder until it is dissolved.
There should be a little bit of Borax on the bottom of the pan or container that does not dissolve. This lets you know you have added enough borax to the water, and it has become a supersaturated solution.
BORAX RATIO: The ratio of borax to water is 3 tablespoons to 1 cup, so you can determine how much you need. Two pipe cleaner crystal trees required 2 cups and 6 tablespoons.
STEP 4. Pour the mixture into two containers.
STEP 5. Suspend the pipe cleaners in each container.
TIP: Try to make sure the pipe cleaners don’t touch the sides or bottom of the cups. If they do touch, the crystals attach the pipe cleaner to the cup. They may break off when you try to pull it free.
STEP 6. Leave your pipe cleaners in the borax solution overnight (or even two nights) until many crystals have grown on them!
STEP 7. Remove your borax crystals from the water and let dry on a layer of paper towels. Once dry, cut the fishing line off if you used it and you have gorgeous crystal trees your rock hound to observe!
More Fun Winter Activities
Click on all the photos below for more winter science and STEM activities you will want to try with the kids!
- Snow storm in a Jar
- Frost on a Can
- Snow Slime Recipes
- Maple Syrup Snow Candy
- Snowflake Salt Painting
- Coffee Filter Snowflakes

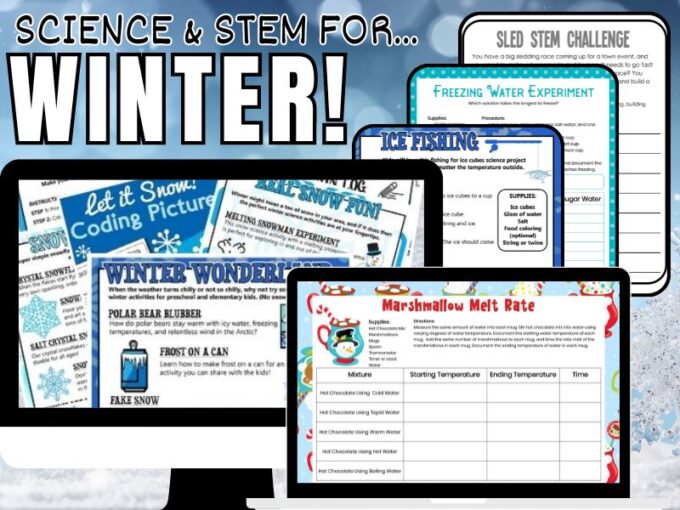
Printable Winter STEM Pack
Even if you don’t live in a snowy winter climate, there are many ways to explore the season!
WHAT’S INSIDE? You’ll find 250+ Pages of Winter theme projects for science, STEM, and art!
- 25+ Winter science activities and STEM projects for kids that are easy to set up and fit into the time you have available even if it’s limited! NEW: Observation sheets for activities.
- Printable winter theme STEM activities that are simple but engaging for home or classroom. Perfect for K-2 and beyond and adaptable to many skill levels.
- Find simple background science explanations to share with kids while they explore hands-on and playful experiments, projects, and activities! Fun with physics, chemistry, design, engineering, and more!
- Easy to gather supplies makes these STEM activities ideal when you have limited resources available. Perfect for trying with groups of kids.
- Engaging winter STEM activities packed with winter theme activities, journal pages, and design process steps! Includes structure-building cards, STEM challenge cards, and screen-free coding activities.
- Fun snowflake theme STEM, including snowflake cutting templates, snowflake tinker cards, and snowflake science activities, including a snowflake formation cycle!
- Even more, winter printable sheets include hibernating animals sort, snow weather cycle, five senses for winter journal pages, thaumatrope patterns, and fun extras with a winter theme!