If you have ever wanted to make scented slime but didn’t want to buy the more expensive scented oils, there’s another option. It’s pretty sweet too but NOT edible! This fruit scented slime recipe uses a small scoop of fruit gelatin powder instead. Our homemade slime recipes come in such a variety now, and this one is perfect for summer fun!
Tips For Making Slime With Jello
I LOVE the smell of citrus fruits, and I wanted to bring that to my basic saline solution slime recipe! Often times, scented slime uses special fragrance oils that cost a bit more.
However, this fruit scented slime recipe uses our favorite jello powder packets. Plus, you only need a little bit so there’s no reason why you can’t make your favorite jiggly treat afterward or save it for the next batch of slime.
Watch the video! Read the recipe and the science below!
This is a very smell-able slime! Not EDIBLE! If you want an edible version of this JELLO scented slime, click here and check out our edible JELLO slime.
The olfactory senses will go nuts with this easy to make scented slime! Of course, our slime recipes are already an amazing activity for the sense of touch, but now we have added the sense of smell too!
Afterward, go ahead and make the gelatin as directed on the package and you can eat science too! Wash hands after playing with your slime, and check out our gelatin heart to learn more. You can use unflavored gelatin to make birdseed ornaments too!
NOTE: Do not use sugar-free JELLO for this homemade slime recipe!
Basic Slime Recipes
Our easy, “how to make” slime recipes show you how to master slime in 5 minutes or less! We have spent years tinkering with our favorite basic slime recipes to make sure you can make the BEST slime every time!
We believe slime shouldn’t be disappointing or frustrating! That’s why we want to take the guesswork out of making slime!
- Discover the best slime ingredients and get the right slime supplies the first time!
- Make easy slime recipes that really work!
- Achieve awesome slimy consistency the kids’ love!
Which Slime Recipe To Use?
We have several basic slime recipes that can all be used for this fruity scented slime recipe. You decide which one works best for you depending on what slime activator you want to use. This allows for some flexibility depending on where you live in the world! Not everyone has access to the same ingredients!
Each of the basic slime recipes below have the full step by step photos, directions, and even videos to help you along the way!
In the recipe below, we used our number one saline solution slime recipe. This is our #1 most viewed slime recipe, and we love it. Awesome stretchy slime in no time is my motto!
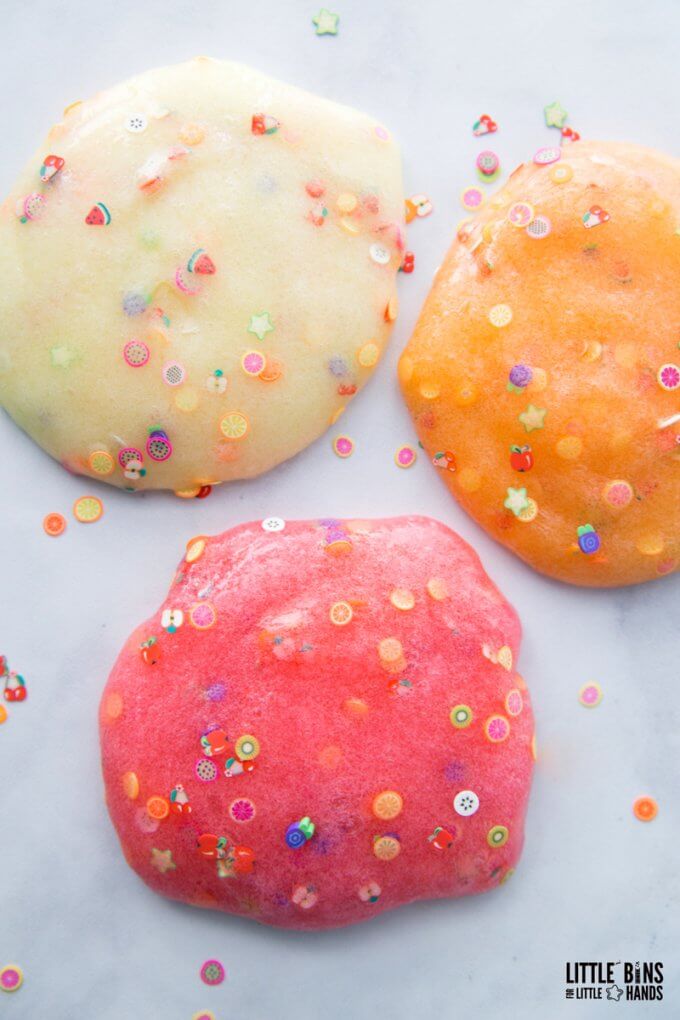
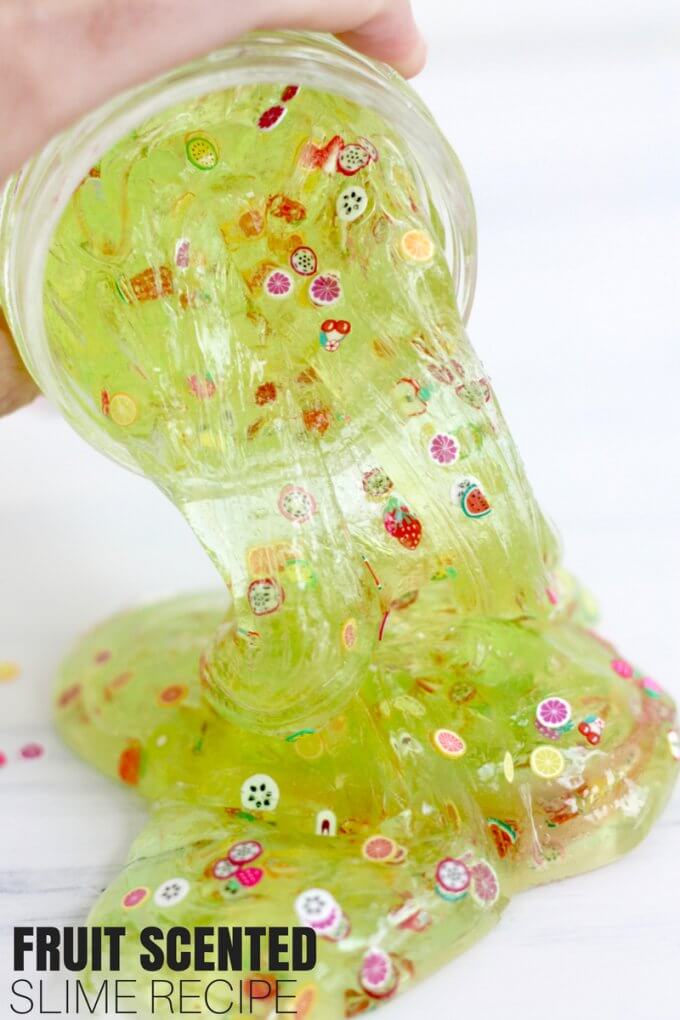
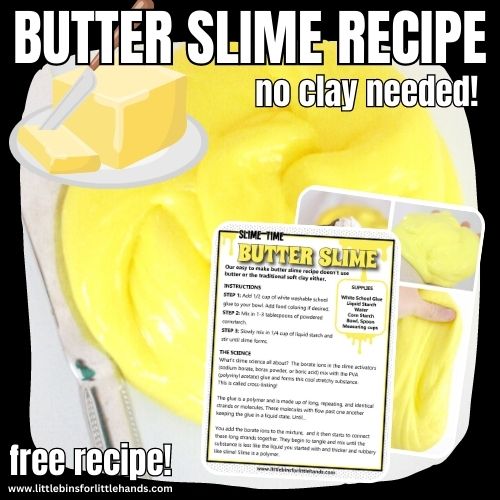
Fruit Scented Slime Recipe
We made three separate batches of this scented slime! For summer, a lemon scented slime is fun to make!
Supplies:
- 1 to 2 TBSP Saline Solution
- 1/2 TSP Baking Soda
- 1/2 Cup Clear Washable PVA Glue
- 1/2 Cup Water
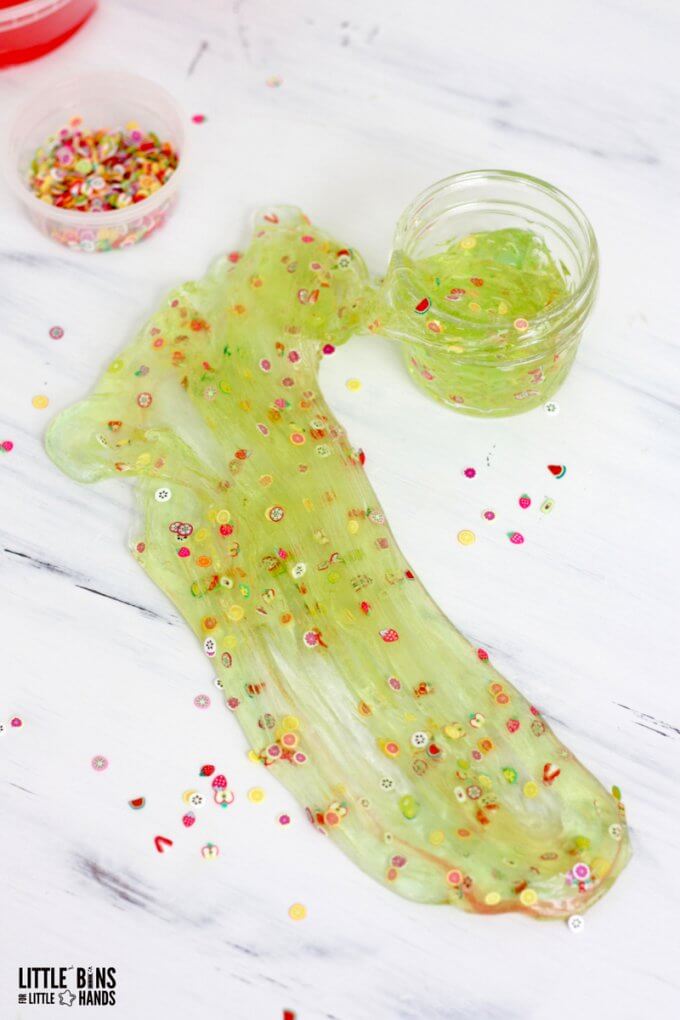
- 1 TBSP Jello Gelatin Packets (lemon, strawberry, orange, lime)
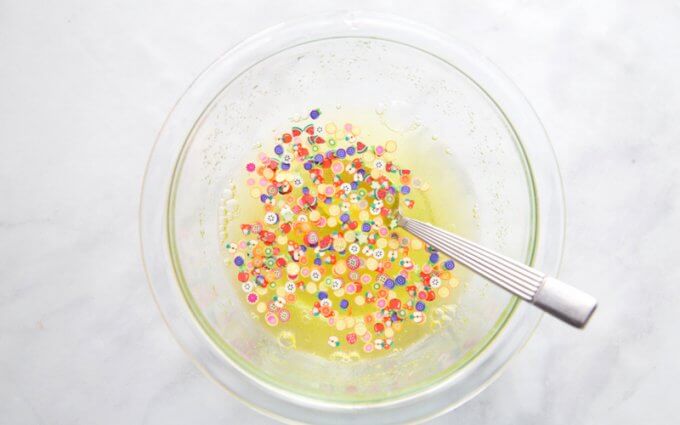
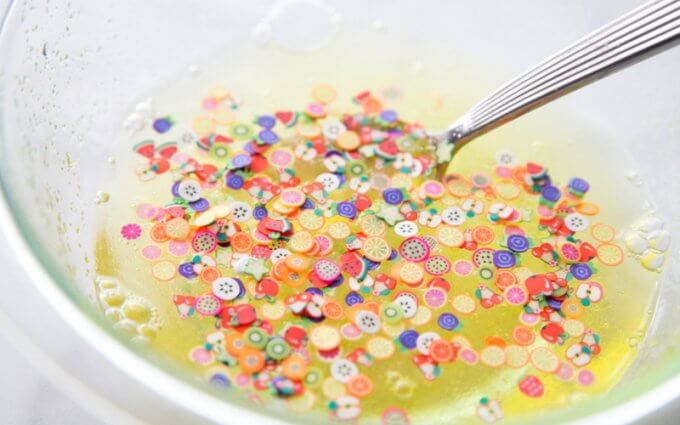
- Fruit Slices Confetti (optional but fun!)
- Glitter (optional but fun!)
- Food Coloring (optional)
How To Make Fruit Scented Slime
STEP 1: In a bowl mix 1/2 cup water, 1/2 cup of glue and Jello powder well to combine completely.
STEP 2: Now’s the time to add a few drops of food coloring and glitter if using.
STEP 3: Stir in 1/4- 1/2 tsp baking soda.
You can play around with how much you add but we prefer between 1/4 and 1/2 tsp per batch. I get asked all the time why do you need baking soda for slime. Baking soda helps to improve the firmness of the slime. You can experiment with your own ratios!
STEP 4: Mix in 1 tbsp saline solution and stir until slime forms and pulls away from sides of the bowl. This is exactly how much you will need with the Target Sensitive Eyes brand, but other brands may differ slightly!
If your slime still feels too sticky, you may need a few more drops of saline solution. As I mentioned above, start by squirting a few drops of the solution onto your hands and kneading your slime longer. You can always add but you can’t take away. Saline solution is preferred over contact solution.
STEP 5: Start kneading your slime! It will appear stringy at first but just work it around with your hands and you will notice the consistency changes. You can also put it in a clean container and set it aside for 3 minutes, and you will also notice the change in consistency!
You can knead the slime in the bowl before you pick it up as well. This slime is stretchy but can be stickier. However, keep in mind that although adding more activator (saline solution) reduces the stickiness, and it will eventually create a stiffer slime.
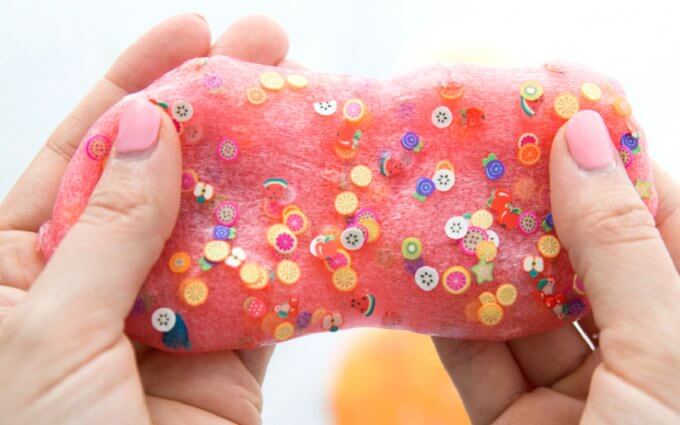
Now your fruit scented slime is ready for sniffing, stretching, squishing, and popping!
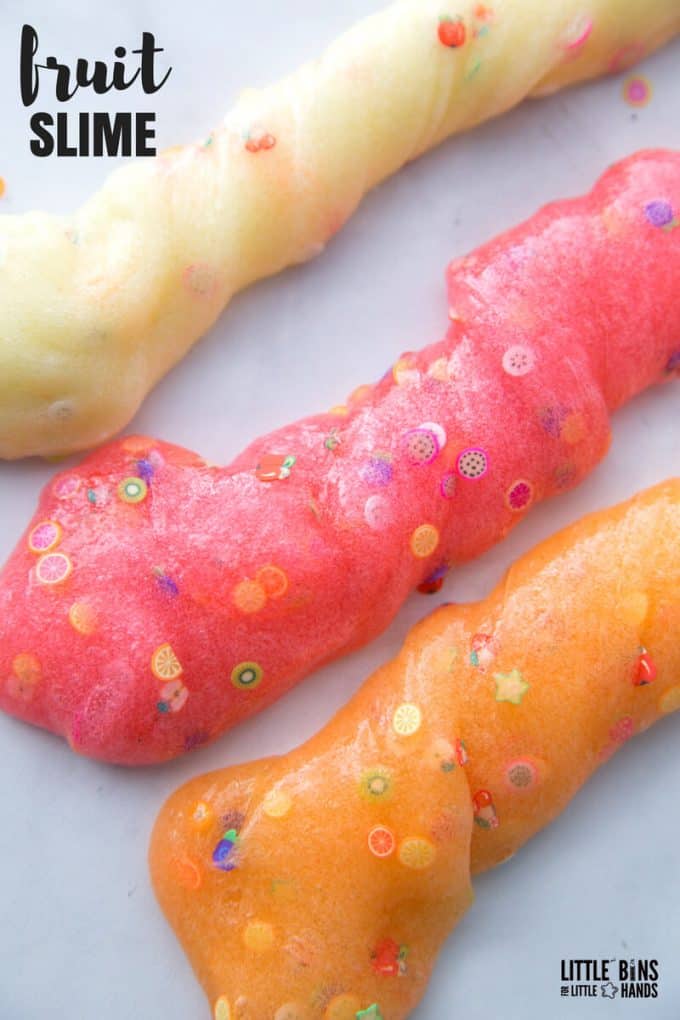
You will love how easy and stretchy this scented slime is to make, and play with too! Once you have your desired slime consistency, time to have fun! How big of a stretch can you get without the slime breaking?
How To Store Slime
Slime lasts quite a while! I get a lot of questions regarding how I store my slime. We use reusable containers in either plastic or glass. Make sure to keep your slime clean and it will last for several weeks.
If you want to send kids home with a bit of slime from a camp, party, or classroom project, I would suggest packages of reusable containers from the dollar store or grocery store or even Amazon. For large groups, we have used condiment containers and labels as seen here.
If you have been wanting to make a fun fruit scented slime recipe with your kids, our easy recipe is perfect for you! Give it a try and let us know what you think.
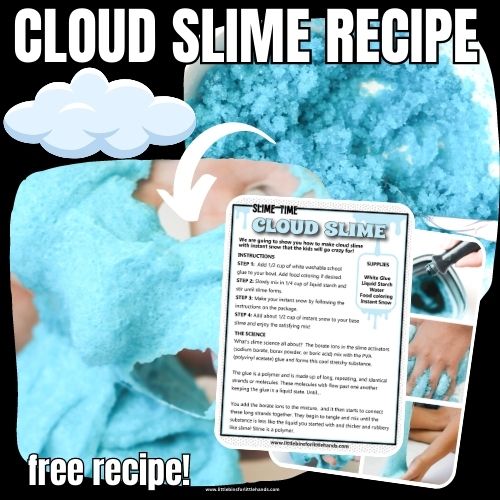
The Science of Slime
We always like to include a bit of homemade slime science around here! Slime is an excellent chemistry demonstration and kids love it too! Mixtures, substances, polymers, cross-linking, states of matter, elasticity, and viscosity are just a few of the science concepts that can be explored with homemade slime!
What’s slime science all about? The borate ions in the slime activators (sodium borate, borax powder, or boric acid) mix with the PVA (polyvinyl acetate) glue and forms this cool stretchy substance. This is called cross-linking!
The glue is a polymer and is made up of long, repeating, and identical strands or molecules. These molecules with flow past one another keeping the glue in a liquid state. Until…
You add the borate ions to the mixture, and it then starts to connect these long strands together. They begin to tangle and mix until the substance is less like the liquid you started with and thicker and rubbery like slime! Slime is a polymer.
Picture the difference between wet spaghetti and leftover spaghetti the next day. As the slime forms, the tangled molecule strands are much like the clump of spaghetti!
Is slime a liquid or solid?
We call it a non-Newtonian fluid because it’s a little bit of both! Experiment with making the slime more or less viscous with varying amounts of foam beads. Can you change the density?
Did you know that slime aligns with the Next Generation Science Standards (NGSS)?
It does and you can use slime making to explore states of matter and its interactions. Find out more below…
Helpful Slime Making Resources
These are the best resources to look through before, during, and after making your awesome fruit scented slime! We talk more about slime science below too.
More Fun Slime Recipes To Try
If your kids love playing with slime, why not try more favorite slime ideas…
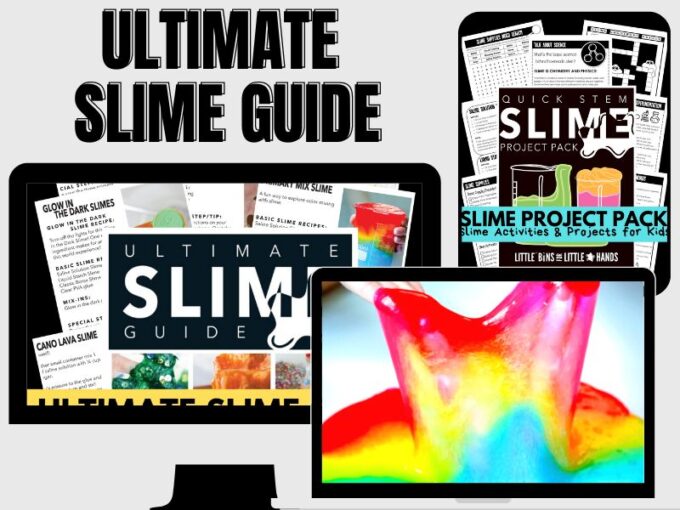
Grab the Ultimate Slime Recipe Bundle
All the best homemade slime recipes in one place with plenty of fantastic extras!
What’s Included:
- The Ultimate Slime Guide contains all the specialty recipes you or your kids want to make! You’ll find all the best tips, tricks, hints, and slime-y info in almost 100 pages!
- The Ultimate Slime Holiday Guide covers all the best holidays and seasons with special themes and slime-y projects!
- The Ultimate Borax-FREE and Taste-Safe Slime Guide shows you how to make all the best borax-free, taste-safe, and non-toxic slimes kids love, such as marshmallow slime. These recipes do not use chemical activators such as saline solution, liquid starch, or borax powder, making them truly borax-free.
- The Ultimate Slime Coloring Book is an easy-to-print coloring book kids will love! Color and design your favorite slimes!
- The Slime Starter Guide is a fact-filled information guide with everything you need to know to make the best slime ever!
- Slime Science Project Pack helps you turn slime-making into a science lesson!


Hello my Favorite Slime Advisor,
If you did want to scent slime with oils and you were making take home kits would you add the oils to the glue or to the saline solution?
Hmm, great question! I actually don’t know what would happen if you scented the glue ahead of time! Maybe someone else will share an experience!
Me again! Now I am wondering how you got the much more clear slime pictured by itself as opposed to the three colors together? I used jello and got a translucent slime but would love a more clear slime result like the first picture in this post.