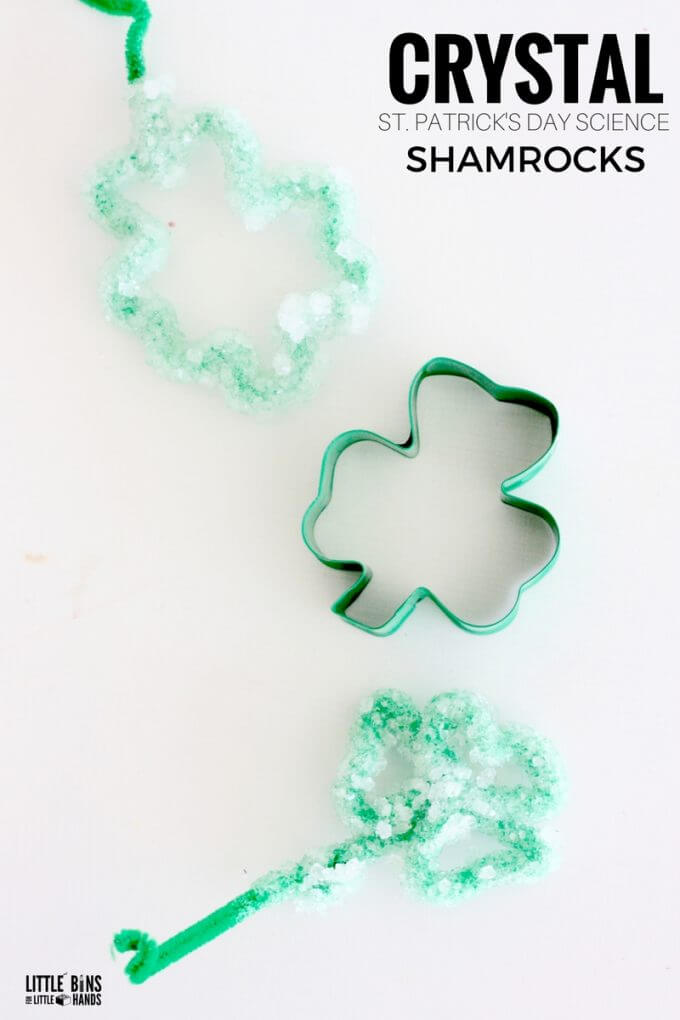
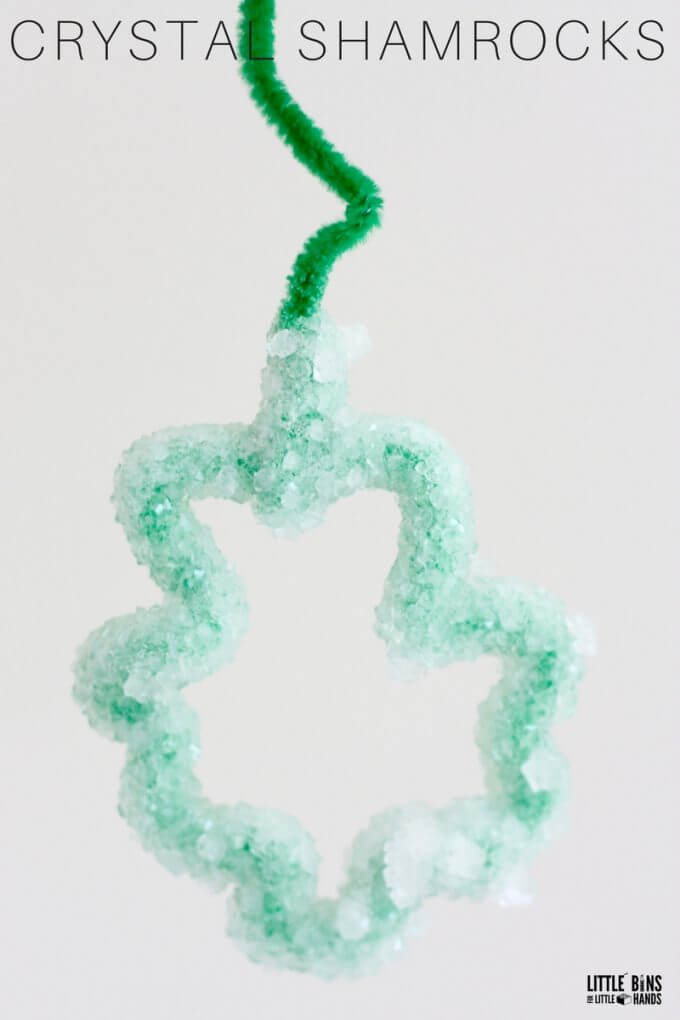
Each holiday we enjoy growing crystals together! We come up with a theme and create a shape to symbolize the holiday or season! Of course, with St. Patrick’s Day approaching, we had to try out crystal shamrocks this year! A super simple way to grow crystals using borax and pipe cleaners. See how to grow your own crystals below!
How Do Crystals Form
It’s a neat chemistry project that is quick set up involving liquids and solids and soluble solutions. Because there are still solid particles within the liquid mixture, if let untouched, the particles will settle.
No matter how you mix these particles are not going to fully dissolve because you are making a saturated solution with more powder than the liquid can hold. The hotter the liquid, the more saturated the solution.
As the solution cools down the particles settle on the pipe cleaners as well as the container {considered impurities} and form crystals. Once a tiny seed crystal is started, more of the falling material bonds with it to form bigger crystals.
Crystal Shamrocks
Supplies:
- Borax Powder
- Water
- Pipe Cleaners
- Mason Jars {other glass jars}
- Bowl, Measuring Cups, and Spoon
We have also used the same recipe and pipe cleaners to create a beautiful crystal rainbow!
Instructions:
Note: Adults should handle the borax powder when using this project with young kids and also the boiling water for safety. This activity is also suitable for older kids to do independently if you feel they are capable.
The most important part of the recipe is the ratio of borax powder to water. The ratio you need to grow these very cool crystals is 3tablespoons of borax powder to one cup of water. It generally takes three cups of solution to fill the larger of the two mason jars and two cups of solution to fill the smaller mason jar.
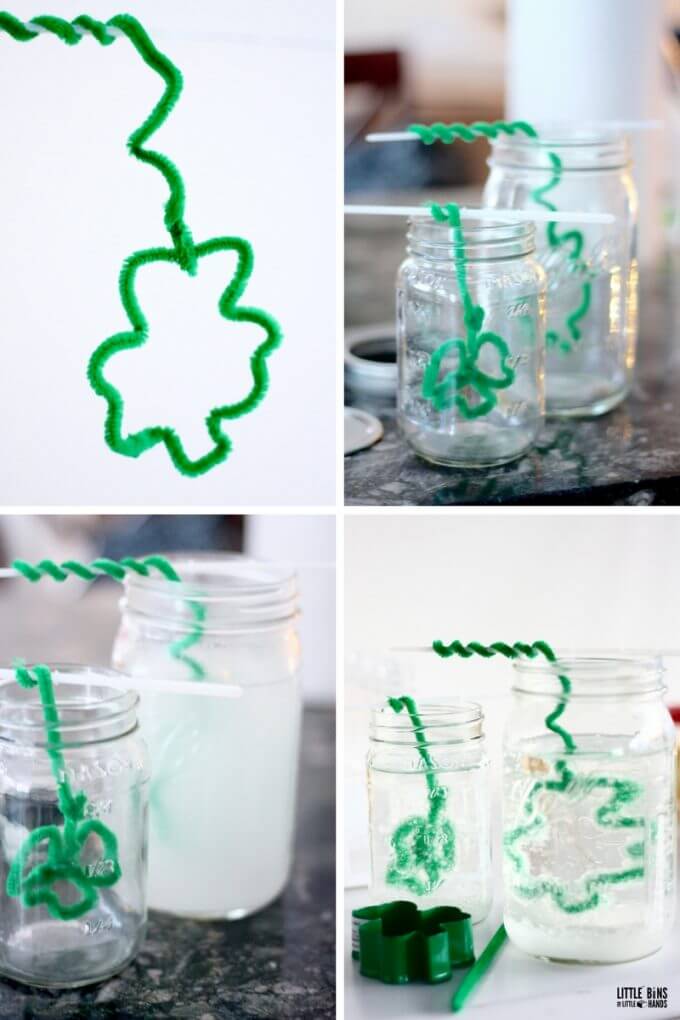
STEP 1. Create your shamrock shapes by bending and twisting the pipe cleaners. We made one free hand and we wrapped a pipe cleaner around the cookie cutter for the other!
STEP 2. Attach your shamrock to a stick or something that can be laid across the top of the mason jar. You can also tie it with string to a stick. Here we just wrapped the pipe cleaner around the plastic stick. You can see our crystal hearts using string here.
DOUBLE CHECK: Make sure you can easily remove your shamrock from the mouth of the jar. Once the crystals have formed, the shape will n longer be flexible!
STEP 3: Boil the amount of water you think you will need to fill your mason jars. Alternatively, we have used glass vases. Plastic cups do not work as well and will not grow as stable and thick of a crystal as the glass jars will. You can see the difference here when we tested the two containers.
STEP 4: Measure Borax into a mixing bowl keeping in mind the three tablespoons to one cup of water.
STEP 5: Add boiling water and stir well to combine. The solution will be cloudy because you have made a saturated solution. The borax powder is now suspended with in the liquid.
STEP 6: Pour the solution into the jars.
STEP 7: Add your pipe cleaner shamrock to the solution. Take care that it is not resting against the side of the jar.
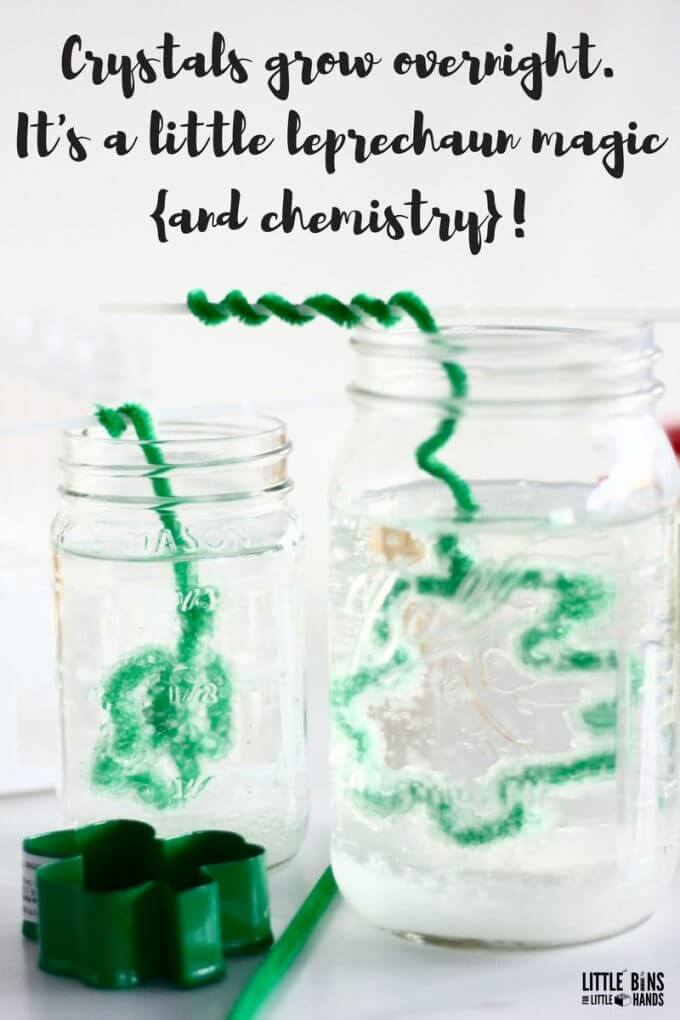
STEP 8: Place in a quiet area to rest. The solution can not be continually jiggled around.
STEP 9: Your crystals will be well formed within 16 hours or so. It will look like a thick crust round the pipe cleaners as you can see from our pictures. Remove them from the jars and place on paper towels to dry.
CLEAN UP: Hot water will loosen the crystal crust that forms inside the jar. I use a butter knife to break it up inside the jar and wash it down the drain {or throw away if desired}. Then I pop the jars in the dishwasher.
Once your crystals have dried off for a bit on the paper towel, you will be very impressed with how sturdy they are! You can even hang them in a window. We have used them for ornaments on our Christmas tree too.
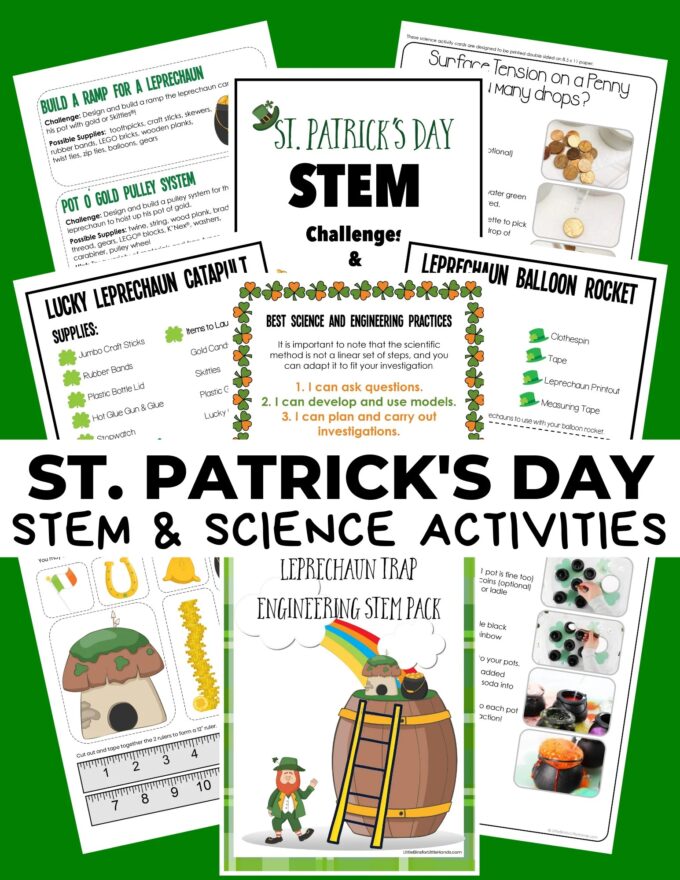
Printable St Patrick’s Day STEM Pack
Get ready to catch a Leprechaun, explore fizzy pots, and dig for gold coin oobleck all while exploring simple science and engineering design process with the St Patrick’s Day STEM Pack!
Over 100 pages of easy to use STEM activities that will make your prep and planning time a cinch! Cheap supplies, easy to set up and clean up, and full of hands-on fun!
- 25+ St. Patrick’s Day science activities and STEM projects kids that are easy to set up and fit into the time you have available even if it’s limited!
- Printable leprechaun theme STEM activities that are simple but engaging for home or classroom. Perfect for K-2 and beyond but easily adaptable to many skill levels.


3 Comments
Comments are closed.