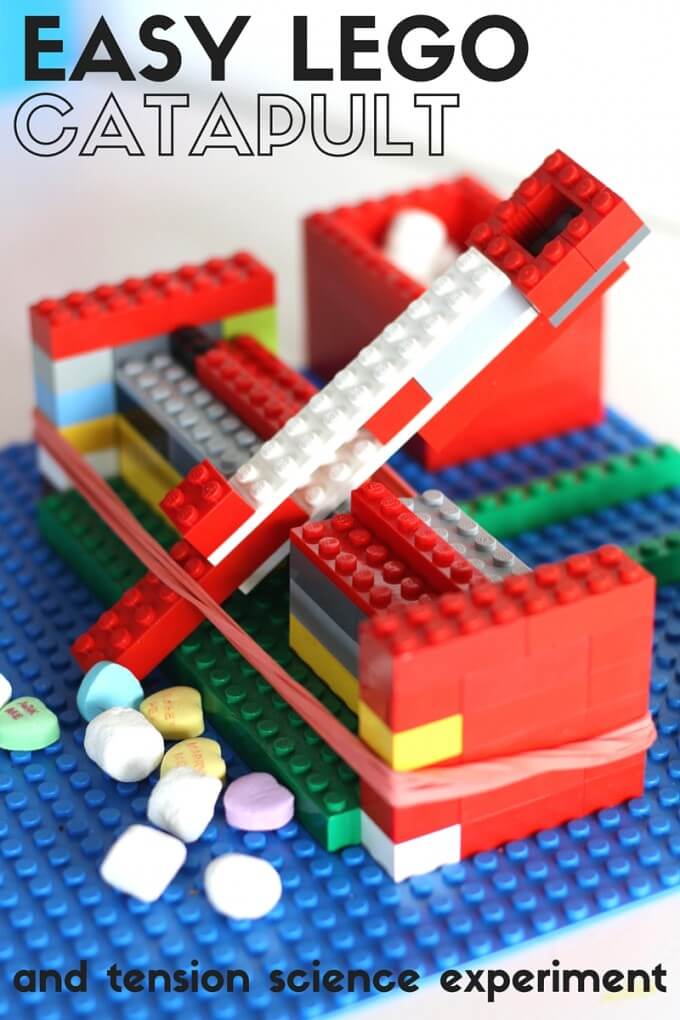
We built an awesome LEGO catapult using basic bricks for an easy STEM and physics activity. This is a fun homemade catapult just about everyone will want to make! We love cool LEGO activities with basic LEGO bricks.
Build A Simple Catapult For Physics
Wouldn’t LEGO activities for kids be better with specialty pieces that did this and did that? Maybe, but then it wouldn’t necessarily be easy for a project to be built by most kids with a smaller LEGO® collection!
My son is 6, and he is still learning the ins and outs of different LEGO® pieces. I did not want to build all of this catapult for him. Instead, I prefer to help him troubleshoot his ideas.
I like to ask questions to help him when he gets stuck. Sometimes it’s as simple as redirecting the question back to him to help him come up with his own solution. This is great practice for developing STEM skills! Read more about STEM below.
Building any sort of creation with LEGO® is a little bit about trial and error which actually makes it even more fun. What would we learn if everything always worked perfectly the first time? Not much.
You may have the same or different lengths and sizes of bricks, but you can use our idea for building this easy LEGO catapult to get you started. Maybe you will even come up with a better LEGO catapult design, and share it with us.
ALSO CHECK OUT: Easy Physics Experiments For Kids
What Is STEM For Kids?
STEM sounds complicated, but it isn’t! Once you get how science, technology, engineering, and math (STEM) mingle, you can see how it applies to so many of the science and STEM activities you already love.
The best STEM activities encourage your kids to use at least 3 of the 4 pillars of the STEM acronym (science, technology, engineering, and math) to tackle their projects head-on, challenge what they know, and build character. The lessons STEM can teach our kids are priceless!
Have you played around with science with your kiddos? If you haven’t, you are in for a real treat. And if you have, you already know how much fun STEM activities are…
Unlock your kids’ curiosity, and spark their inner inventor! The world of science and STEM is AMAZING with these hands-on science experiments and STEM activities!
You don’t have to be a rocket scientist to share STEM with your kids. We have everything you need: simple-to-follow activities, low-prep ideas, easy-to-digest science information, and inexpensive supplies.
Helpful STEM Resources To Get You Started
Here are a few resources to help you introduce STEM more effectively to your kiddos or students and feel confident when presenting materials. You’ll find helpful free printables throughout.
Get your free printable brick building challenges!
How To Make A LEGO Catapult
Popsicle sticks are a fun alternative for a catapult. See our popsicle stick catapult!
Supplies:
1. LEGO CATAPULT BASE
- Large base plate any color
- Small plate that is 20 studs long and at least 10 wide {or as close as you can get it!}
- 2×2, 2×4 bricks
- 1×2, 1×4, 1×6 bricks
- Rubberbands (we only had these large ones handy but you can try other sizes too)
2. LEVER ARM
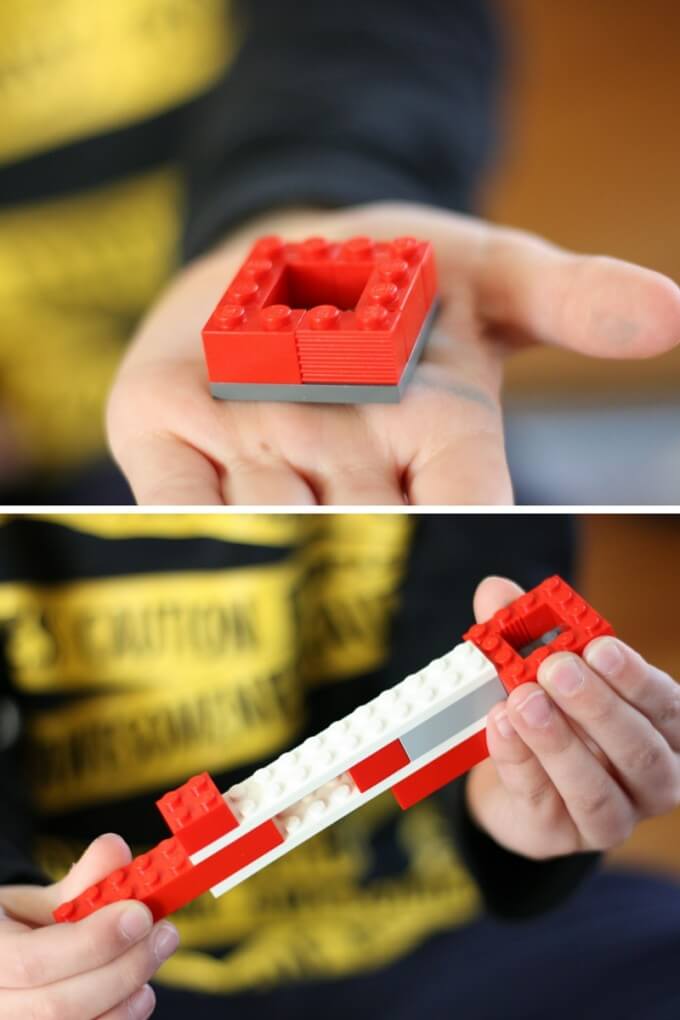
- 4×4 plate for the part that holds the marshmallow surrounded by 1×2 bricks to make a holder
- (2) 2×12 flats for the lever arm
- (2) 2×8 bricks
- 2×2 brick
At any point you can try to modify this LEGO catapult to fit the bricks you have. For instance you may have (2) 1×8 bricks that you can substitute for the 2×8 bricks. See if it works! Get creative!
LEGO Catapult Instructions
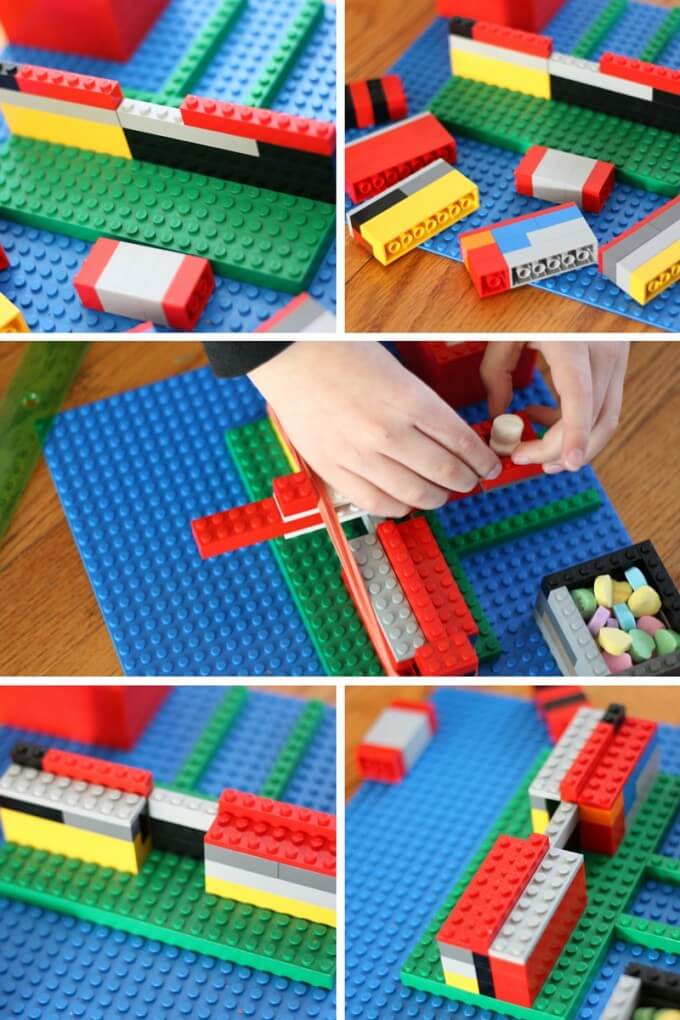
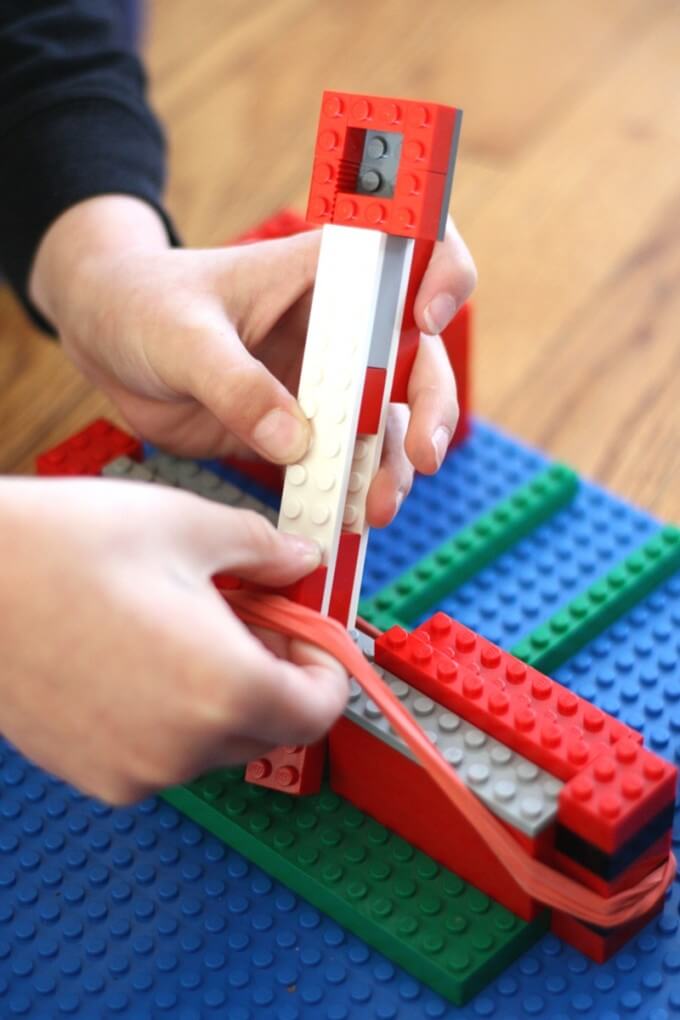
We made a single wide wall out of 1×4 and 1×6 bricks across the small plate and attached it to the base plate.
Next, we added supports on the front and back with double wide bricks. Notice that we left a gap of 4 studs in the middle. The majority of the base is three bricks worth high and then one extra layer of 1×8 bricks were added onto the top of each side, still keeping the middle clear.
Check out our launcher to make your own. The red bricks are 2×8.
The bucket part is flush with the end of the red brick. The white plate is not under it.
The 2×2 brick is used to keep the rubber bands in place. This is where you start experimenting with tension with your LEGO catapult.
Initially, we wrapped the rubber bands around the whole base but realized we needed more tension since the bands were quite large. We added an extra row on each side (5) 2×3 bricks high.
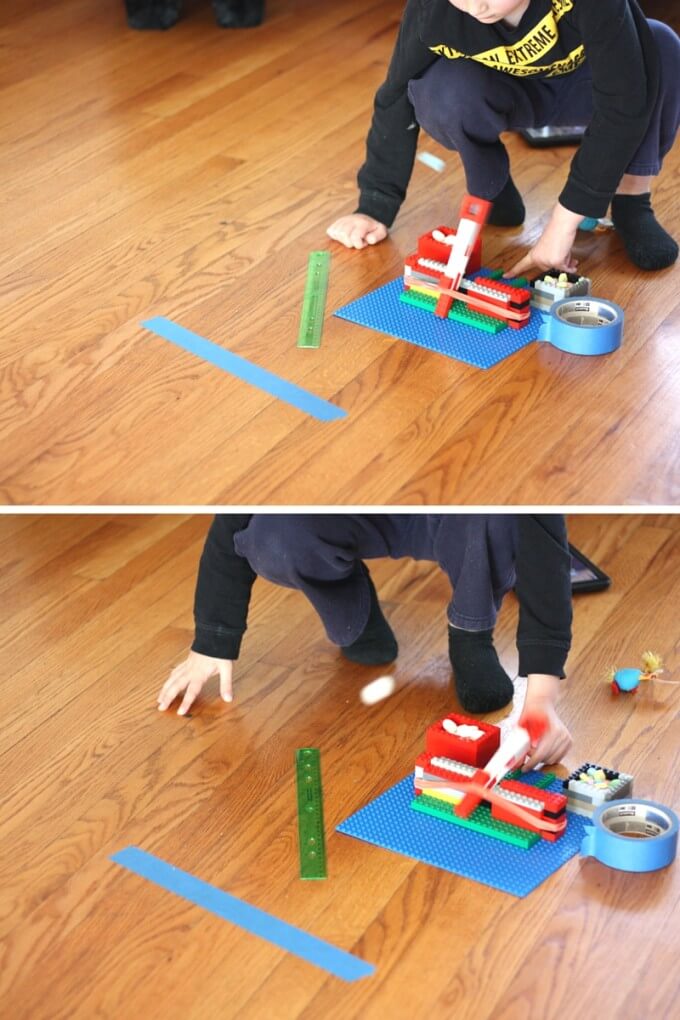
YES! THIS LEGO CATAPULT REALLY WORKS! The cat also loved it. It kept her just as entertained.
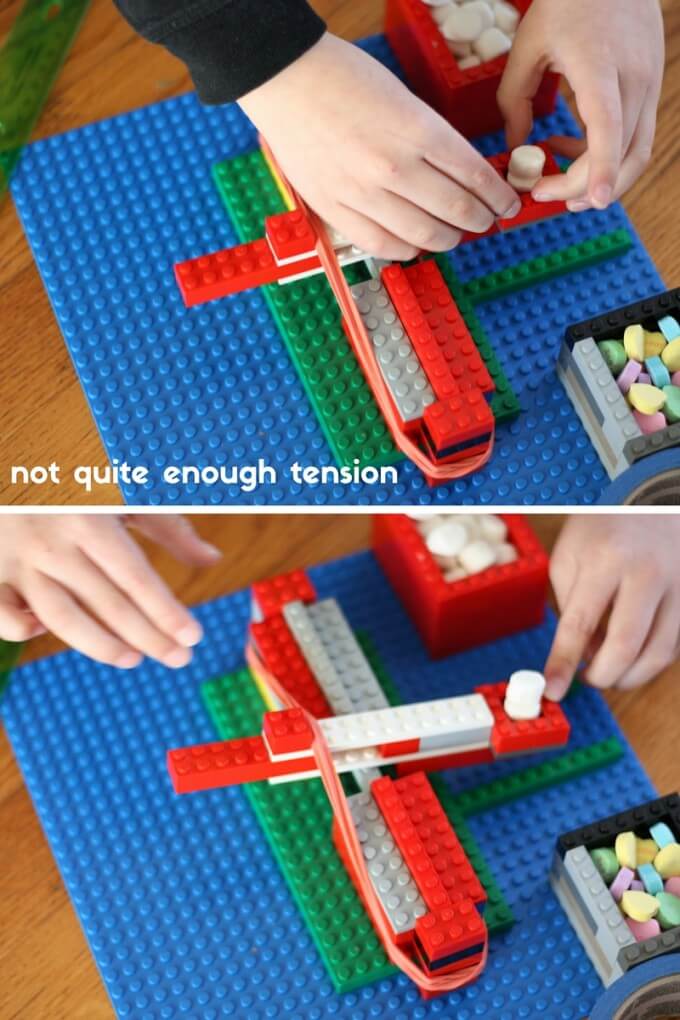
Tip: Check The Tension On Your LEGO Catapult
Although this LEGO catapult definitely launched our candy, it didn’t go as far as we would have like it too. We needed more tension! We tried adding another row next to the row we had just added, but that didn’t provide the tension we needed {not shown}. Make sure the rubber bands are under not over the 2×2 brick {not like below!}
So we went ahead and added bricks to the initial columns we had added to the side of the plate (as shown above). We decided to even it out with the plate. Oops too much tension! Look what happened! The lever arm shot right out too!
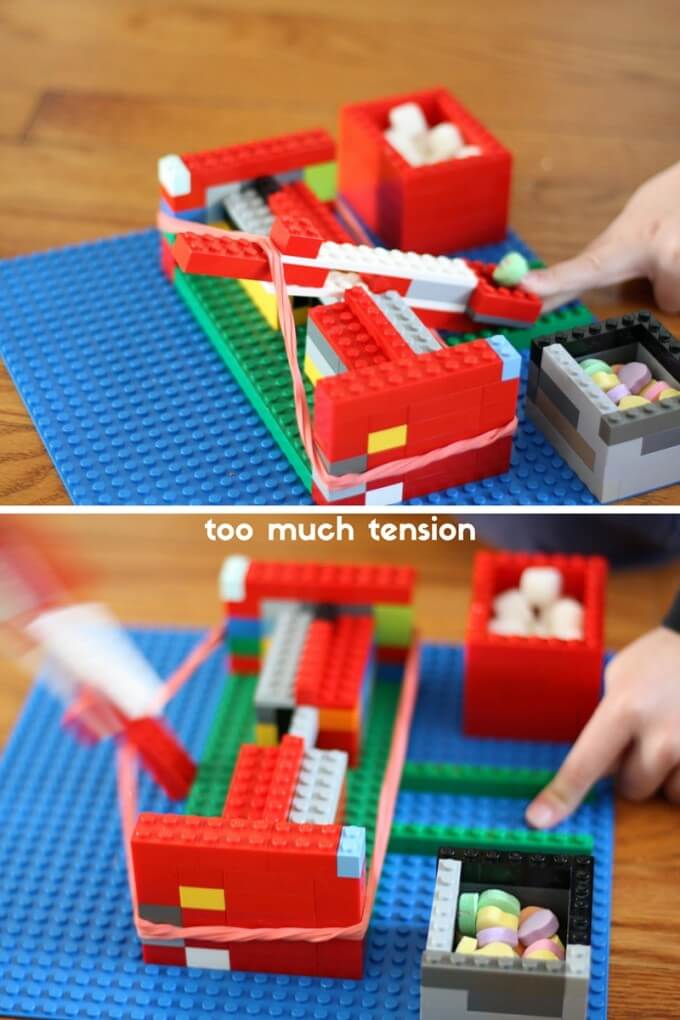
We tried a few variations of bricks before we found the perfect tension for our easy LEGO catapult {might be different for yours!} We ended up having to leave one stud free on either side of the column.

That’s it! A cool tension science experiment to go with an awesome LEGO® building activity!
More Fun LEGO Building Challenges
Make sure to also check out our free printable LEGO building challenges! There are tons of cool themes and topics to choose from!
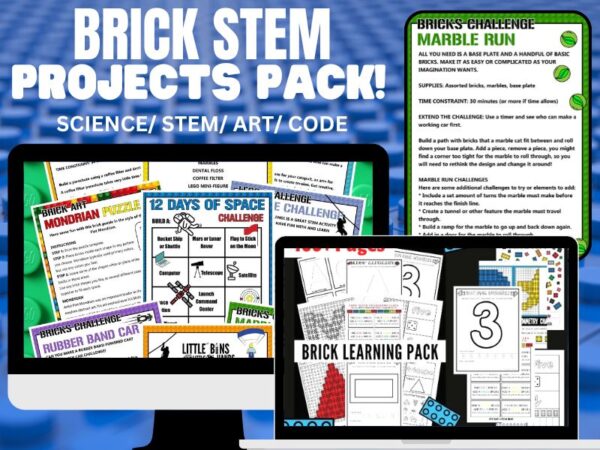
Printable Brick Building Pack
Don’t want to bother checking out every link 👆, grab the huge brick bundle instead. Make it easy on yourself.
Visit the SHOP for the huge LEGO and brick building pack!
- 10O+ Brick theme learning activities in an e-book guide using the bricks you have on hand! Activities include literacy, math, science, art, STEM, and more!
- A complete year of Brick themed seasonal and holiday challenges and task cards
- 100+ page of The Unofficial Guide to Learning with LEGO ebook and materials
- Brick Building Early learning pack filled with letters, numbers, and shapes!


MY KID LOVES LEGOS!
this was really fun to try and do
Great! I am so happy you had fun with it!
did the catapult land over the blue line????