Are your junior engineers ready to think outside the box? Unlike the traditional scientific method, which follows a linear path, the engineering design process is a flexible and creative approach to problem-solving. Dive into this exciting way of thinking and tackle hands-on engineering challenges that inspire innovation and discovery!

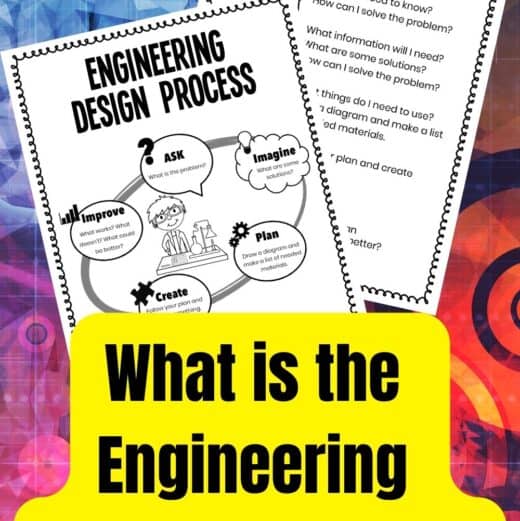
What is the Engineering Design Process?
Engineers often follow a design process. There are many different design processes that all engineers use, but each one includes the same basic steps to identify and solve problems.
An example of the process is “ask, imagine, plan, create, and improve.” This process is flexible and may be completed in any order. let’s encourage problem solving skills in both the classroom and at home with these lessons.
💡 It is considered a cycle with no real starting point or endpoint. It may even loop out and expand into parallel design processes that return to the original problem or run on a tangent.
The engineering design process has a specific task as its focus and is important as it allows the engineer to reproduce results. Also, communicate those results with other engineers once the goal is reached.

Classroom Engineering Design Process
Incorporating the engineering design process into the classroom is adaptable for various grade levels and lesson plans. By encouraging creativity and problem-solving through hands-on activities, students gain a deeper understanding of each step in the process. Our reflection sheet is a great resource for self-evaluation and guiding redesigns when needed.
Students can work individually or collaboratively to develop solutions for engaging engineering challenges. Adding constraints, like time limits or specific materials, can inspire quick thinking and innovative ideas.
While many of our engineering challenges include step-by-step instructions, there’s plenty of room for students to design and test their creations. These instructions can be a helpful starting point, especially for those needing additional guidance.
💡Look through our grade-level recommended engineering projects here.
Steps of the Engineering Design Process
The engineering design process steps don’t always need to be followed in order. However, it’s a good idea to start by identifying the problem, creating an initial design or prototype, and then testing and improving it.
You may discover new insights or encounter unexpected challenges as you go, leading you to revise your approach. This process, called iteration, is a natural and essential part of engineering—and it often happens multiple times!
💡 Download the printable worksheets at the end to use with your projects. Below, you will also find the egg drop challenge used as an example! With just a few materials and 15 minutes (or more!), it’s a great way to introduce kids to the excitement of the engineering process.
Below, we break down the steps of the engineering design process in a kid-friendly way.
1. Ask
Define what the problem is. Write down your thoughts or discuss them with others.
- What is the problem (or the challenge)?
- Why is it important to find a solution (note that not every challenge or problem will solve a real-world problem as kiddos are starting)?
2. Imagine
Brainstorm as many ideas as you can think of without judging whether it is a good idea or not. Sometimes your best idea will not be the first or second thing you think of.
Although not applicable (or practical) in every situation, you can aim to learn from the experience of other people. Talk with people about their ideas and research what similar projects have been done before.
- What are possible solutions?
- What information do I need to know?
3. Plan
Decide which possible solution you want to use from your brainstorm above. Think about what might be difficult about the design and what would make it the best idea to try first.
Write out a plan for your design project. List what materials you want to use and draw a diagram of what you want to make. Make sure to label your diagram. The planning face can sneak in a little math with taking measurements and weights and such!
- What materials do I need?
- What tasks do I need to do?
NOTE: You may only be able to dedicate 2-5 minutes to the imagine/plan phase and that’s perfectly fine! If time allows, you can always go back and retry other plans!
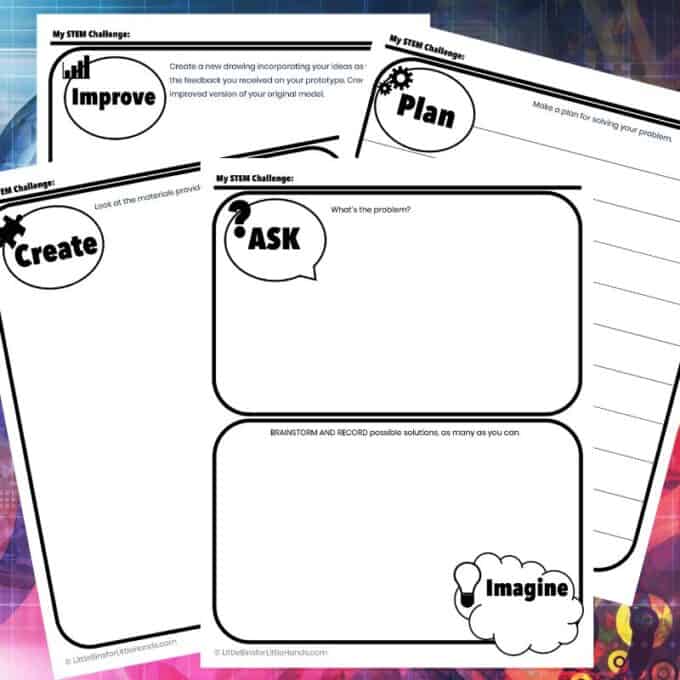
4. Create
Build a prototype and test it out. A prototype is the first version of your solution. Testing it out will help you learn what you want your final design to look like. It’s ok if the prototype isn’t perfect or you need to cycle back around and rethink the plan!
NOTE: This is an area where you can limit the time to 15-20 minutes if needed and use the questions below as a talking point for 3-5 minutes.
5. Improve
Once you have tested your design, think about what improvements you need to make. These last few steps may be repeated several times until you come up with your final design.
The following questions are great for reflecting on the experience and encouraging kids to communicate what they have done and get them thinking about what they could do better next time.
- What worked and what didn’t work well?
- What changes can I make to improve my design?
- Have I solved the problem?
- If I could do it over, what would I do differently?
- If I had more time, I would like to…
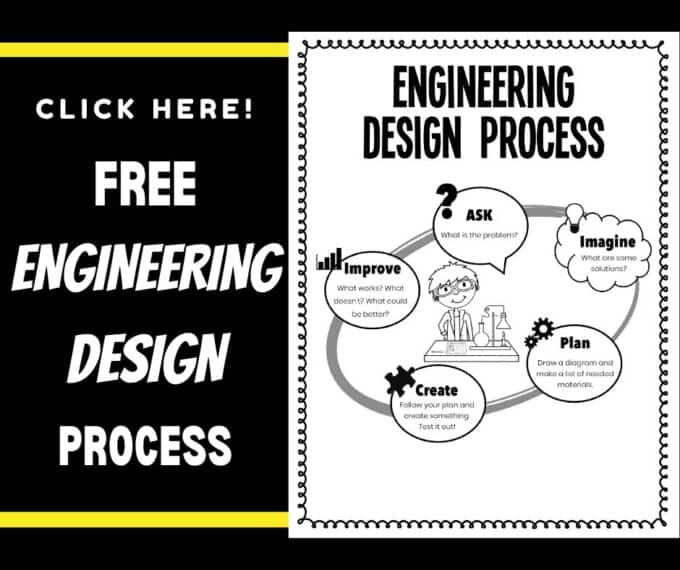
Get your FREE 8-Page Engineering Design Process Pack
Examples of the Engineering Design Process
Let’s practice the engineering design process steps with eggs and read more about the egg drop challenge [here], which includes a free printable.
💡Take a look through all of our engineering activities here.
Egg Drop Challenge
The classic egg drop challenge is a fantastic example of the engineering design process because it naturally incorporates each step in a hands-on, engaging way:
- Identify the Problem: Students must figure out how to protect an egg from breaking when dropped from a height, introducing them to the challenge and its constraints.
- Brainstorm and Plan: They brainstorm ideas and create a plan for their design, considering materials, structure, and strategies to absorb the impact.
- Create a Prototype: Students build their first design using the materials provided, turning their ideas into a tangible prototype.
- Test the Design: They drop the egg in its protective structure to see if it survives, observing how well their design performs under real-world conditions.
- Evaluate and Redesign: If the egg breaks or if there are ways to improve the design, students reflect on what worked, what didn’t, and why. They then modify their prototype to enhance its performance.
- Share Results: Finally, students can discuss their findings, compare approaches, and explain their reasoning, reinforcing critical thinking and communication skills.
This STEM challenge is iterative by nature, encouraging students to test, learn, and improve repeatedly—perfectly demonstrating the flexibility and creativity of the engineering design process!
More Engineering Activities for Kids
Each activity provides ample opportunity for brainstorming, prototyping, testing, and redesigning, making them excellent examples of the engineering design process in action.
💡Explore the different branches of engineering activities here, including structural, mechanical, electrical, and so on.
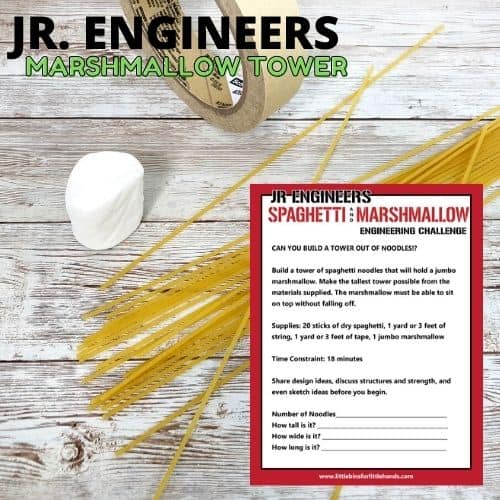
Marshmallow and Spaghetti Tower
Build the tallest tower using only spaghetti and marshmallows. This challenge encourages creative thinking and testing structural stability.
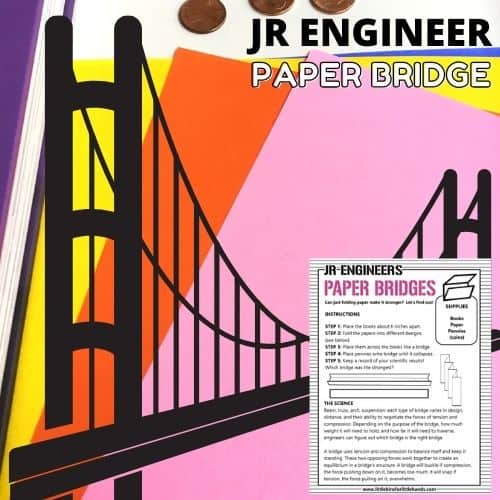
Paper Bridge Challenge
Construct a bridge using only paper and tape that can hold the most weight. Students explore strength and efficiency in design.
Popsicle Stick Catapult
Create a catapult using popsicle sticks, rubber bands, and a spoon to launch small objects. Perfect for discussing force and motion.
Balloon-Powered Car
Build a car that moves using the thrust of a balloon. This activity introduces concepts of propulsion and aerodynamics.
Parachute Design
Create a parachute to safely land a small object. Students experiment with materials and shapes to optimize air resistance.
LEGO Zip Line
Design a zip line that can safely and quickly carry a small Lego figure across a distance. It’s an engaging way to explore gravity and friction. Can also be done with various materials not just LEGO
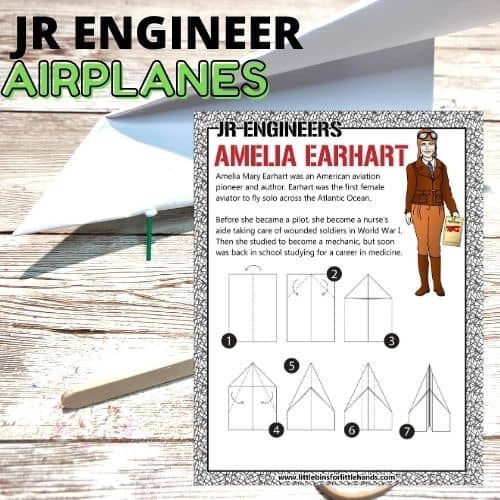
Paper Airplane Challenge
Experiment with different paper airplane designs to achieve the longest flight or most accurate landing. A simple yet effective introduction to iteration.
Foil Boat Challenge
Design a boat from aluminum foil that can hold the most pennies before sinking. Students learn about buoyancy and material limitations.
Build a Bird Feeder
Design and construct a functional bird feeder using recyclable materials. This challenge incorporates creativity, problem-solving, and environmental awareness.
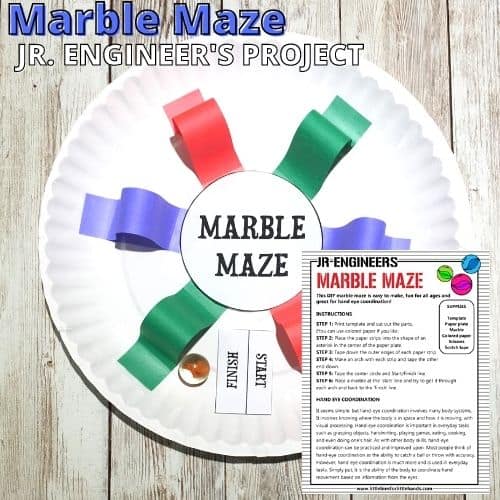
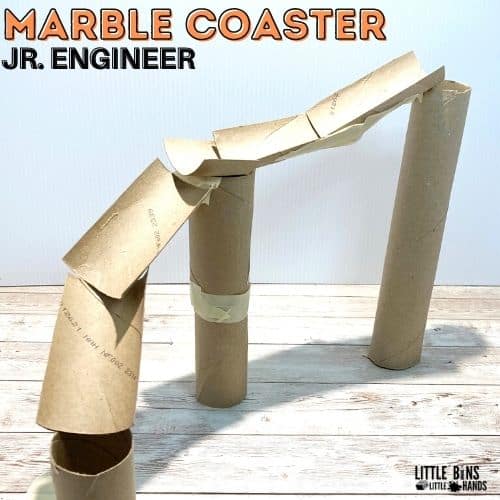
Marble Maze Design
Create a marble maze using cardboard, straws, or other materials. Students practice iteration as they test and refine their designs for smooth navigation.

Helpful STEM Resources
Here are a few resources to help introduce STEM more effectively to your kids or students. You’ll find helpful free printables throughout.
- Engineering Design Process Explained
- What Is An Engineer?
- Engineering Words
- Real World STEM
- Build A Growth Mindset With STEM
- Questions for Reflection (get them talking about it!)
- BEST STEM Books for Kids
- 14 Engineering Books for Kids
- Jr. Engineer Challenge Calendar (Free)
- Must Have STEM Supplies List
- Join us in the Club