Looking for an easy science experiment you can build with toys you already own? This LEGO volcano uses basic bricks and a simple baking soda reaction to create a real erupting model in minutes.
Kids design, test, and rebuild their volcano while learning about chemical reactions and how real volcanoes erupt — making this both an engineering and chemistry activity for home or classroom use.
No special LEGO set required.
👉 Looking for more hands-on building ideas? Browse all our design challenges in the LEGO STEM Projects Hub.

What Kids Learn
To make a LEGO volcano:
- Watch carbon dioxide gas push the liquid out like lava
- Build bricks around a small bottle
- Add baking soda inside
- Pour vinegar to trigger an eruption
Field: Chemistry + Engineering
Best Ages: K-4
Concepts: chemical reactions, gas pressure, structure design, problem solving
This LEGO volcano is a hands-on model of the classic baking-soda-and-vinegar experiment.
Instead of building with clay or papier-mache, kids use bricks to design the structure while exploring the same chemical reaction and pressure buildup.
👉 You can learn more about the real volcano science here.
How To Build A LEGO Volcano
Supplies
- LEGO bricks
- Baseplate
- Small bottle or jar
- Baking soda
- Vinegar
- Dish soap (optional but recommended)
- Food coloring (optional)
- Tray or bin
Instructions
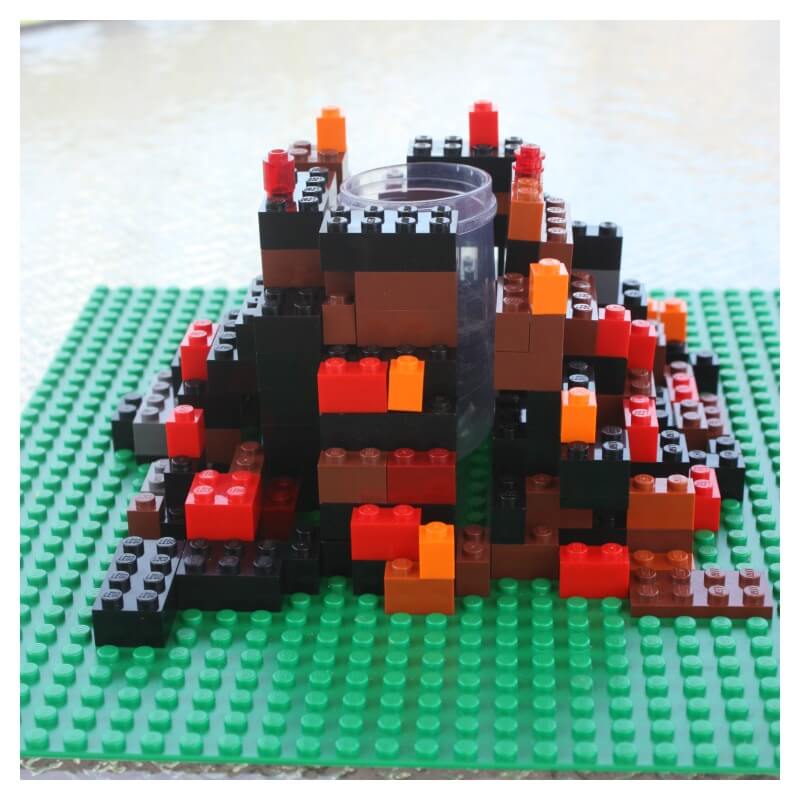
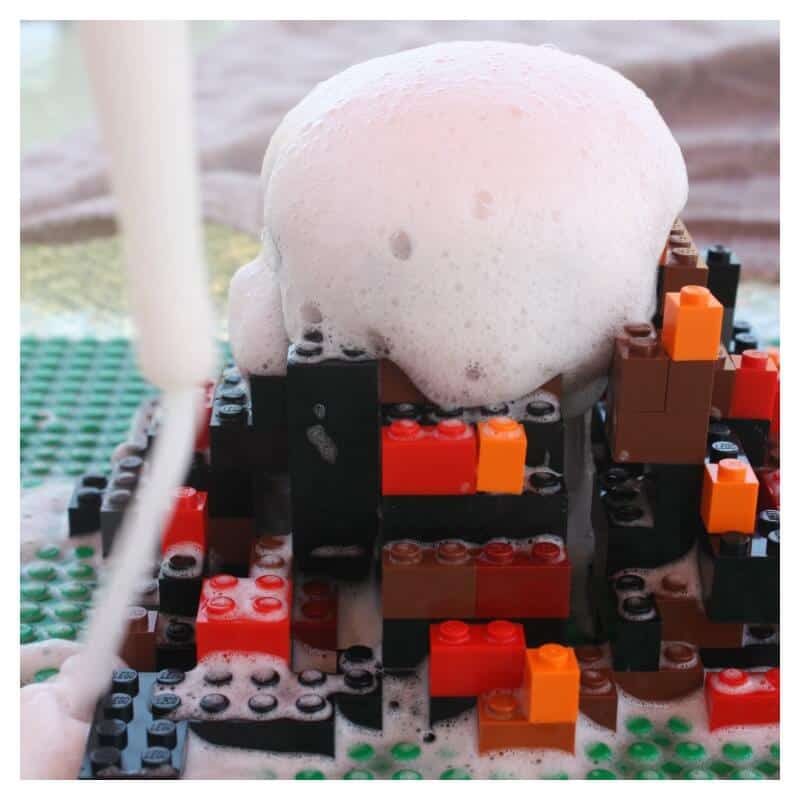
Step 1 — Build the volcano
Build bricks around the bottle. Start wide at the bottom and taper upward.
Leave small gaps so the lava can flow out.
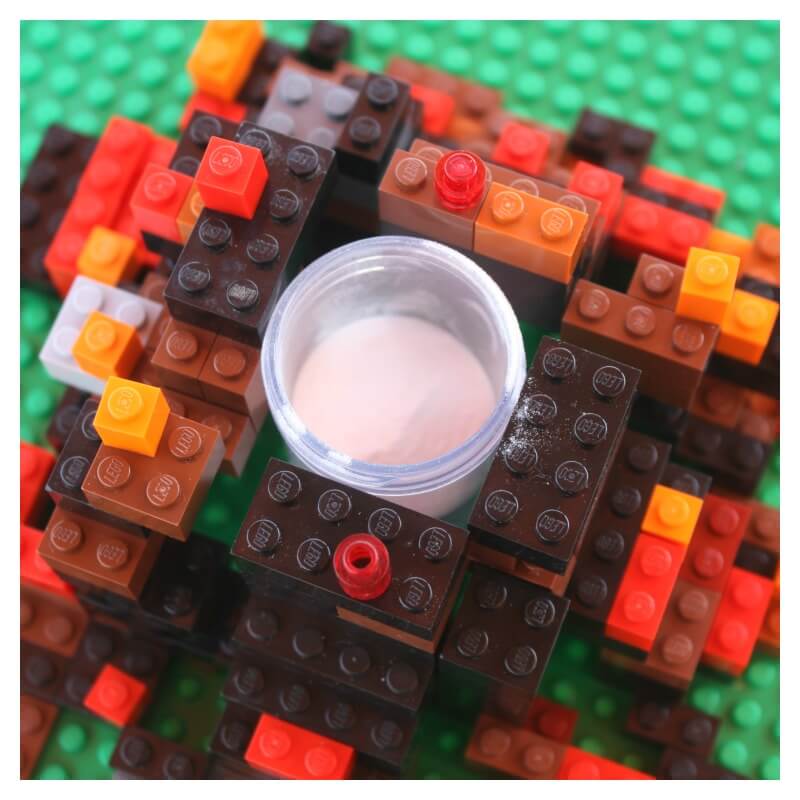
Step 2 — Add baking soda
Fill the container about 2/3 full.
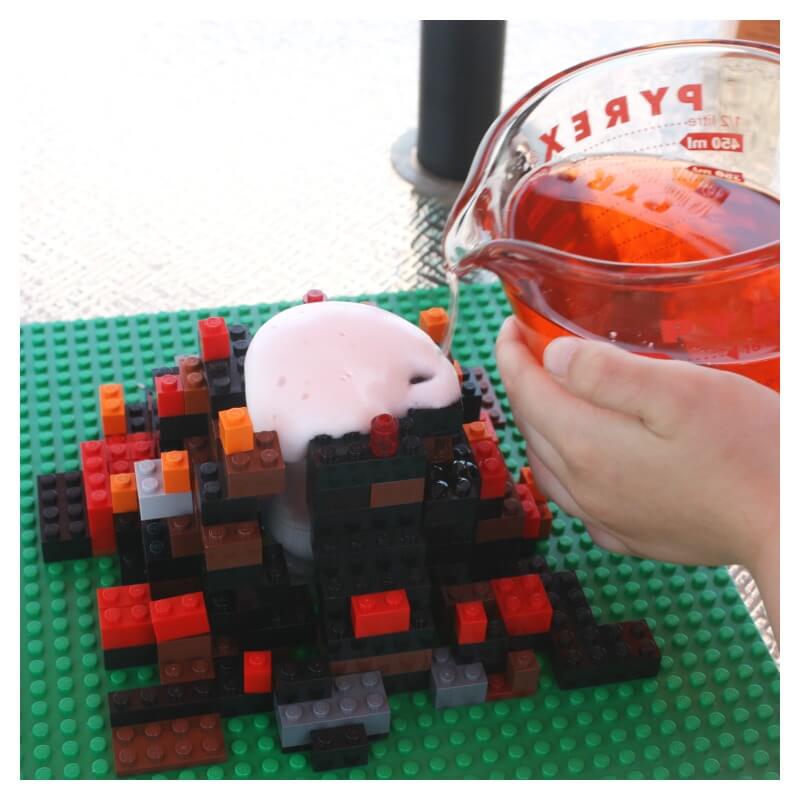
Step 3 — Prepare eruption liquid
Mix vinegar with:
- a few drops food coloring
- 1 squirt dish soap (creates foamy lava)
Step 4 — Erupt
Pour vinegar into the baking soda and watch the eruption.
💡 Tip: Use a turkey baster to repeat eruptions.
Why The LEGO Volcano Erupts (Science)
After you build the LEGO volcano, the eruption comes from a chemical reaction between baking soda and vinegar.
- Baking soda is a base
- Vinegar is an acid
When they mix, they form a new substance called carbon dioxide.
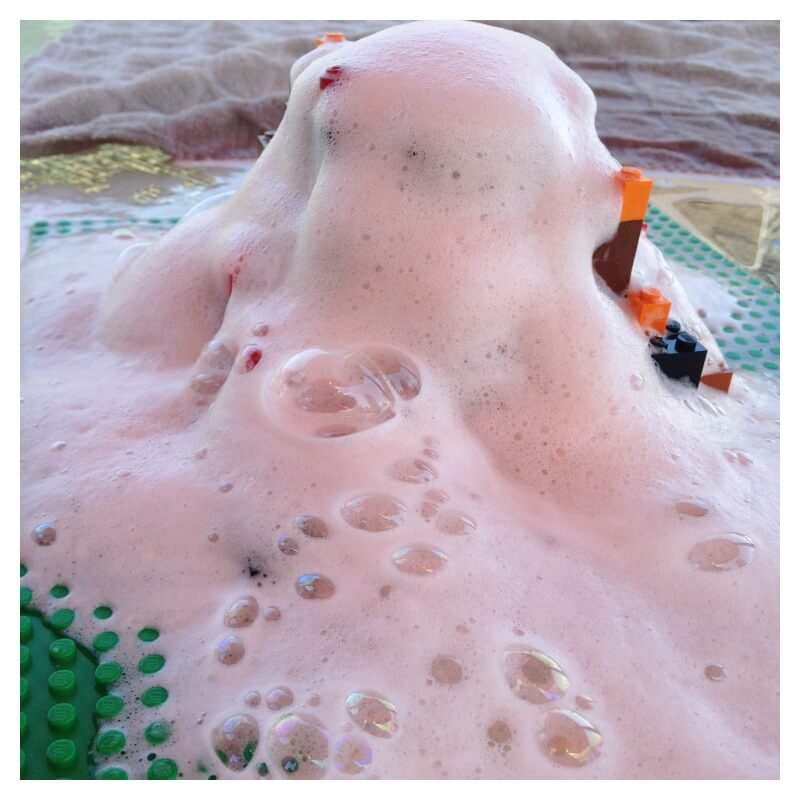
You can see this gas as bubbles forming immediately. The gas takes up more space than the liquid, so it pushes the mixture upward and out of the container. That rising liquid looks like lava erupting from the volcano.
This is similar to real volcanoes. Underground, gases build pressure inside molten rock. When enough pressure forms, it forces the material upward and out through the opening.
Adding dish soap makes the eruption foamier because the soap traps the gas bubbles together. Instead of popping quickly, the bubbles stack and flow slowly, creating thick “lava”.
Real Volcano Comparison
Your LEGO structure controls how the eruption behaves, much like real volcano shapes affect eruptions.
The shape of the volcano affects what the eruption looks like:
- Narrow opening → explosive eruption
- Wide opening → flowing lava
Your LEGO volcano works the same way. Changing the crater size affects how the gas escapes, which in turn changes the eruption style.
This means kids are not just watching a reaction — they are testing how structure affects behavior. That makes this both a science experiment and an engineering design challenge.
👉 Download the paper volcano printable to reinforce learning concepts.
Make It A Real Experiment
Turn the activity into an investigation by changing only one thing at a time and comparing results.
Try testing:
- crater size
- amount of baking soda
- bottle width
- dish soap vs. no soap
Before erupting, ask kids to predict what will happen.
Afterward ask:
What made the biggest eruption?
What made the lava flow farther?
What stayed the same each time?
Recording observations helps kids see patterns and understand cause and effect.
FAQ
Do you need real LEGO bricks?
No. Any building bricks that stack securely will work.
Can you reuse the volcano?
Yes. Dump the liquid, rinse the container, and add more baking soda for another eruption.
Is this safe for classrooms?
Yes. Baking soda and vinegar are non-toxic household materials. A tray underneath helps contain the mess.
Why add dish soap?
Dish soap traps gas bubbles, making the eruption thick and foamy rather than quick and watery.
How long does it take?
About 10–15 minutes to build and erupt, plus extra time if kids redesign and test again.
Extend The Activity
Want to explore eruptions and gas reactions further?
Try one more hands-on experiment:
- Salt Dough Volcano — build a long-lasting erupting model
- Balloon Gas Experiment — trap the gas in a balloon and watch it inflate
Or explore more reactions here → Baking Soda Experiments Hub
More LEGO STEM Challenges
Keep testing your designs using the same bricks:
- LEGO Catapult — change launch distance
- LEGO Balloon Car — test propulsion speed
Find more building challenges here → LEGO STEM Projects Hub

Get even more fun LEGO projects!
Don’t want to bother checking out every link? Grab the huge brick bundle instead. Make it easy on yourself.


We had the best time this morning building the volcano and then making the chemical reaction. Very satisfying to attempt a cone formation of legos and to intentionally leave gaps- a little more thinking and time involved- that was my favorite part! My 3.5yo of course loved playing with the overflowing foam. Thanks for your content. I’m a newsletter subscriber since your earlier slime days. I love seeing your evolution and comforted by your emails reaching out to help parents during the covid19 quarantine. ❤️
That made my day Emma! I am so happy it was a great experience for both of you. Who doesn’t love a LEGO volcano!
We made a Lego volcano today and was such a hit !!
Thank you so much for detailed steps
Made for a perfect t afternoon of fun
So glad to hear! Thank you!