
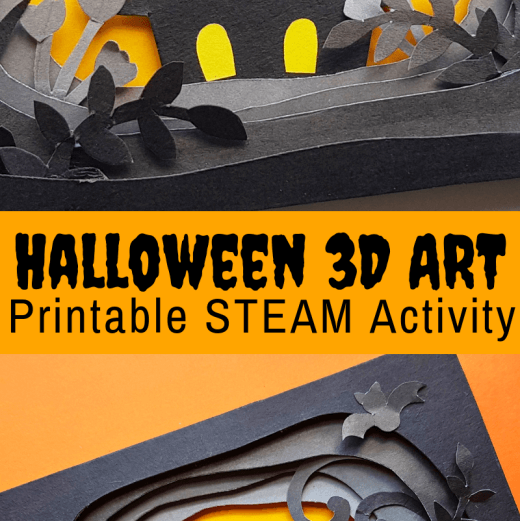
Make a spooky Halloween scene with this fun 3D Halloween papercraft! Kids can turn simple sheets of colored paper into a layered haunted house scene with bats, a moon, and spooky silhouettes.
This printable Halloween paper craft is a creative way to explore 3D art, depth, and paper engineering. It’s a great STEAM activity for upper elementary and middle school students. Use it for a classroom art project, Halloween party activity, or creative make-at-home papercraft.

Grades: 3–8 (younger students with prepared pieces)
Concepts: 3D art, depth, layering, perspective, paper engineering
What Is a 3D Halloween Papercraft?
Unlike a flat drawing or paper cutout, this Halloween papercraft uses several paper layers separated by foam frames to create a 3D scene.
Each layer adds something different, from the large opening front frame to the haunted house and moon in the background.
Kids can explore a few simple art and STEAM concepts as they build:
- Depth: Separating the paper layers makes some objects appear closer while others look farther away.
- Perspective: Changing objects’ size and position creates the illusion of distance.
- Layering: Combining individual paper cutouts creates one complete scene.
- Paper engineering: Measuring, cutting, and assembling the frames gives the finished artwork structure.
💡 Try this: Before gluing, stack the paper layers loosely. What happens when you change their order or increase the distance between them?
Get Your Free Halloween Papercraft Templates
Use our free printable Halloween papercraft templates to create your spooky scene. The designs include the shapes and details you need to build the layered artwork.
👉 Grab the Free 3D Halloween Papercraft Templates
Follow our example or combine the printable shapes with your own Halloween designs.
How to Make a 3D Halloween Papercraft
This project uses four layers of colored craft paper with foam board spacers between them. The result is a dimensional Halloween scene you can display on a shelf or attach to a bulletin board. You can even use mini easels!
Supplies
- Colored craft paper (black, gray, purple, or other Halloween colors)
- Free Halloween papercraft templates
- Pencil
- Scissors
- Craft glue
- Craft foam board
- Ruler
- Craft knife (adult use only)

Step 1: Prepare the Paper Layers
Choose four coordinating craft paper colors. Different shades of gray, black, and purple work especially well for a spooky nighttime scene. Cut four rectangles measuring 5.5 inches by 3.5 inches.
💡 Using different shades helps make the layers easier to see once the project is assembled.

Step 2: Trace the Templates
Use the printable templates to trace the frame designs onto the colored paper.
Start with the front layer and work toward the back, keeping the openings progressively smaller.
💡 You can also create your own frame shapes if you’d like to experiment with different designs.

Step 3: Cut Out the Paper Frames
Carefully cut out each traced shape.
💡 Make the front opening the largest, with the remaining openings getting smaller toward the back.
Adult Tip: A craft knife helps with the interior openings, but an adult should complete this part. Prepare these pieces ahead of time when working with younger students.

Step 4: Make the Foam Spacers
Use the foam board to create frames that will separate the paper layers. Measure, trace, and cut the foam frames to fit behind your paper pieces.
💡 These spacers give your Halloween papercraft a three-dimensional appearance.

Step 5: Attach the First Paper Layer
Begin with the back paper frame. Apply a thin line of craft glue to the foam frame and carefully attach the paper, lining up the edges. Allow the glue to set before adding the next layer.


Step 6: Build the Remaining Layers
Continue adding paper layers with foam spacers between them. Work from back to front, keeping the frames aligned as you go.
💡 When you finish, look through the opening. You should be able to see how the different layers create depth.


Step 7: Add Your Halloween Decorations
Now it’s time to make your scene spooky! Trace and cut out Halloween shapes using the printable templates or your own drawings.
Try adding:
- A haunted house or castle
- Flying bats
- A full moon
- Bare trees
- Grass and plants
- Spooky silhouettes

Step 8: Arrange the Halloween Scene
Before gluing everything in place, experiment with where each piece belongs. Attach your cutouts to the backs of different paper layers using small amounts of glue.
💡 Place some decorations in the foreground and others farther back to create a sense of distance.
🔎 STEAM Challenge: How can you make a bat appear closer to the viewer than the haunted house?

Step 9: Add the Background
Choose a final background color that contrasts with your Halloween shapes. Purple, orange, yellow, or blue can create a dramatic nighttime sky.
Attach the background paper to a sturdy backing piece and secure it behind the layered scene. Allow the glue to dry completely.


Your 3D Halloween paper craft is ready to display! Try making several scenes with different colors, silhouettes, and arrangements.
👉 Also try our 3D Thanksgiving paper craft for a similar project feel.

Easy Halloween Papercraft Challenges
Want to extend the activity? Try one of these simple ideas.
- Change the colors. Make one scene using dark Halloween colors and another with bright contrasting colors. How does the mood change?
- Experiment with depth. Try increasing or decreasing the spacing between layers. Which arrangement makes the scene look deeper?
- Design your own silhouette. Create a new haunted house, ghost, or spooky tree to add to your artwork.
- Explore light and shadow. Shine a flashlight across your finished project. What shadows appear between the layers?
💡 These small challenges help kids think like artists and designers while working with familiar craft materials.
More Haunted House Art and Printable Activities
Want to keep the haunted-house theme going? Try these three creative Halloween projects that explore art, shapes, and visual problem-solving in different ways.
Printable 3D Haunted House or Castle
Build another spooky paper structure using our 3D haunted house and castle templates. Kids can cut, fold, and assemble the printable pieces to create a freestanding Halloween building.
This is a fun next project for kids who enjoy building with paper.
👉 3D Haunted House/Castle Templates
Kandinsky Haunted House Art
Try a colorful haunted house art project inspired by artist Wassily Kandinsky! This Halloween art activity combines bold colors, geometric shapes, and creative design for an eye-catching haunted house.
👉 Kandinsky Haunted House Watercolor Art
Haunted House Mystery Picture Printable
For a quieter Halloween activity or early finisher project, try our haunted house mystery picture printable.
Kids complete the picture to reveal a spooky Halloween design. It’s an easy choice for independent work, early finishers, or a seasonal art station.
👉 Haunted House Mystery Picture


Halloween Papercraft FAQs
What age is this Halloween papercraft best for? This project is especially suitable for upper elementary and middle school students. Younger children can enjoy arranging and gluing the layers when an adult prepares the cutouts.
Can I make the papercraft without foam board? You can experiment with stacked cardstock or folded paper spacers. The goal is to create enough separation between the layers to show depth.
Is this a 2D or 3D art project?
The individual paper cutouts are two-dimensional, but the assembled artwork becomes three-dimensional because the layers are separated and occupy space.
Can kids design their own Halloween scenes? Absolutely! The printable templates provide a starting point, but kids can add their own ghosts, castles, pumpkins, trees, and other Halloween decorations.
More Halloween Art Projects for Kids
Keep creating with these fun Halloween art activities:
- Picasso Pumpkin Art – Make expressive, spooky pumpkin faces.
- Halloween Starry Night Art – Create a Halloween scene inspired by Vincent van Gogh.
- Halloween Bat Art – Explore a playful painting technique with bats.
- Halloween Art Activities – Find even more seasonal art projects.
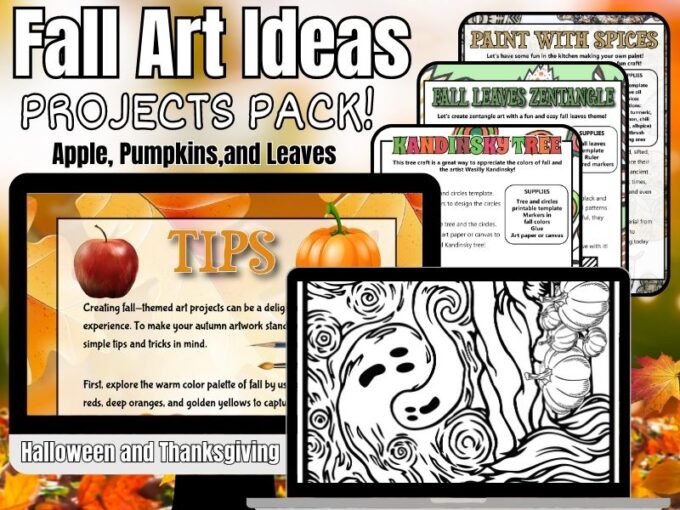
Get the Printable Fall Art Project Pack
Looking for more ready-to-use art projects for fall? Our Fall Art Project Pack includes over 40 creative projects with printable templates and instructions.
Explore Halloween, pumpkins, apples, leaves, Thanksgiving, famous artists, and more using everyday art supplies. Perfect for classrooms, homeschool groups, and creative afternoons at home.
👉 Explore the Fall Art Project Pack
More to Explore
Halloween Science Experiments | Halloween STEM Activities | Preschool Halloween Activities | Halloween Slime | Thanksgiving 3D Papercraft