It will be 400 years this Thanksgiving since the Mayflower ship landed in America carrying the first group of pilgrims. Celebrate this Thanksgiving for kids with a LEGO Mayflower building idea you can make with basic bricks. Finding fun and creative ways to play with our LEGO pieces is a must. Make sure to check out more easy LEGO building ideas! Read on for instructions on how to make your own LEGO Mayflower ship.
MAYFLOWER
Mayflower was an English ship that transported the first English Puritans or Pilgrims from England to America in 1620. The ship was at sea for 10 weeks, and it carried 102 passengers and a crew of about 30. The Mayflower reached the New World, dropping anchor near the tip of Cape Cod on November 21, 1620.
Build your own Mayflower ship below this Thanksgiving!
Also check out our easy LEGO turkey instructions, Thanksgiving LEGO challenges and Thanksgiving LEGO Habitat Challenge
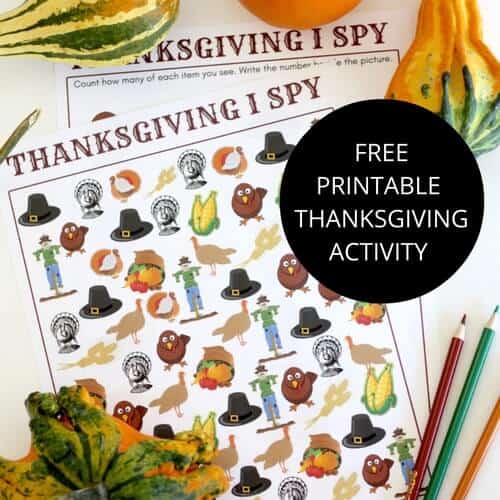
Click here to get your quick and easy fall brick building ideas!
BUILD A LEGO MAYFLOWER SHIP
Tip: Use our boat design as an example if you don’t have the same bricks! This is a highly detailed build, but you can make a much simpler boat and explore if it floats!
TIP: Build your collection! I love both of these LEGO classic brick sets that are currently on sale at Walmart. See here and here. I have bought two of each already!
Bricks For the ship’s body:
- 2 brown 1×4 bricks with knobs
- 4 brown 1×2 bricks
- 1 tan 1×2 palisade brick
- 2 brown 3×3 ¼ circle bricks
- 3 beige 2×4 plates
- 1 tan 2×4 flat plate
- 2 beige 2×3 inv roof tile
- 10 brown 2×2 inv roof tile
- 2 brown 2×10 bricks
Bricks For the 2 main masts:
- 12 tan 1×2 bricks
- 8 white 1X2X3 73° roof tiles
- 6 white 2×4 plates
- 4 tan 2×2 round bricks
- 4 white 1x2x3 bricks OR 12 white 1×2 bricks
- 2 white 2×6 bricks
- 2 brown 1×1 nose cones
- 2 red 1×3 bricks with bow
- 1 brown 2×2 brick
- 1 brown 2×2 plate
- 1 tan 2×2 round plates
Bricks For the bow mast:
- 2 brown 1×1 round plates
- 1 white 1×1 plate
- 1 white 1×1 brick with knob
- 2 white 1×1 round bricks
- 1 white 1X2 45° roof tile
- 1 white 1X2X3 73° roof tile
- For the stern mast:
- 2 white 1×1 brick with knobs
- 1 brown stick
- 1 brown 1×2 nose cone
- 1 brown 1×1 round plate
- 1 white 1×3 brick
- 2 white 1 X 2 X 2/3, ABS roof tiles
For the stern/cabin:
Level 1
- 2 brown 3×3 ¼ circle bricks
- 1 beige 1×2 brick
- 4 beige 1×1 bricks with knob
- 4 gold 1×1 nose cones
Level 2
- 1 brown 3×6 corner plate
- 1 beige 1×2 brick
- 2 beige 1×1 bricks with knob
- 2 gold 1×1 nose cones
- 1 beige 1×4 with arch
Level 3
- 4 brown 1×2 bricks with bow
- 1 brown 1×2 brick
- 2 tan 1×1 round plates
- 1 tan 3×6 corner plate
- For the bow:
- 1 tan 2×6 plate
- 5 brown 2×2 plates
- 2 brown 1×2 bricks with bow
- 1 brown 1×1 round brick
LEGO MAYFLOWER INSTRUCTIONS
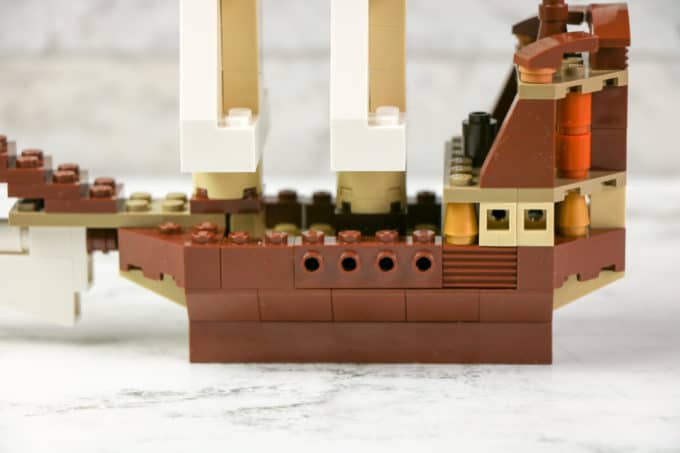
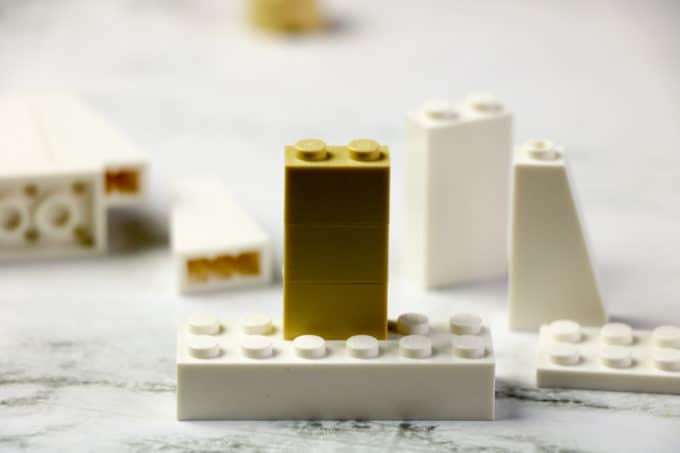
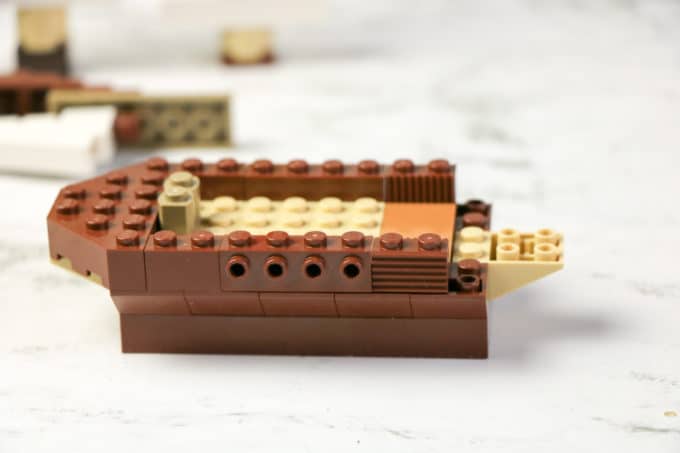
STEP 1. To make the body of the ship:
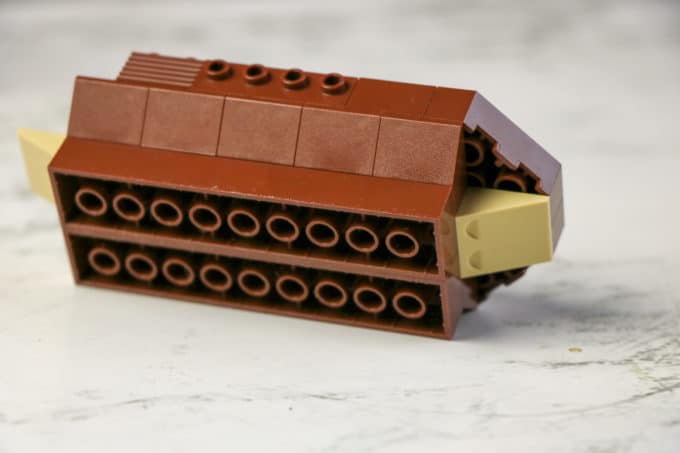
There are three levels to the ship’s body.
Level 1: Align the two 2×10 bricks.
Level 2:
- Snap the two 2×3 inv roof tiles along the seam on each side of the 2×10 bricks on level one to hold them together.
- Along the edges of the 2×10 bricks, place five brown 2×2 inv roof tiles on each side.
Level 3:
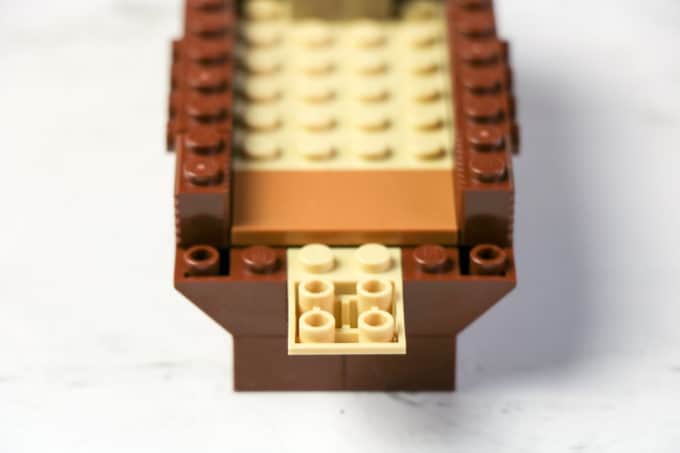
- Over the opening of level 2, snap the 2×4 plates with the flat plate at the stern of the ship’s body.
- At the bow of the ship, snap the two 3×3 1×4 circle blocks.
- Directly behind these blocks, place the 1×2 palisade block in the middle.
- Then, line each side of the ship’s body (from bow to stern) with a 1×2 brick, a 1×4 brick with knobs, and another 1×2 brick.
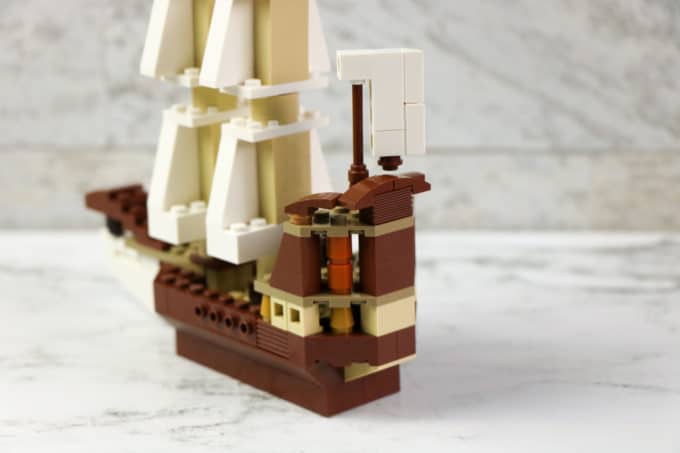
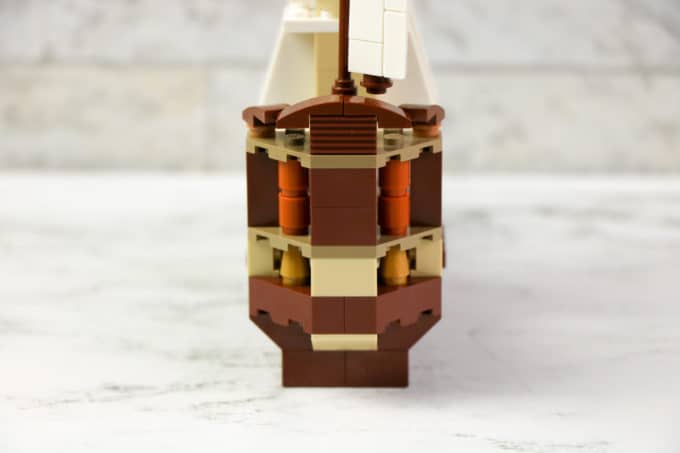
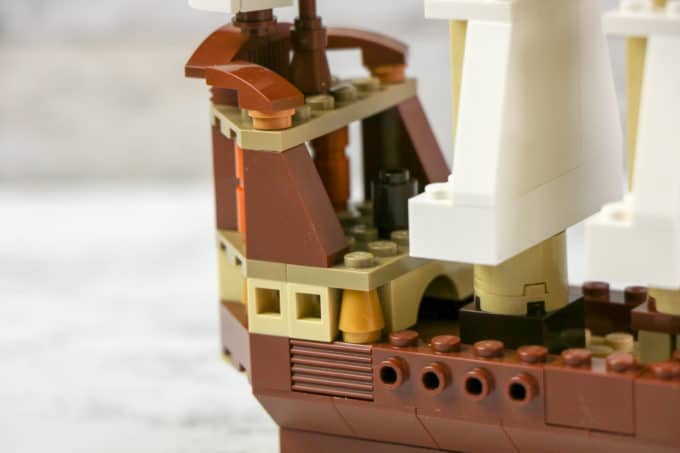
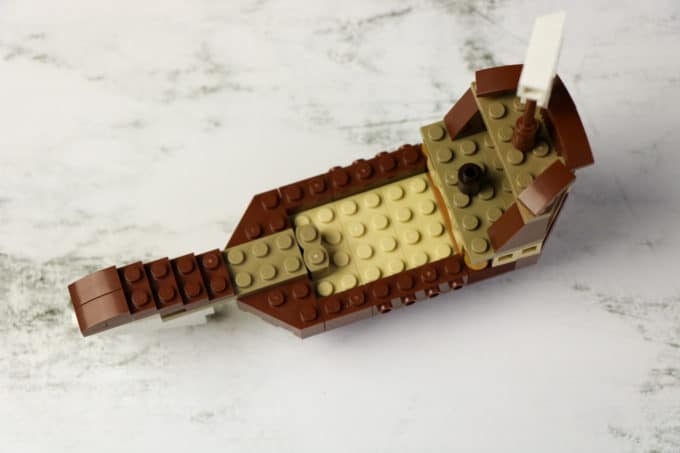
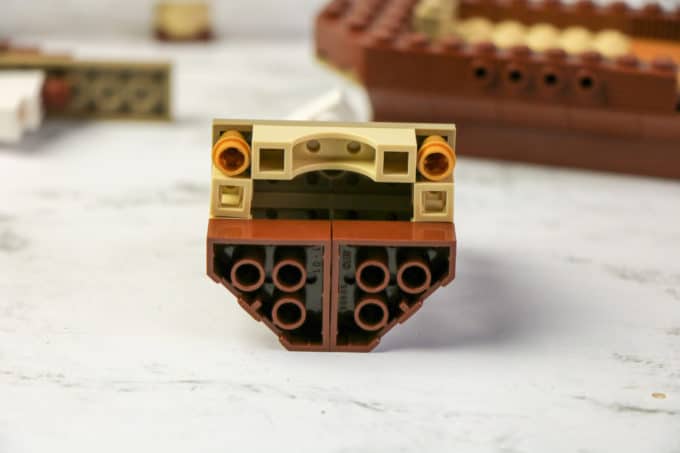
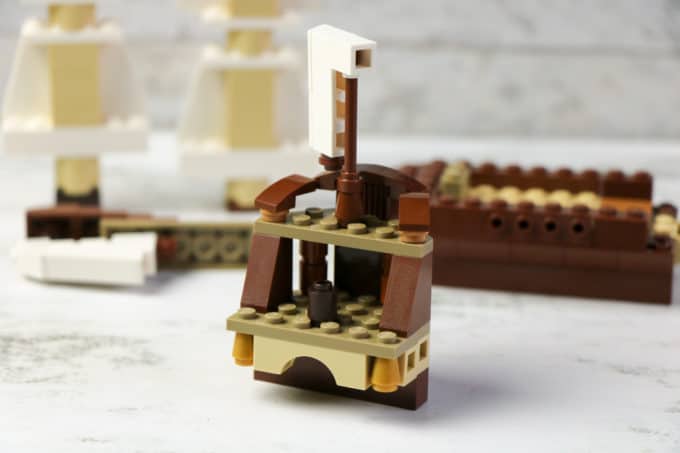
STEP 2. To make the stern/cabin:
There are three levels to the stern/cabin.
Level 1:
- Align the two brown 3×3 ¼ circle bricks and snap onto the stern of the ship’s stern over the beige 2×3 inv roof tile.
- Attach the 1×2 brick to the studs in the back across the seam of the ¼ circle bricks.
- On the edges of the next row, place a nose cone on each side.
- Attach two 1×1 bricks with knobs to the front corners and another two (one on each side) on the side of the ship’s body, creating the illusion of two windows on each side of the cabin.
- Then, place the two remaining nose cones on the edge of the ship’s body.
Level 2:
- On the 3×6 corner plate, snap together two brown 1×2 bricks and place on the back.
- On the next row forward, make two stacks of red 1×1 round bricks, placing one set on each side of the stacked 1×2 bricks.
- Align the 2×6 plate with the front of the 3×6 corner plate and attach the brown 1X2X3 73° roof tiles with one on each side.
- In the middle of the 2×6 plate, attach a brown 1×1 round brick.
- To the underside of the corner plate, add the 1×4 with arch at the front.
Level 3:
- On a 3×6 corner plate, attach the 1×2 to the 2 studs in the back.
- Snap one 1×1 round plate to each side of the front.
- Attach a 1×2 brick with bow to each 1×1 round plate and two to the 1×2 in the back.
- Snap the three levels together.
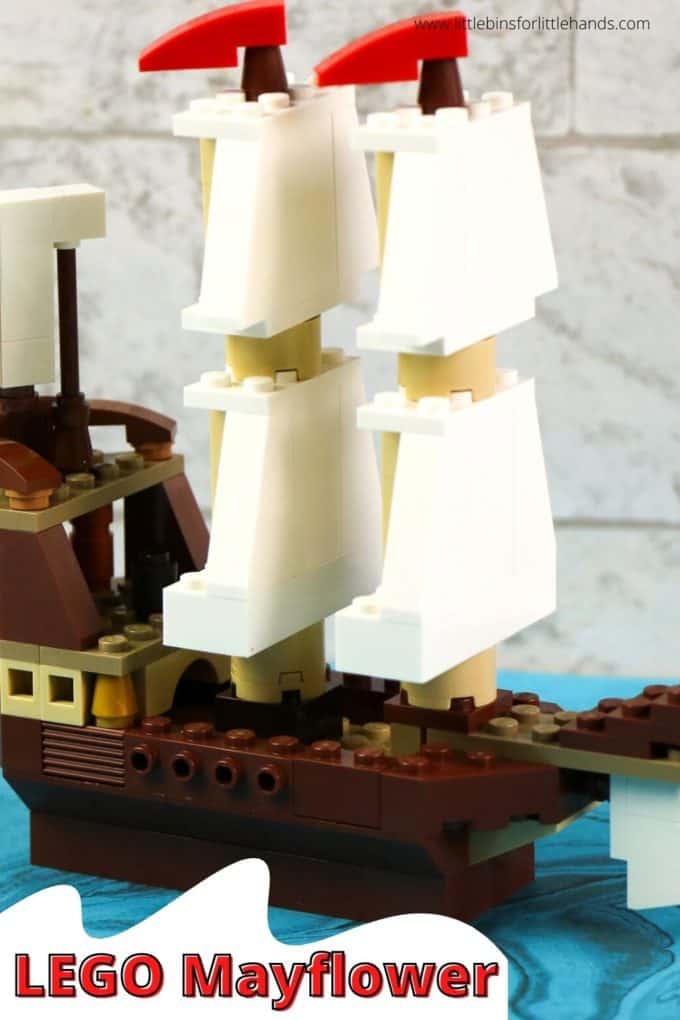
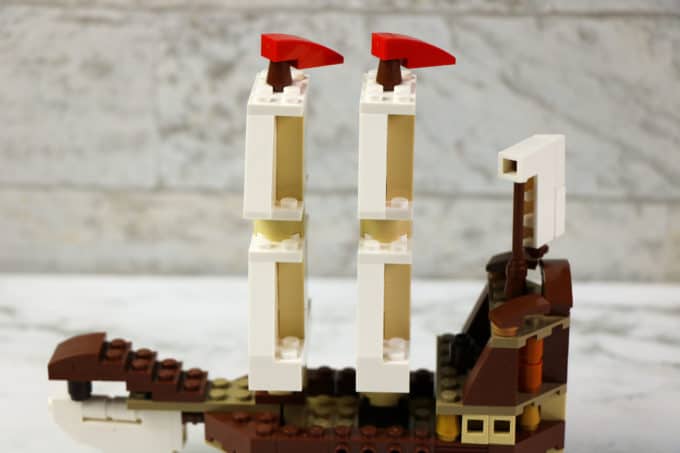
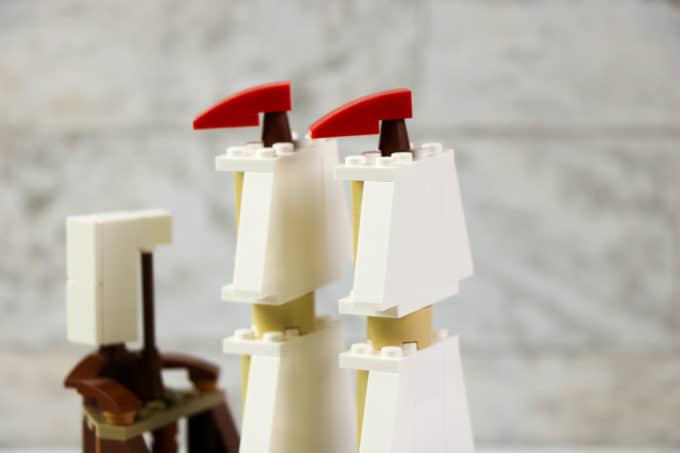
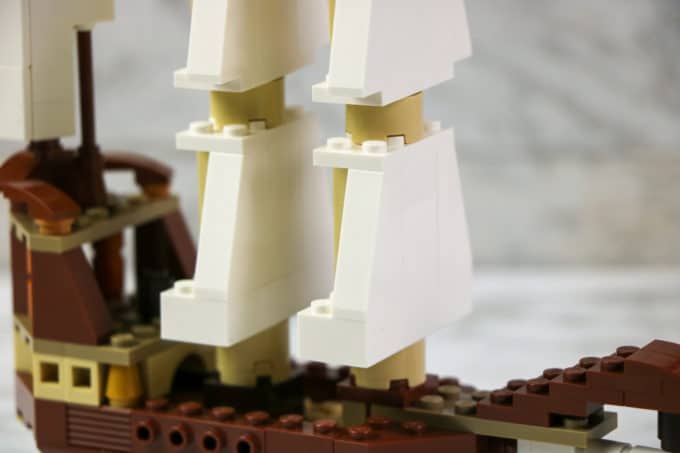
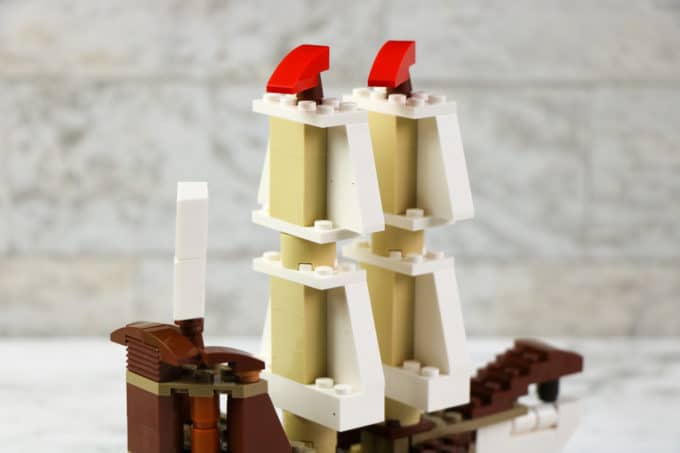
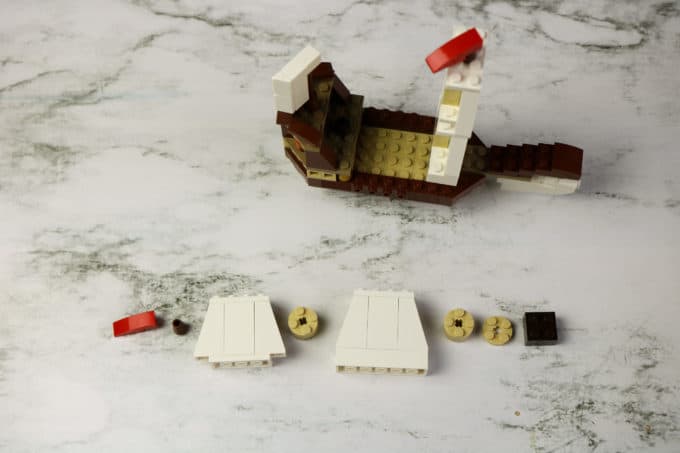
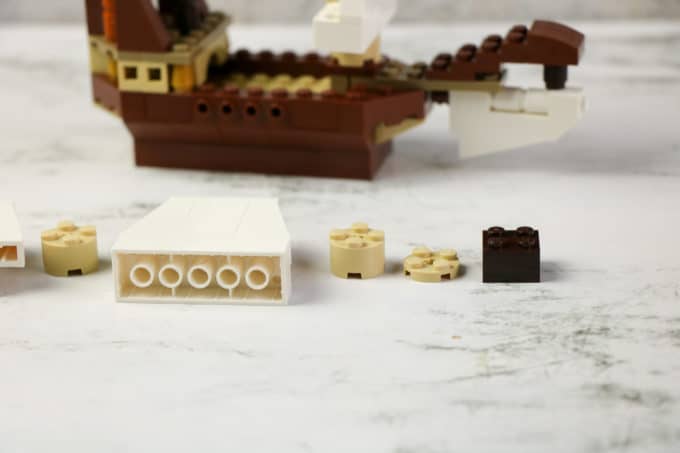
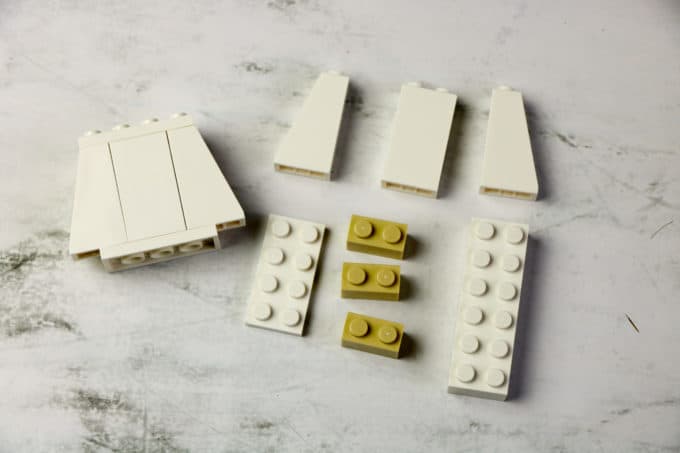
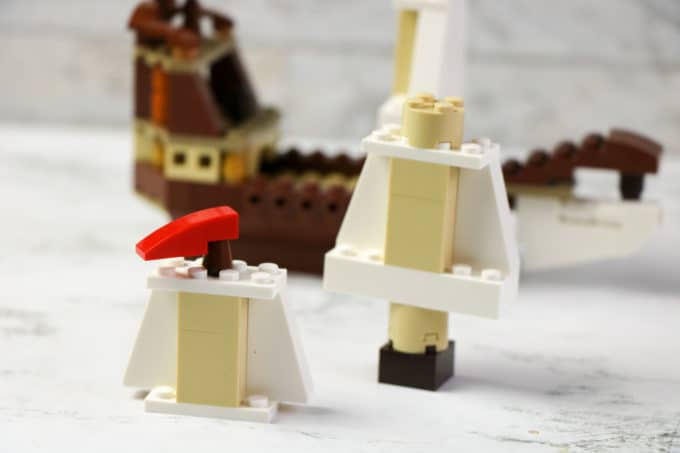
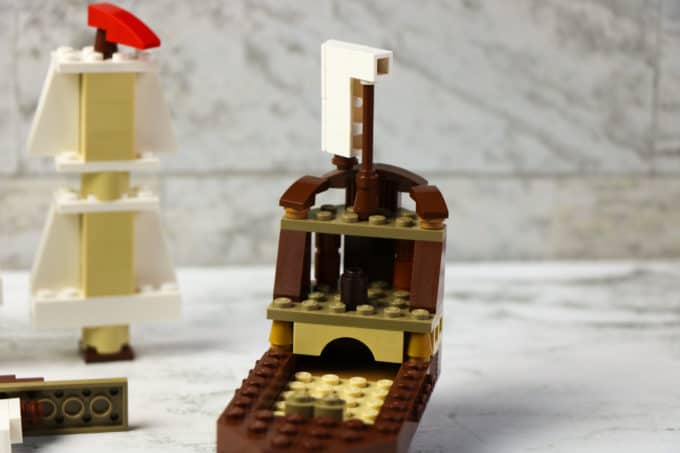
STEP 3. To make the sails:
Stack 3 tan 1×2 bricks. Repeat with the remaining 1×2 bricks, creating 4 total stacks.
To create the topsails:
- On a 1×4 plate, attach a white 1x2x3 brick on the middle two knobs.
- Directly behind this block, place a tan stack.
- To each side of the white 1x2x3 brick, place a white 1X2X3 73° roof tile.
- On top, place another 2×4 plate.
- Repeat to build an identical sail.
To build the bottom sails:
- On a 2×6 brick, attach a white 1x2x3 brick on the middle two knobs.
- Directly behind this block, place a tan stack.
- To each side of the white 1x2x3 brick, place a white 1X2X3 73° roof tile.
- On top, place a 2×4 plate.
- Repeat to build an identical sail.
To put the sails together:
- Attach the top to the bottom sail using a 2×2 round brick.
- Repeat for each set to create two masts.
- On the bottom of each mast, attach a 2×2 round brick.
- On one mast, attach the 2×2 round plate to the bottom of the 2×2 round brick and a 2×2 brick. This is the back mast. Snap into the ship’s body in front of the stern/cabin.
- On the forward mast, attach a 2×2 plate to the bottom of the 2×2 round brick. Snap into the ship’s body over the palisade block.
- To the top of each mast, attach a 1×1 nose cone and a red 1×3 brick with the bow.
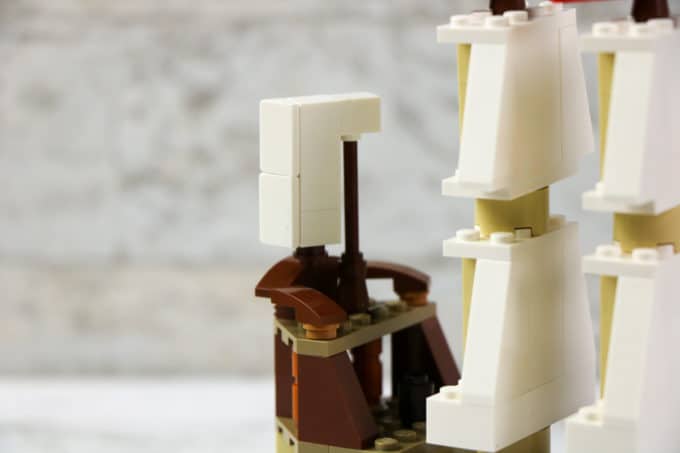
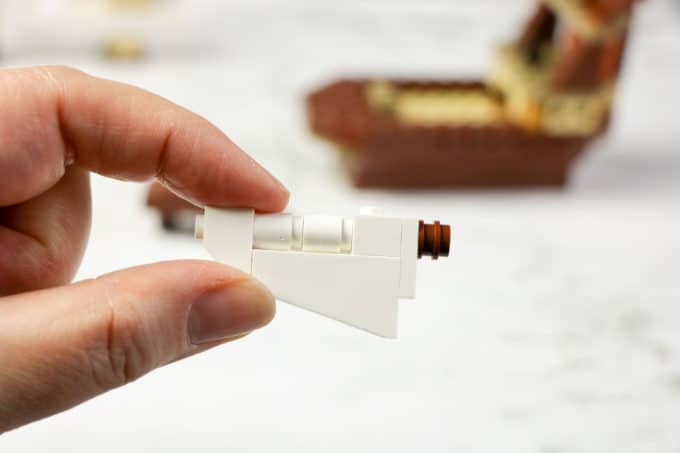
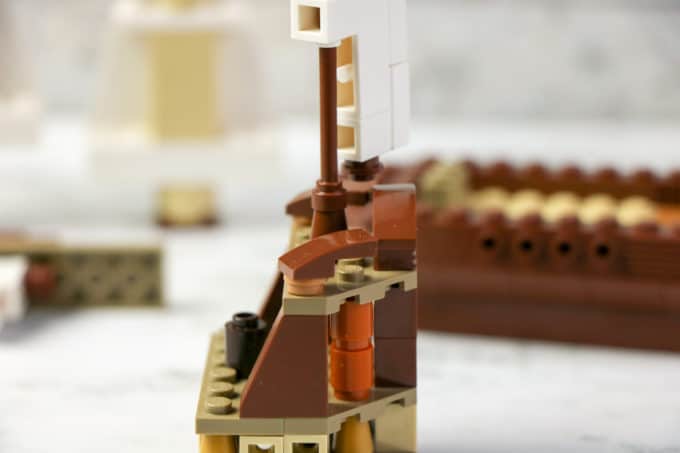
STEP 4. To make the bow mast:
- Attach the two brown 1×1 round plates to one another. Snap this under the 1×1 plate.
- On the same edge of the 1×1 plate where the round plates are attached, stack the 1×1 brick with knob, and 2 1×1 round bricks.
- On the remaining stud of the 1×1 plate, attach the white 1X2X3 73° roof tile.
- At the end of the mast, attach the 1X2 45° roof tile to hold the two loose ends together.
STEP 5. To make the stern mast:
- On one 1×1 brick with knob, attach the brown stick to the knob and top with the nose cone.
- Align the white 1×3 brick with the remaining 1×1 brick with knob. Snap the two 1 X 2 X 2/3, ABS roof tiles to hold the two bricks together creating a rectangle sail.
- On the ending knob, attach the brown 1×1 round tile.
- Attach the rectangle sail to the 1×1 brick with knob holding the stick.
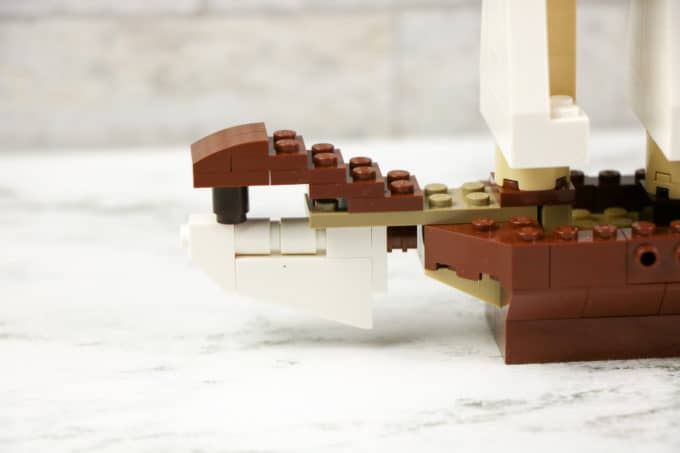
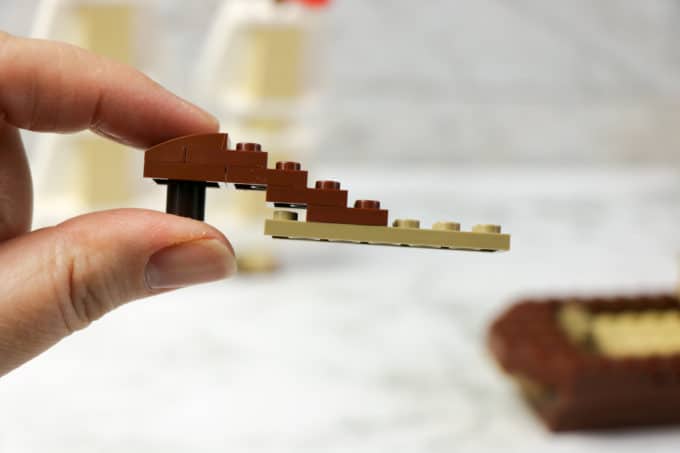
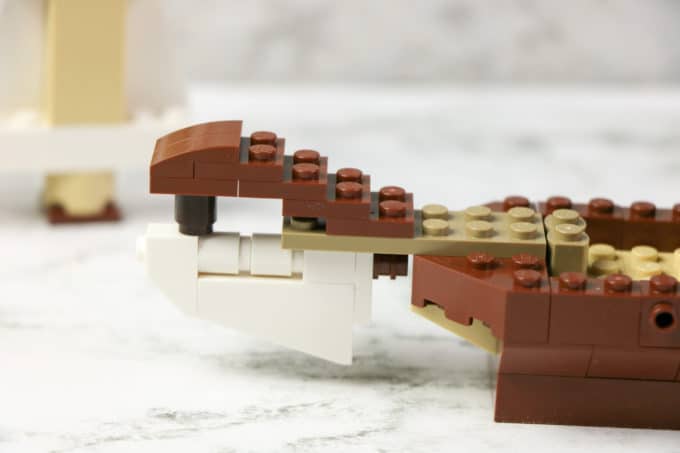
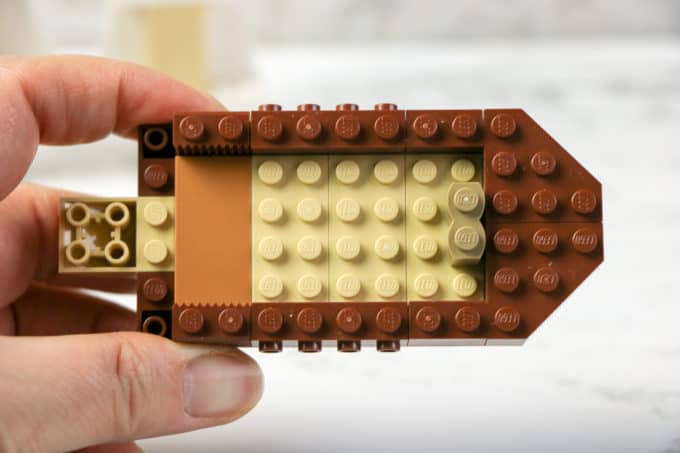
STEP 6. To make the bow of the ship:
-
- Create a staggered staircase by attaching four of the 2×2 plates together.
- Attach the staircase to the 2×6 plate on the 2nd and 3rd row of studs.
- Below the top of the stairs, attach the remaining 2×2 plate.
- Across the top, place the two 1×2 with arch bricks to create the curved finish.
- Snap the 2×6 plate onto the stern of the ship’s body over the two 3×3 ¼ circle bricks.
- Under the bow’s staircase, attach the brown 1×1 round brick.
- Then, align the bow mast under the 1×1 round brick and 2×6 plate, attaching to the 2×6 plate with the open knob on the bow mast.
MORE FUN THANKSGIVING ACTIVITIES


BUILD A MAYFLOWER SHIP FOR THANKSGIVING
Click on the image below or on the link for favorite LEGO building ideas from basic bricks.