
Watch the wonder of nature unfold right inside a sandwich bag! This easy germinating seeds in a bag experiment is a favorite among kids because they observe the first signs of life. Whether at home or in the classroom, this seed sprouting experiment for kids is simple and offers a fantastic hands-on experience for exploring the plant life cycle.

Germinating Seeds in a Bag
Field of Science: Botany
Grades: Preschool to 3rd Grade
Concepts Explored: Germination, plant life cycles, plant needs, observation skills
In this experiment, kids observe how seeds sprout without using dirt. This makes it easy to see the entire growth stage through the bag. Introduce photosynthesis, chlorophyll, and the basic needs of a plant. Understanding life cycles is a fantastic basic science concept to share with young kids.
Supplies Needed
- Uncooked beans (or any type of bean—try watermelon, lettuce, chives, or broccoli! See bean seed suggesting below)
- Paper towels or a clean towel
- Ziplock bag, sandwich bag, or small plastic zipper storage bag
- Tape
- Water
- A sunny window (and a dark closet for comparison)
- Optional: Science notebook for observations
🔎 Alternative idea: Try our seed in a jar experiment for more plant life cycle activities without soil!

How to Germinate Seeds in a Bag
💡Note: Below the instructions, you will find tips on preventing mold from growing.
Wet a paper towel until it’s damp, not dripping.
Fold it to fit inside your sandwich bag or small plastic zipper storage bag.

Place several bean seeds spaced out on the towel.

Seal the bag and tape it to a window (for light) or place one in a dark closet (for comparison).
Watch for sprouts to emerge from the bottom of the bag—you’ll soon see a small stem and first leaves!
Record what you see in a science notebook, including drawings of the seed leaves, roots, and central part of the plant.

Seed Growth Science Information
This plastic bag method demonstrates the early stages of a plant’s life cycle. By removing the dirt, you can easily view the very first sign of growth.
You can observe a plant’s tiny beginning, the texture of a sprouting bean, the way the stem stretches toward light, and the first leaves opening. Try comparing various beans to explore which are slow-growing seeds and which germinate quickly.
Chlorophyll appears as the leaves turn green—this green pigment helps the plant make food through photosynthesis. This experiment is also an opportunity to discuss nutrients and how plants absorb these from the soil in nature. Here, we focus on growth, making it easy to track and understand.
🔎 Add our What Plants Need worksheets to extend the lesson and grab some spinach leaves to make chlorophyll prints for a photosynthesis STEAM experience.
Vocabulary Word: What Are Cotyledons?
Cotyledons are the first leaves that appear when a seed begins to grow. They’re sometimes called seed leaves because they are part of the seed and help feed the plant in its early days.
Before the seed starts making food through photosynthesis, the cotyledons provide stored nutrients to help the young plant grow. As the plant develops, the true leaves (which look different from cotyledons) begin to form and take over.
🧠 Fun Fact: Some plants, like beans, have two cotyledons—these are called dicots. Others, like corn, have only one—these are called monocots.
Printable Life Cycle Activities
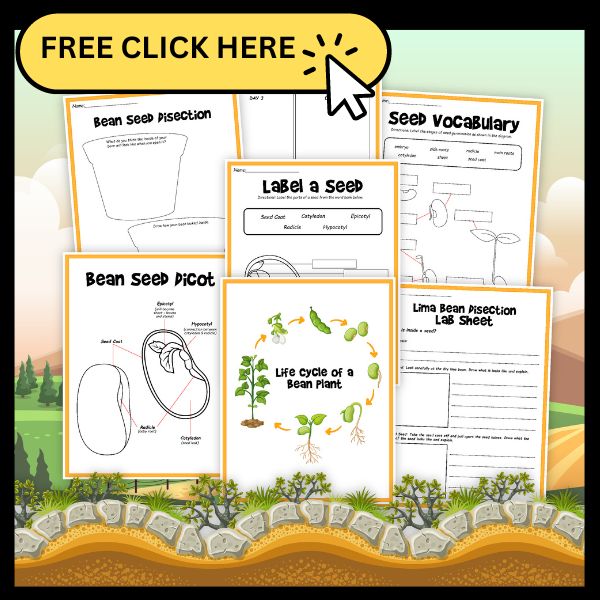
You can download our free bean seed life cycle activities here. If you’re looking for a preschool-friendly version of this activity, grab our Preschool Plants Pack.
Extensions and Facts for Kids
- Germination usually takes 3-7 days, depending on the type of seed.
- The cotyledon provides stored food to help the young plant grow until it can make its own food.
- Different kinds of seeds have different needs and speeds—try turnips, zucchini, or other beans to compare!
- Use this experiment with storybook tie-ins or nonfiction stories about how plants grow.
- This activity is perfect for preschool, plant units, or even DIY greenhouse activities.
🔎 See how to make a mini greenhouse for your seeds here.
Make It a Science Project
Want to turn this into a complete science fair project? Try asking a big question like:
- Which type of bean sprouts the fastest?
- Does light or darkness affect how seeds sprout? Direct or Indirect sunlight?
- Do seeds grow taller in a bag with more water?
Create a hypothesis, track changes daily in your science notebook, and graph your results. You can even explore variables like bag placement, creative container types, or different paper towel textures to investigate the surface quality of your setup.
🔎 Learn more about the scientific method and how to use it with younger kids, too!
Which Bean Seeds Are Best?
The best bean seeds for the Seed Jar Germination Experiment are:
💡 For best results, soak the beans overnight before placing them in the seed jar to speed up germination.
Tips to Avoid Mold When Germinating Seeds in a Bag
Use only a damp paper towel (not soaking wet). Too much moisture encourages mold. The towel should be damp to the touch but not dripping. Wring out excess water before placing it in the bag.
Leave the bag slightly open. Instead of sealing the bag completely, leave a small opening for airflow. Mold thrives in trapped, humid air.
Avoid placing the bag in direct sunlight. Choose indirect sunlight or a bright spot indoors. Direct heat can cause excess condensation, which leads to mold.
Change the paper towel if needed. If it looks discolored or smells musty, carefully replace it with a fresh, damp towel while gently handling the bean seeds.
Use clean hands and materials. Before starting, make sure your seeds, bag, and towel are clean. Any dirt or residue can introduce mold spores.
Don’t overcrowd the seeds. Space out the bean seeds on the towel. Crowding can trap extra moisture and reduce airflow between seeds.
More Plant Activities
🔎 You can explore more plant activities and experiments here.
- Plant Life Cycle Color By Number
- Parts of a Plant Activity
- How Leaves Breathe Experiment
- How Leaves Drink Experiment
- Growing Seeds in Eggshells
- Grow Grass Heads
- Pollination and Pollinator Activities
- Plant Scavenger Hunt
Pair This with Our Preschool Plants Theme Pack! 🌻
Want more plant-based learning activities? Our Preschool Plants Theme Pack is full of hands-on science and literacy ideas, including:
- Printable plant life cycle charts
- Parts of a plant posters
- Easy plant experiments (watch seeds grow!)
- Fine motor activities
- Science journals
- Plant-themed playdough mats and more!