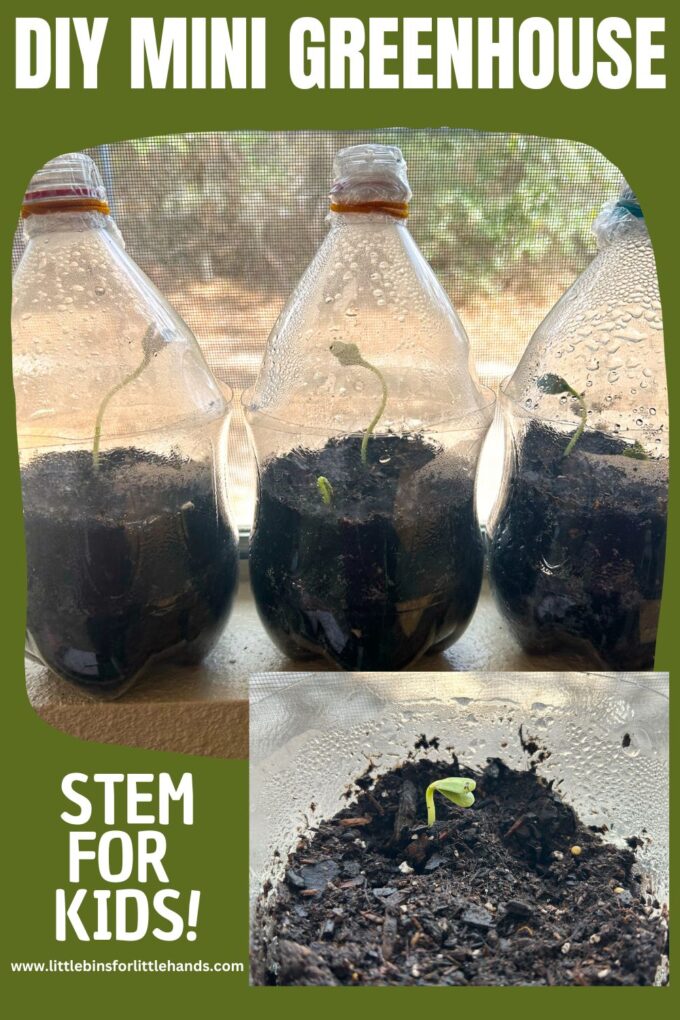
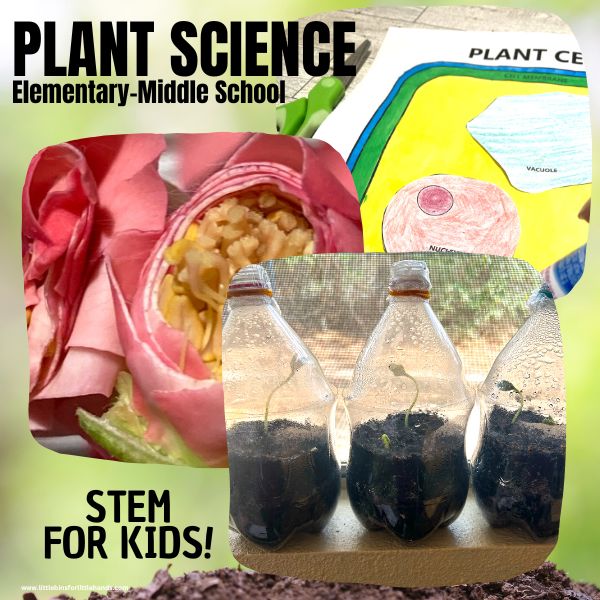
This season, enjoy the wonder of growing plants with a mini greenhouse made from plastic bottles! Watch the life cycle of a plant unfold with simple materials from your recycling bin! A homemade plastic bottle greenhouse is perfect for making with any size group of kiddos in the classroom, at camp, or home. Build a greenhouse for super simple spring science!
What Is A Greenhouse?
Kids may have heard of the warming effect of greenhouse gases on the environment and how dangerous it is. But a greenhouse can be a helpful place to grow young green plants as part of a backyard garden or farm.
A greenhouse is a building traditionally made of glass set up to provide optimal conditions for growing plants. The right amount of water, sunlight, and temperature means people can grow young or out-of-season plants even when it is excessively cold.
Free Life Cycle of a Plant Worksheets
Add this free plant life cycle printable pack to your hands-on biology activity!
How To Make A Plastic Bottle Greenhouse
Why not pair this easy activity with a visit to a local greenhouse and talk to the gardener? Or discuss with kids why greenhouses are necessary in different parts of the world.
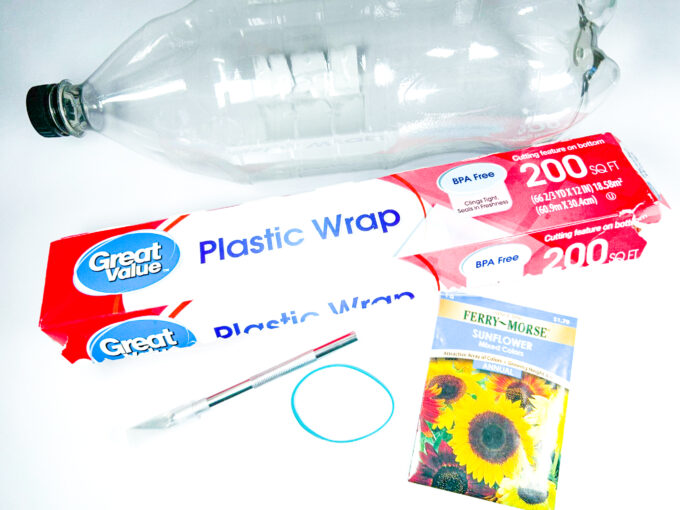
Supplies:
- clear recycled plastic bottles (2-Liter works well)
- x-acto knife or sharp scissors
- plastic wrap
- rubber band
- soil
- seeds (I used sunflower for this project, but you can choose a different seed or several)
- spray bottle filled with water
- plastic tray (optional)
TIP: Easy seeds to grow for kids include; beans, peas, radishes, sunflowers and marigolds. You want to look for seeds that don’t take long to germinate.
Instructions:
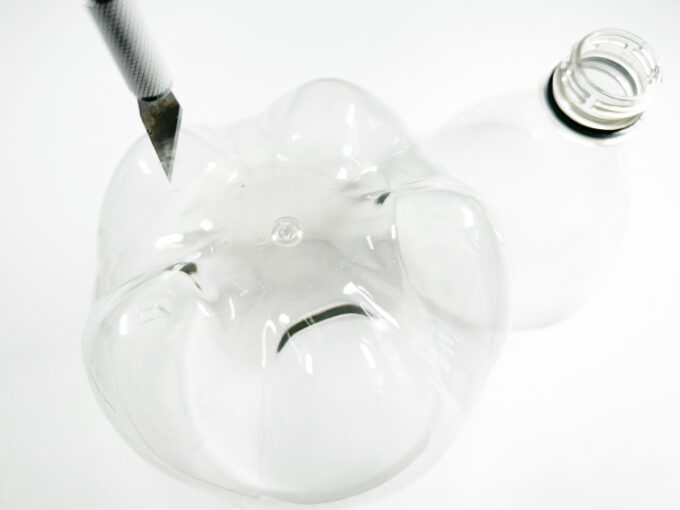
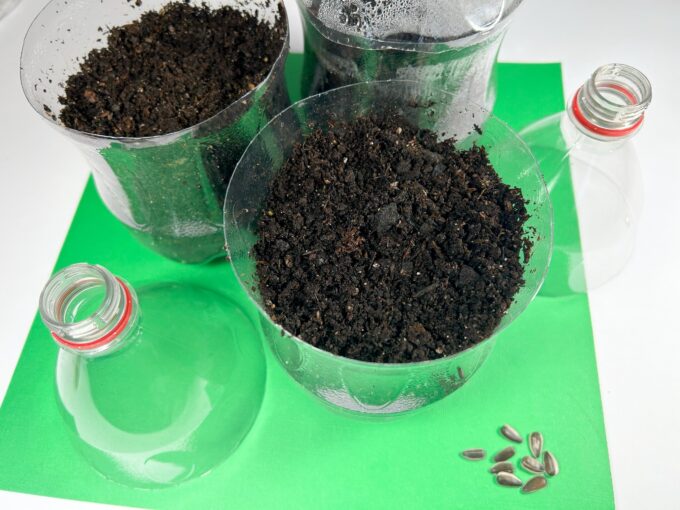
STEP 1. Remove the label and clean your plastic bottle!
STEP 2. Using the xacto knife or sharp scissors, discard the middle part of the plastic bottle. Cut a few drain holes using a knife on the bottom of the bottle.
You’ll want the top half of the bottle to fit just enough into the bottom portion to create the greenhouse.
This part must be done by an adult!
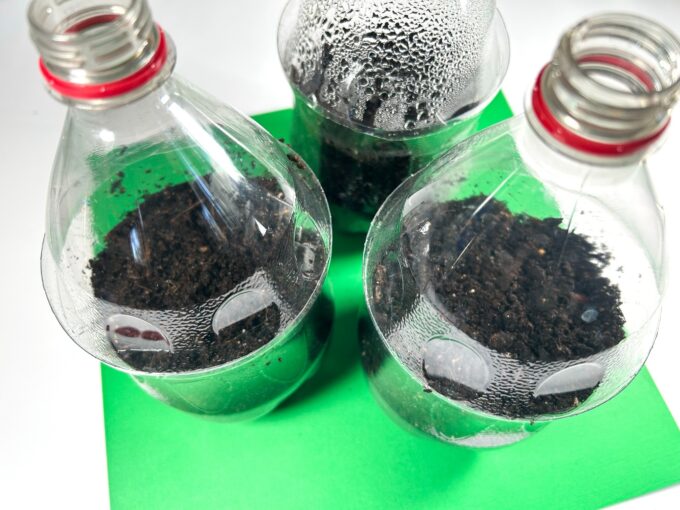
STEP 3. Fill the bottom portion of the bottle with soil. Poke 1 to 3 holes into the soil for the seeds. Place a seed in each hole and cover. Use the spray bottle to moisten the soil enough with water.
STEP 4. Cover the top portion of the bottle with a piece of plastic wrap and secure it with a rubber band. Place the lid on top of the bottom portion of the greenhouse.
This step will help your greenhouse retain moisture, and the drips of water that collect will keep the soil moist and water your plants.
STEP 5. Set the mini greenhouse near a window sill with good sunshine. Use a tray underneath if desired.
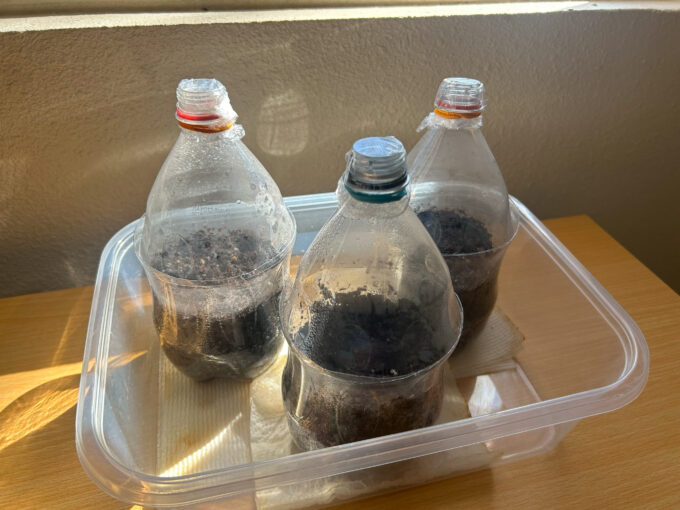
STEP 6. Observe for a few days! Older kids can start a seed diary, record daily observations, and draw pictures of what they see.
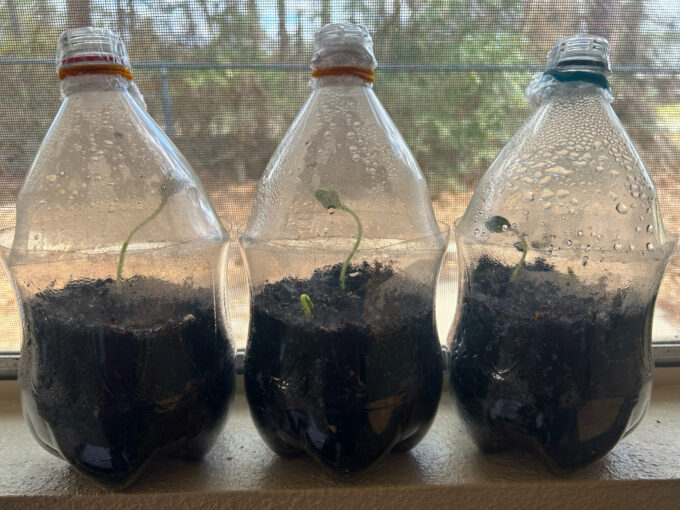
After a few days, you may see the seeds germinating. Because you are using clear plastic bottles, you may also be able to see the roots as they grow. You might also enjoy making a seed jar.

If you do not see any seeds sprouting, you can try planting a few more seeds until you get a sprout. Seeds that do not germinate could be damaged seeds, diseased seeds, etc.
Once your seedlings get big enough, you can transfer them to a bigger pot or garden outside and watch them grow! Then go ahead and plant a new crop.
How Does A Greenhouse Work?
A greenhouse works by having many clear walls allowing sunlight to enter and warm up the air inside. The air can stay warmer for longer than it would outside the greenhouse, even as the outside air cools down at night.
Build a mini greenhouse from a plastic bottle that works in much the same way. The covering on the top of the bottle keeps the warm air from escaping even if the temperature around the bottle cools.
Condensation (water vapor becomes liquid) forms inside the bottle due to the warm air and moist conditions. The drops of water that form on the plastic water the plant so that it will grow!
Turn It Into A Plant Experiment
Want to turn this easy greenhouse activity into a fun plant-growing experiment? Apply the scientific method by choosing one of the questions below to investigate. Or come up with your own!
Remember to change the independent variable and measure the dependent variable when designing your experiment. All other factors stay the same! Learn more about variables in science.
- How will the amount of water affect the growth of the seedlings?
- How will the amount of light affect plant growth?
- How do different types of water affect growth?
- How do different types of soil affect growth?
More Plant Activities To Extend The Learning
When you finish setting up this mini greenhouse activity, why not learn more about plants with one of these ideas below. You can find all our plant activities for kids here!
Explore the basic needs of plants with these printable activities.
See up close how a seed grows with seeds in a bag or a seed germination jar.
Why not try planting seeds in eggshells.
Explore how light, water, and temperature affect plants with this plant growth experiment.
Growing grass in a cup is just a lot of fun!
Learn about transpiration.
Learn about how plants make their own food through photosynthesis.
Explore the life cycle of a bean plant.
Explore the important role plants have as producers in the food chain.
Name the parts of a leaf, the parts of a flower, and the parts of a plant.
Printable Spring Activities Pack
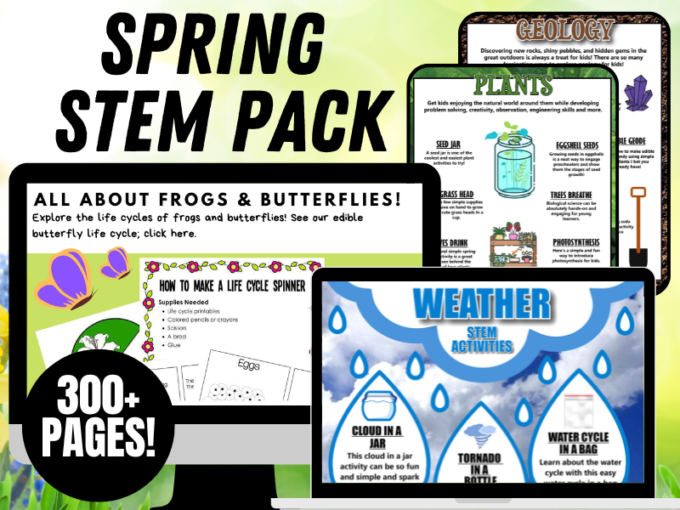
If you’re looking to grab all of the printables in one convenient place plus exclusives with a spring theme, our 300+ page Spring STEM Project Pack is what you need!
Weather, geology, plants, life cycles, and more!