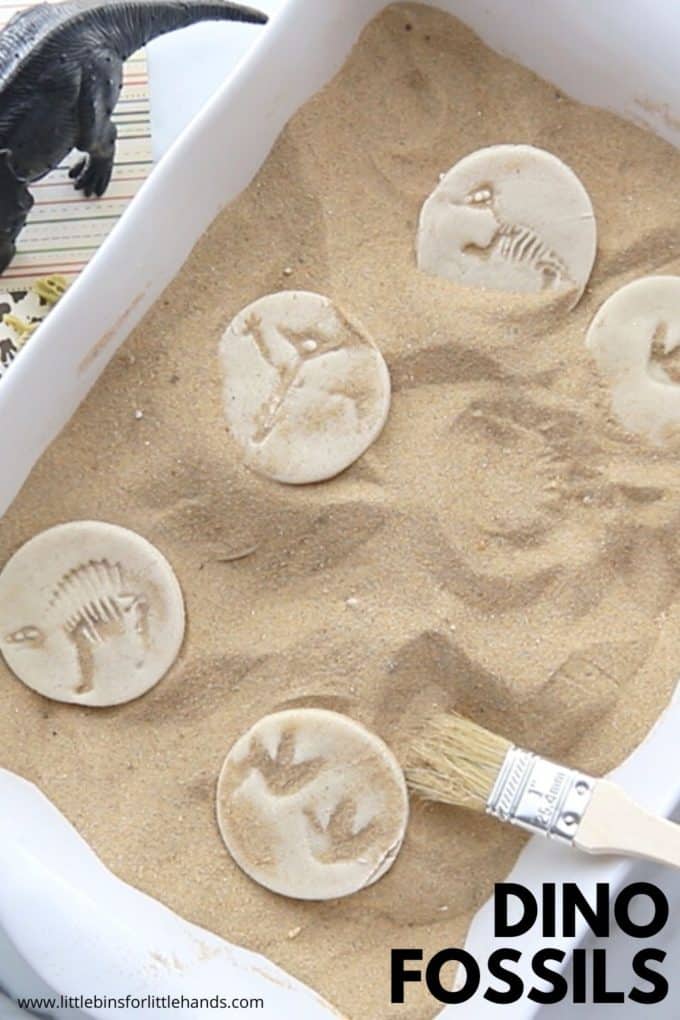
Create easy salt dough fossils! This hands-on fossil craft is a fun way to explore dinosaurs, trace fossils, and basic Earth science concepts. Kids can press toy dinosaurs into salt dough to make imprints, let them dry, and then set up their own DIY fossil dig. A perfect dinosaur activity for preschoolers, kindergartners, and early elementary students.
What Are Salt Dough Fossils?
Salt dough fossils are imprints made by pressing dinosaur toys, leaves, shells, or bones into homemade salt dough. Once the dough dries, kids can examine the “fossils,” sort them, and use them for dig sites or sensory bins. This simple activity introduces what a fossil is and how fossils form in nature.
How to Make Salt Dough Fossils
This is one of the easiest ways to teach kids how to make a fossil at home or in the classroom. The recipe uses pantry staples and dries naturally—no oven needed! Perfect addition to favorite dinosaur activities (including Dinovember)
💡 Grab the complete Dinosaur Project Pack here for printable activities, recipes, and templates.
Salt Dough Fossil Recipe
Ingredients
- 2 cups all-purpose flour
- 1 cup salt
- 1 cup warm water
- Round cookie cutters
- Dinosaur figurines or small animal toys
Note: Salt dough is not edible but is taste-safe.
Step-by-Step: How to Make a Fossil with Salt Dough
🎥 Watch the video:
1. Mix the Dough
Combine flour and salt in a medium bowl. Add warm water and stir until a dough forms.
Tip: If the dough seems sticky, let it rest for 3–5 minutes. The salt will naturally absorb extra moisture.

2. Roll and Cut
Roll your dough to about ¼ inch thick. Use a round cookie cutter (or cup) to make circles.

3. Make the Fossil Impressions
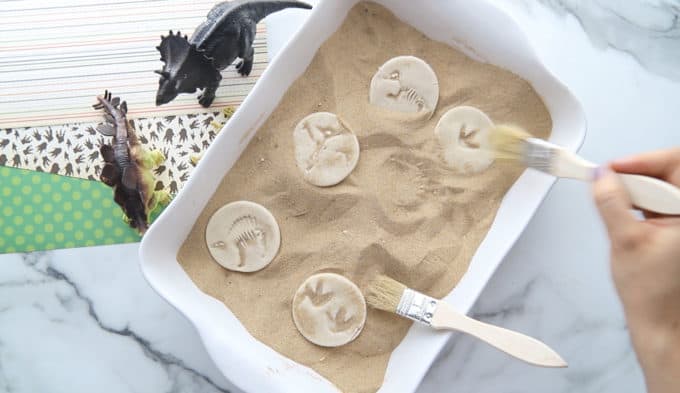
Press dinosaur feet, bones, tails, or shells firmly into the dough to create detailed fossil prints.

4. Air Dry
Place the fossils on a tray and let them dry for 24–48 hours. Flip once to help them dry evenly. See how to bake these instead, below.
💡 While you wait, make these edible Dinosaur Dirt Cups!

5. Set Up Your Dino Dig
Hide the fossils in kinetic sand, regular sand, beans, or shredded paper to create a DIY fossil dig. Can your kids match the fossil to the correct dinosaur?
What Is a Fossil? (For Kids)
A fossil is a rock-like copy of something that lived long ago—plants, shells, bones, or even footprints! Fossils form when remains or impressions are buried quickly by sediment, mud, or sand, and then harden over millions of years.
Types of Fossils
- Body fossils: bones, teeth, shells, leaves
- Trace fossils: footprints, burrows, tracks
🔎 Salt dough fossils help kids understand the idea of trace fossils (imprints left behind). Read more about fossils here.
How Are Fossils Formed? (Simple Explanation)
- A plant or animal dies in a watery environment.
- It gets buried by mud, sand, or sediment.
- Over time, layers build up and harden into rock.
- The organic materials disappear, leaving a rock-like imprint.
- Scientists discover the fossils millions of years later!
🔎 Your salt dough fossil project demonstrates how pressure, impressions, and sediment combine to create fossilized evidence.
Click here for your FREE Dinosaur Activity Pack
Dinosaur Activities to Add to Your Fossil Dig
Our dinosaur project pack is a fantastic collection of hands-on and early learning activities for your young dinosaur enthusiast or budding paleontologist!

Salt Dough Fossils FAQ
Why Is My Salt Dough Sticky?
If your salt dough feels sticky, let it rest for 5 minutes before adding more flour. The salt absorbs moisture as it sits. If it’s still sticky after resting, add 1 tablespoon of flour at a time until smooth.
Why Is My Salt Dough Cracking?
Cracks form when salt dough dries too quickly or is rolled too thin. For best results, roll fossils ¼ inch thick and dry them slowly. If baking, keep the oven at 200–250°F so the dough doesn’t puff or crack.
How Long Do Salt Dough Fossils Last?
Salt dough fossils can last for years if kept completely dry. Store them in a container or bag. For extra durability, seal with clear acrylic spray or Mod Podge.
Can You Bake Salt Dough Fossils Instead of Air Drying?
Yes! Bake your salt dough fossils at 200–250°F (90–120°C) for 1.5–3 hours, flipping halfway through. Bake low and slow to avoid browning or cracking.
Teacher Tip: Bake 1–2 hours and finish drying on a cooling rack if you need them the same day.
How Long Does Salt Dough Take to Air Dry?
Air drying usually takes 24–48 hours depending on thickness and humidity. Flip fossils once during drying for even hardening.
Can You Color Salt Dough Fossils?
Yes! Add food coloring or washable paint to the dough before mixing, or paint the fossils after drying with acrylic or tempera paint. Many kids prefer leaving fossils their natural stone-like color.
Is Salt Dough Safe for Toddlers?
Salt dough is taste-safe but not edible due to the high salt content. It’s safe for toddlers with supervision—just prevent them from eating it and wash hands after play.
Can You Make Salt Dough Fossils in the Classroom?
Absolutely! Salt dough fossils are inexpensive, easy to prep, and perfect for science units, STEAM lessons, or dinosaur themes. Mix dough in the morning, create impressions with students, and air dry overnight or bake during prep time.
More Things to Make With Salt Dough
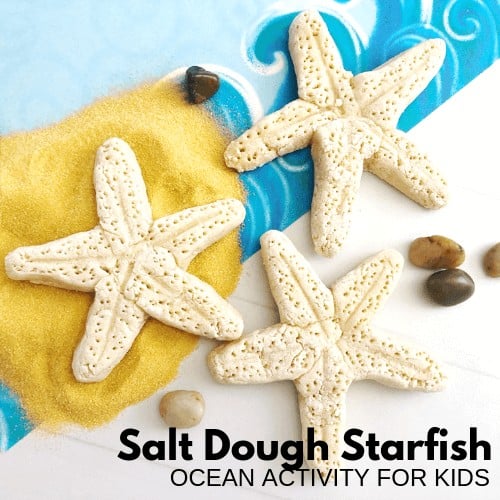
- Salt Dough Starfish
- Salt Dough Ornaments
- Salt Dough Volcano
- Cinnamon Salt Dough
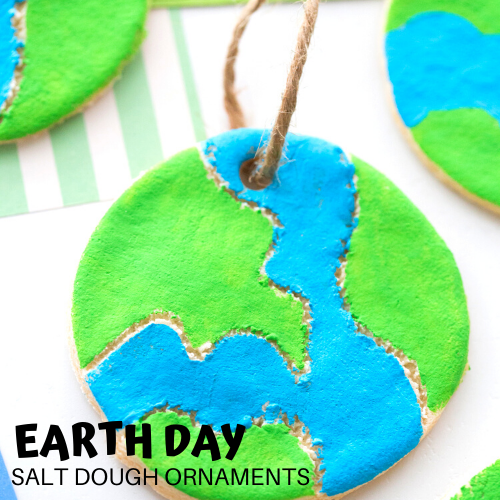
- Earth Day Salt Dough Craft