Atoms are the building blocks of everything. Learn about the structure of atoms by building a simple 3D atom model with pom-poms. Make a carbon atom model, oxygen atom, nitrogen atom and more. This physics activity is fun and hands-on way to explore atoms!

How To Build A 3D Atom Model
Here is an easy atom model project for students to do. All you need are toothpicks and pom poms. This is a simplified scientific model of an atom, as it doesn’t show the electron shells around the nucleus. Great for students’ first introduction to atoms and matter!
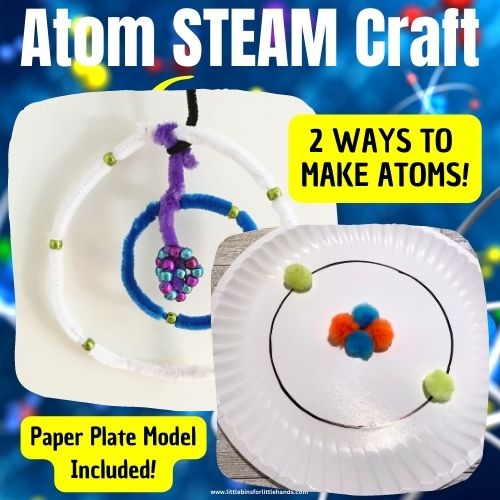
💡 Here are two ways to make an atom model that do show the electron shells.
We also include instructions for several atoms you can make, a Carbon atom, Oxygen atom, Nitrogen atom and Hydrogen atom.
Want to experiment with more atom models? Here are a couple of things you need to know…
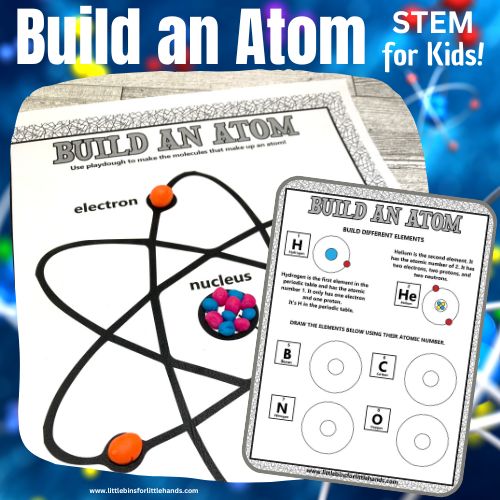
- Protons and neutrons are the same size, and form the nucleus of the atom.
- A neutral atom will have the same number of electrons as protons.
- Electrons are much smaller than protons and neutrons.
- You can find the Atomic Number of any element (the number of protons) by using a Periodic Table.
Carbon Atom Model (C)
Carbon is a common element found in all living things. A carbon atom has three parts: 6 protons, 6 neutrons, and 6 electrons. The protons and neutrons stay together in the middle of the atom, called the nucleus. The electrons move around the nucleus in orbits called shells. They are much smaller than protons and neutrons.
💡 A carbon atom plays a central role in the carbon cycle [here], which is the process by which carbon moves through the Earth’s atmosphere, oceans, soil, and living organisms
Supplies:
- 6 large pink pom-poms (protons)
- 6 large yellow pom-poms (neutrons)
- 6 small green pom-poms (electrons)
- 6 toothpicks (for connecting the electrons)
- Glue (for sticking everything together)
Instructions:
STEP 1: Build the Nucleus
Glue the proton and neutron pom poms together. This makes the nucleus of your carbon atom. It should look like a ball of pom-poms in the center.
STEP 2: Prepare the Electrons
Now, take six toothpicks. Glue one small green pom-pom (electron) to the end of each toothpick. These will represent the electrons that circle the nucleus.
STEP 3: Attach the Electrons
Finally, glue the other end of each toothpick into the ball of protons and neutrons. Spread them out so the electrons are evenly spaced around the nucleus.
💡 Learn more about parts of an atom [here].

Oxygen Atom Model (O)
An oxygen atom has 8 protons, 8 neutrons, and 8 electrons.
Supplies:
- 8 large pink pom-poms (protons)
- 8 large yellow pom-poms (neutrons)
- 8 small green pom-poms (electrons)
- 8 toothpicks
- Glue
Instructions:
STEP 1: Build the Nucleus
Glue all the proton and neutrons together to form the nucleus. This will be the center of your oxygen atom.
STEP 2: Prepare the Electrons
Take eight toothpicks. Glue one small green pom-pom (electron) to the end of each toothpick.
STEP 3: Attach the Electrons
Glue the other end of the toothpicks into the nucleus, spacing them around the ball. This represents the electrons orbiting the nucleus. Make sure to spread them out evenly.
Hydrogen Atom Model (H)
Hydrogen atom has 1 proton, 0 neutrons and 1 electron.
Supplies:
- 1 large pink pom-pom (proton)
- 1 small green pom-pom (electron)
- 1 toothpick
- Glue
Instructions:
STEP 1: Create the Nucleus
The nucleus of a hydrogen atom is simple. Just use one large pink pom-pom to represent the single proton.
STEP 2: Prepare the Electron
Take one toothpick. Glue the small green pom-pom (electron) to one end of the toothpick.
STEP 3: Attach the Electron
Glue the other end of the toothpick into the pink proton pom-pom. This represents the single electron orbiting the nucleus. Now you have a basic hydrogen atom model!
Nitrogen Atom Model (N)
Nitrogen atom has 7 protons, 7 neutrons and 7 electrons.
Supplies:
- 7 large pink pom-poms (protons)
- 7 large yellow pom-poms (neutrons)
- 7 small green pom-poms (electrons)
- 7 toothpicks
- Glue
Instructions:
STEP 1: Build the Nucleus
Glue the proton and neutrons together to form a nucleus.
STEP 2: Prepare the Electrons
Take seven toothpicks. Glue one small green pom-pom (electron) to the end of each toothpick.
STEP 3: Attach the Electrons
Glue the other end of each toothpick into the nucleus, spreading the electrons evenly around the atom.
Extension: Add Electron Shells
Electron shells are the regions around the nucleus of an atom where electrons are likely to be found. These shells are also called energy levels and represent different distances from the nucleus. Each shell can hold a certain number of electrons, and they fill up in a specific order.
Each shell can hold a limited number of electrons:
- The first shell can hold up to 2 electrons.
- The second shell can hold up to 8 electrons.
- The third shell can hold up to 18 electrons, but it starts filling after the second shell.
Here is how to create electron shells when you make your atom model:
Carbon
Carbon has 2 electrons in the first shell and 4 electrons in the second shell. For the first shell (closest to the nucleus) take 2 small pom-poms and use toothpicks to attach these electron pom-poms in a small circle around the nucleus.
For the second shell take 4 small pom-poms for the electrons in the second shell. Attach these 4 pom-poms around the nucleus in a larger circle, evenly spaced to form the second shell.
Nitrogen
Nitrogen has 7 electrons, which are arranged in two energy levels. The first shell holds 2 electrons and the second shell holds 5 electrons.
Use a toothpick to attach the 2 small pom-poms (electrons) to form the first energy shell around the nucleus. Attach them about an inch away from the nucleus in a circular orbit. For the second shell, attach 5 smaller pom-poms to represent the 5 electrons. Space them out evenly in a larger circle around the nucleus.
Oxygen
Oxygen has 2 electrons in the first shell and 6 electrons in the second shell. For the first shell (closest to the nucleus) take 2 small pom-poms and use toothpicks to attach these electron pom-poms in a small circle around the nucleus.
For the second shell take 6 small pom-poms for the electrons in the second shell. Attach these 6 pom-poms around the nucleus in a larger circle, evenly spaced to form the second shell.
Free Printable Atom Information Sheet
💡 Also, make sure to grab our free atom building printable pack [here].

More Fun Physics Activities To Try
💡 Explore all of our physics experiments for kids [here].
- Parts of an Atom
- Atom Models
- Periodic Table Activities
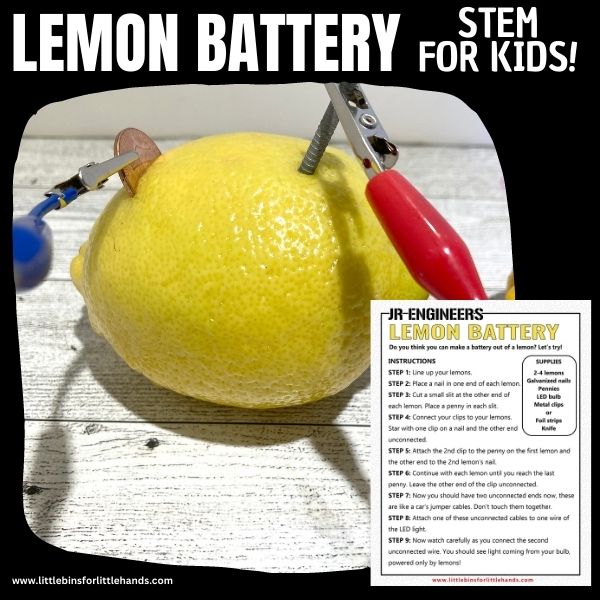
- Lemon Battery (flow of electrons)
- Potato Light Bulb Experiment
- What is an Element?


Join the Library Club Today!
Support Real Learning with Real Projects! When you join the Library Club Membership, you’re not just getting instant access to our complete library of art and STEM printables—you’re helping us keep hands-on, high-quality learning alive. Thoughtfully created resources made by real people who care about inspiring kids through creativity, curiosity, and connection.


