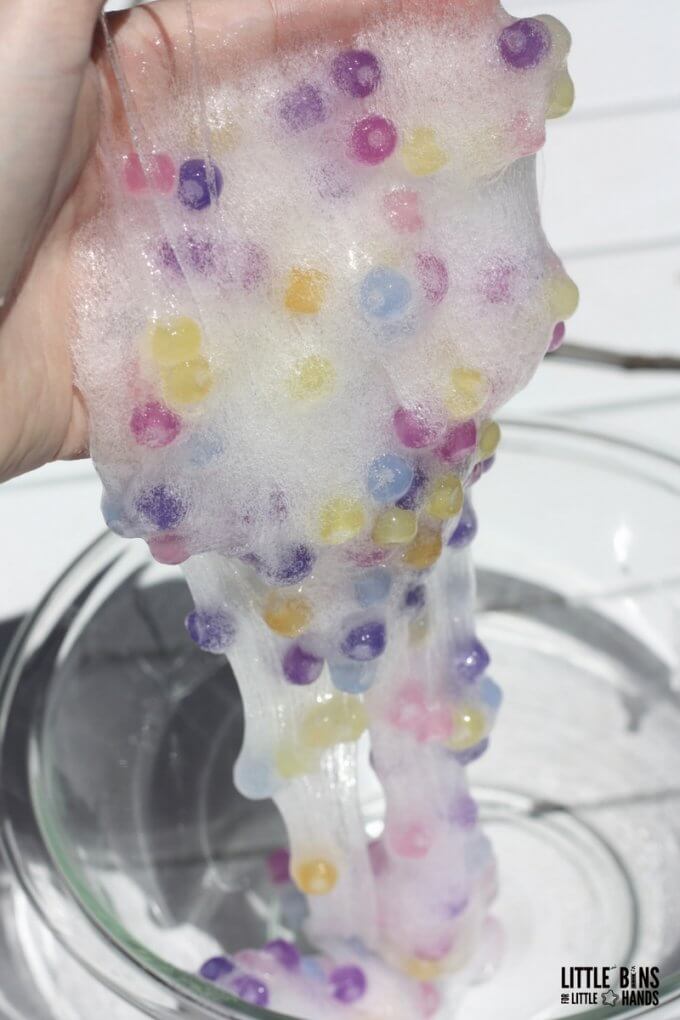
This is slime like you have never seen it before! We love to use slime to complement our science activities because of course slime is AMAZING science all on its own. This time, for a little summer science bonus, we made ultraviolet slime with UV color changing beads as a fun mix-in to our basic homemade slime recipe. Check out sun activated slime that’s easy peasy to make!
Making homemade slime is an awesome screen free activity any time of the year, but we added the perfect summer twist to our favorite basic slime recipe – color changing beads!
We added an extra science twist with these sun activated, UV color changing beads! If stored properly, you can use your ultraviolet slime all summer long to test the strength of the sun’s rays even on cloudy days!
Kids are obsessed with making AMAZING slime recipes, but did you know just how educational slime can be. Make sure you take the time to read the science behind the slime too below!
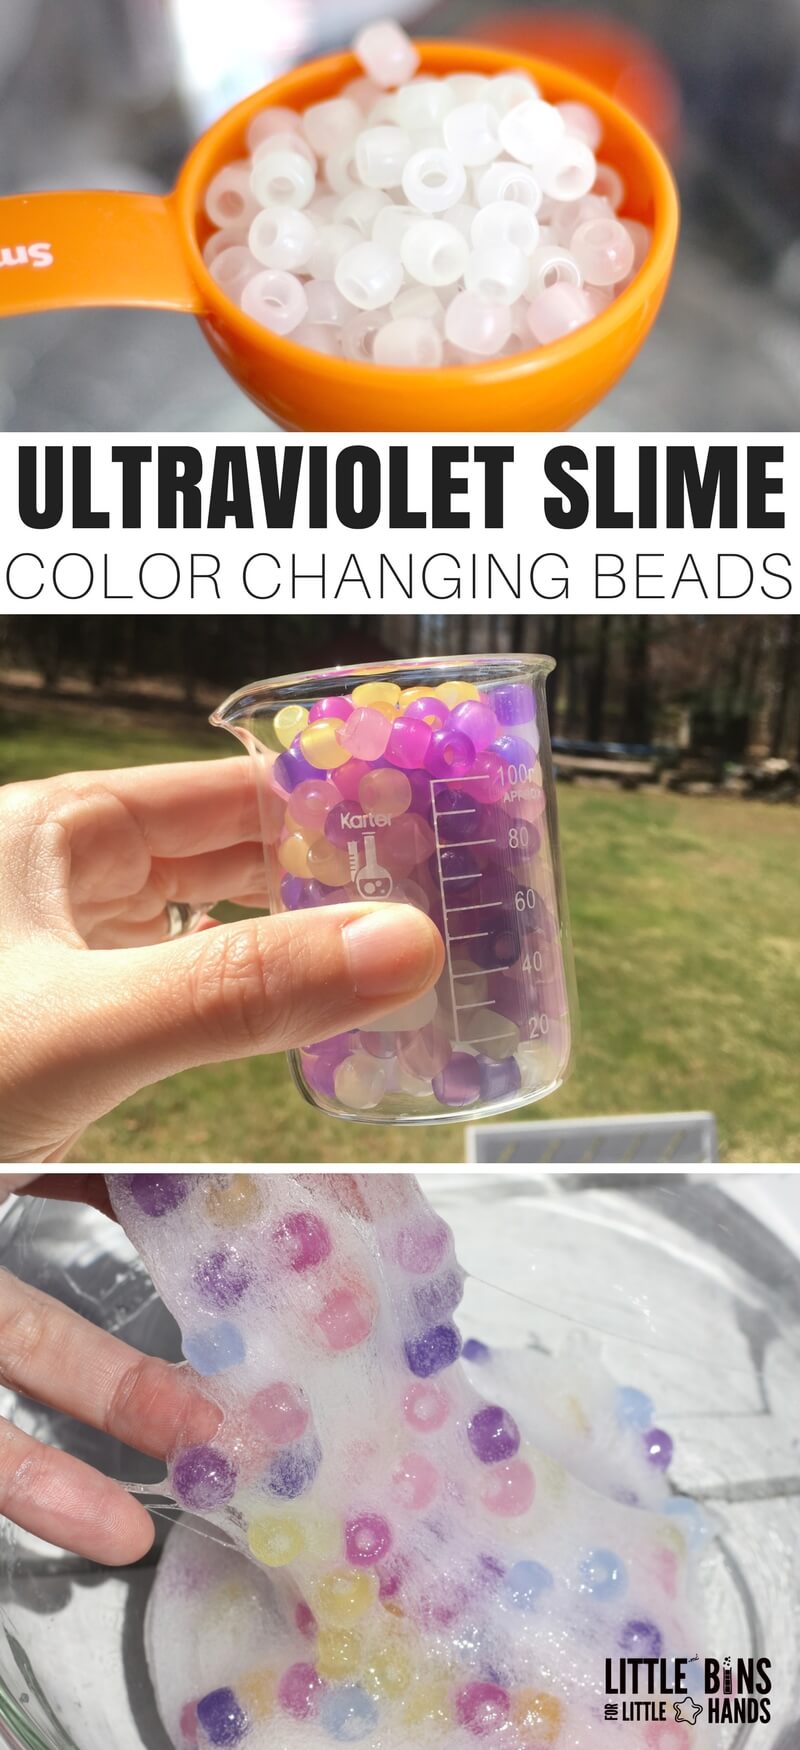
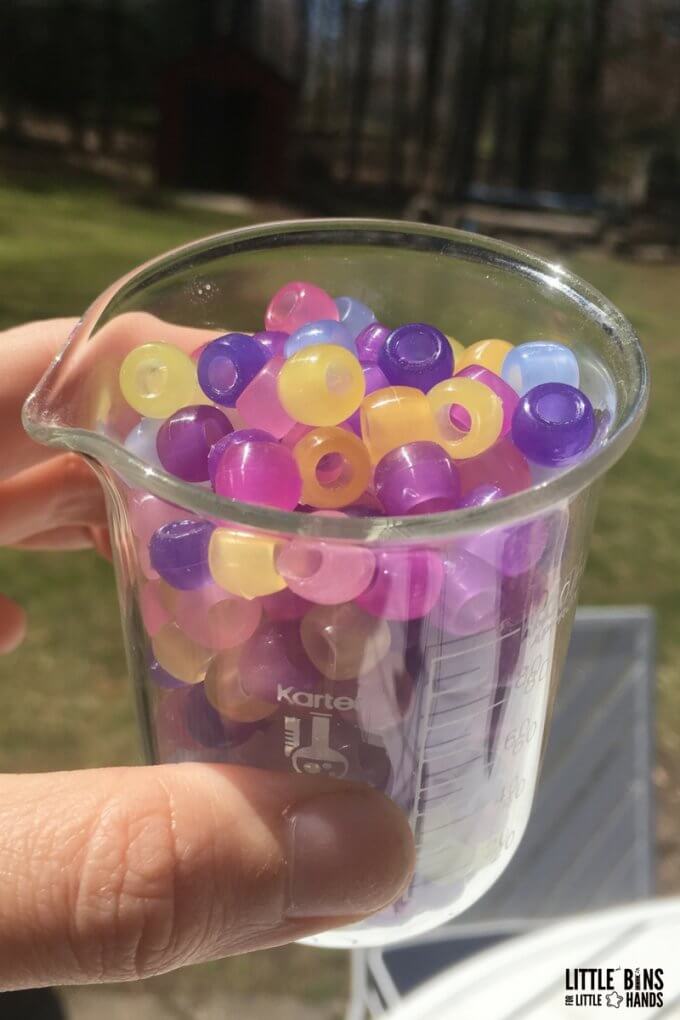
When I opened the package of UV color changing beads, we immediately had to get them outdoors to test them out. We definitely weren’t disappointed. They turned all of these colors almost immediately and continued to darken. It was a bright, bright day.
Upon bringing the beads back inside, they slowly returned to their original color while we got out our favorite slime making supplies. Check out how we make this slime below with our popular saline solution slime recipe.
Basic Slime Recipes
Our easy, “how to make” slime recipes show you how to master slime in 5 minutes or less! We have spent years tinkering with our favorite basic slime recipes to make sure you can make the BEST slime every time!
We believe slime shouldn’t be disappointing or frustrating! That’s why we want to take the guesswork out of making slime!
- Discover the best slime ingredients and get the right slime supplies the first time!
- Make easy slime recipes that really work!
- Achieve awesome slimy consistency the kids’ love!
Which Slime Recipe To Use?
We have several basic slime recipes that can all be used for this ultraviolet slime recipe. You decide which one works best for you depending on what slime activator you want to use. This allows for some flexibility depending on where you live in the world! Not everyone has access to the same ingredients!
Each of the basic slime recipes below have the full step by step photos, directions, and even videos to help you along the way!
In the recipe below, we used our number one saline solution slime recipe. This is our #1 most viewed slime recipe, and we love it. Awesome stretchy slime in no time is my motto!
How To Make Ultraviolet Slime
Check out how to also make sun activated color changing slime with photochromic pigment and color change slime with thermochromic pigment powder!
Supplies:
- Clear Washable PVA School Glue
- Saline Solution (MUST contain boric acid and sodium borate)
- Water
- Baking Soda
- UV Color Changing Beads
- Bowl, Spoon, Measuring Cups, Storage Container
Instructions:
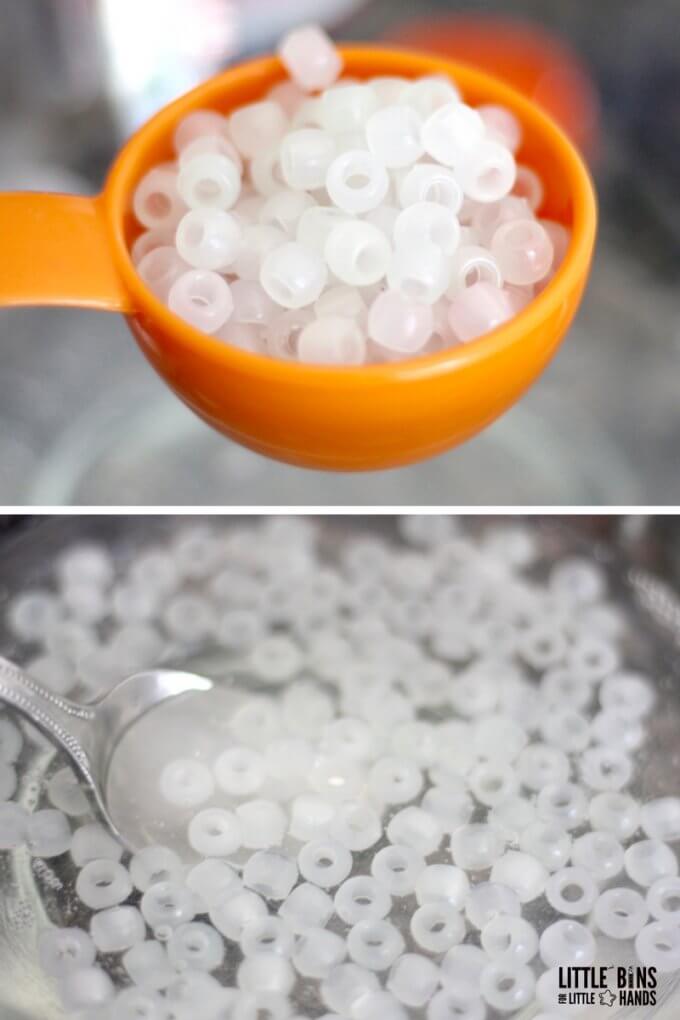
STEP 1. Start by mixing a 1/2 cup of clear PVA glue with a 1/2 cup of water in a bowl.
STEP 2. Next stir in about 1/4 tsp of baking soda (this will help with the firmness of the slime). I have in the past used 1/2 tsp of baking soda but with the clear glue a little less helps the stretch.
STEP 3. Measure out anywhere from a 1/4 cup to 1/2 cup of your UV color changing beads. More beads will make a firmer slime and less beads will preserve the stretch a bit more. Mix the beads into the mixture in your bowl.
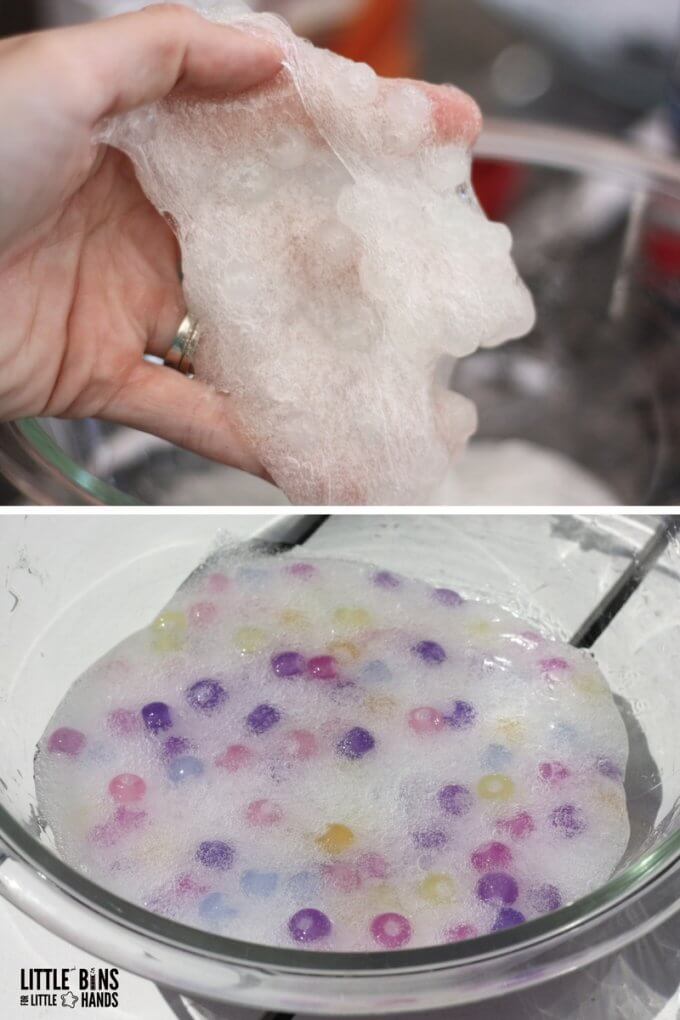
STEP 4. Time for the slime activator. This is the liquid that reacts with the glue to form the slime (read more about the science below). Add up to 1/2 tbsp of your saline solution to the mixture and stir.
You will see the slime pull away from the sides and bottom of the bowl. When you feel like you have given the slime a good stir, you can knead it till perfection!
TIP: I highly suggest coating your hands with a few drops of saline solution to reduce the stickiness. Kneading in general will help with the stickiness too, so try not to keep adding more of the saline solution. The result will be a rubber like slime.
STEP 5. Time to take the slime outside! It would also be fun to make outside in the shade. We were super excited to watch the beads change color, so we didn’t want to chance a sneak preview!
How Bright Will Your Slime Get?
The brightness of these UV color changing beads will depend on the strength of the ultraviolet rays available at any given time. Your ultraviolet slime will become deeper in color depending on the day.
What happens to the beads on a cloudy day vs a sunny day? Are UV rays still coming through those dark clouds. What about a runny day?
Why not chart your findings and make note of the weather for the day! You can even check the UV index and see if it corresponds with the color of your beads.
What Are Ultraviolet Rays?
This sun activated, ultraviolet slime needs some sunscreen! UV rays are invisible rays of energy that come directly from the sun. There are 3 types of rays A. B, and C. As harmful and damaging as the suns rays can be, they can also be healing.
The beads contain small amounts of a photo chromatic color changing pigment that reacts with the presence of ultraviolet rays. All you need is natural light!
I bet you can find some more cool ways to explore these UV color changing beads for ultraviolet rays awareness. Of course simple bracelets and necklaces can alert kids when the UV rays are strong! A great reminder to make sure you have used your sunscreen.

The Science of Slime
We always like to include a bit of homemade slime science around here. Slime really does make for an excellent chemistry demonstration and kids love it too! Mixtures, substances, polymers, cross linking, states of matter, elasticity, and viscosity are just a few of the science concepts that can be explored with homemade slime!
What’s the science behind the slime? The borate ions in the slime activators (sodium borate, borax powder, or boric acid) mix with the PVA (polyvinyl-acetate) glue and forms this cool stretchy substance. This is called cross linking!
The glue is a polymer and is made up of long, repeating, and identical strands or molecules. These molecules with flow past one another keeping the glue in a liquid state. Until…
When you add the borate ions to the mixture, it starts to connect these long strands together. They begin to tangle and mix until the substance is less like the liquid you started with and thicker and rubberier like slime!
Picture the difference between wet spaghetti and leftover spaghetti the next day. As the slime forms the tangled molecule strands are much like the clump of spaghetti!
Is slime a liquid or solid? We call it a non-Newtonian fluid because it’s a little bit of both!
Read more about slime science here!
Get your FREE printable slime recipe cards!
Helpful Slime Making Resources
These are the best resources to look through before, during, and after making your awesome ultraviolet slime! We talk more about slime science below too.
More Fun Slime Recipes To Try
If your kids love playing with slime, why not try more favorite slime ideas…
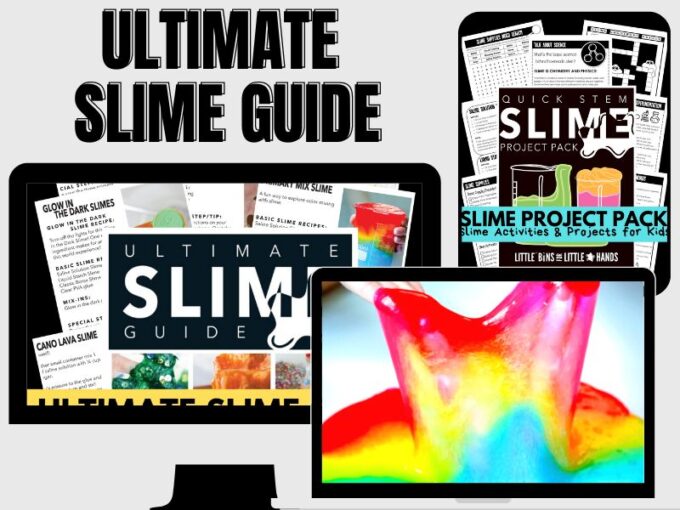
Grab the Ultimate Slime Recipe Bundle
All the best homemade slime recipes in one place with plenty of fantastic extras!
What’s Included:
- The Ultimate Slime Guide contains all the specialty recipes you or your kids want to make! You’ll find all the best tips, tricks, hints, and slime-y info in almost 100 pages!
- The Ultimate Slime Holiday Guide covers all the best holidays and seasons with special themes and slime-y projects!
- The Ultimate Borax-FREE and Taste-Safe Slime Guide shows you how to make all the best borax-free, taste-safe, and non-toxic slimes kids love, such as marshmallow slime. These recipes do not use chemical activators such as saline solution, liquid starch, or borax powder, making them truly borax-free.
- The Ultimate Slime Coloring Book is an easy-to-print coloring book kids will love! Color and design your favorite slimes!
- The Slime Starter Guide is a fact-filled information guide with everything you need to know to make the best slime ever!
- Slime Science Project Pack helps you turn slime-making into a science lesson!


3 Comments
Comments are closed.